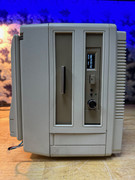
Ok, so there is plenty online about the Compaq Portable III or 386 (just to be clear, I think Compaq always intended this machine to be a 386 machine but didn’t have the motherboards ready for the original release of the finished machine – so they released it originally as the Compaq Portable III, which looks almost identical to the later Compaq Portable 386).
I have about 8 machines which were sitting in my loft and I decided to check the condition of all of them and maybe sell one or two. Not this one though - a modern replica I built and sold to someone in the USA:

I remembered after a short time of going through all these machines for the 2nd or 3rd time that there are a few ‘gotchas’ with these machines that once you know makes things a whole lot easier. Also in the intervening years virtually all of the working hard disks had failed.
Power Supply
The PSU in the Compaq Portable III / 386 is the same but can suffer from leaking caps and failing voltage regulators. You have to be very careful with this PSU because it doesn’t just push out 5 and 12v rails to the motherboard but has another connector which has 2 x 200v rails for the Gas Plasma screen. I replaced all the caps, a couple of regulators and tested the outputs of the connectors with one hand behind my back!
Hard Drives
Most of these machines came with different-sized Connor hard drives which are notoriously rubbish. I thought maybe it was down to the rubber disintegrating to gunk inside that would be the issue, but having tried to repair a bunch of them, even when you sort that out, they generally don’t work. So whilst I wanted to keep everything original, I decided to go for something which looked stock but was much more usable in the future. The data on a compact flash card may degrade over time, but if you have the original image of the drive ready to push back onto it, then you can reasonably protect your hard work from not going to waste 10-30 years down the line.
So with the help of this guy - a truely inspiring restoration, I made up a bunch of HDD drive bay replacements that fit an IDE HDD -> CF card adaptor in the covered up slot. I had to find paint that matched as closely as possible but I think I had some success.
Machines of this era can be a bit temperamental which it comes to big drives or partitions and also I’ve found they can sometimes get a bit confused when using something of comparatively low power draw as a Compact Flash card (as opposed to a heavy spinning Conner drive). Also, as we’ve previously learned the CF card must be of the ‘industrial’ and ‘fixed’ variety.
The BIOS supports about 30 different hard drive types, but I could only get these Compaqs to work correctly with Type 04 drive setup – which his only about 70Mb, but still enough to work with.
I tried almost every other type, followed by a tried-and-tested FDISK, format /s and attempt to boot – and each time you just get “error!” on startup when the machine tries to access the partition. So type 04 is the sweet spot.
I made an image a RAW image of the compact flash, which boots to a DOS 6.22 partitioned FAT16 drive, and has Windows 3.1, DOS, some games, some demos and some test tools – along with the original BIOS Floppy creator files unpacked from their SPXXXX files. You can download it here: http://ret.rocks/files/CP386-Type04-Best.zip . I use ‘active@disk image’ to write them to 1Gb Pretec Compact Flash cards.
At the time of writing, I have 6 of the left-over drive bay CF card mounts left to sell.

Floppy Drives
These machines, I think only came with 320k 5.25” (DSDD) Canon drive or a 720k 3.5” floppy drive. The 5.25” drives are fairly reliable. I replaced a couple of capacitors, greased the corkscrew and cleaned the heads with IPA and mostly they still work fine. They’re just limited on what you can fit on a disk. The 720k drives are more reliable but did need the same – a few caps and servicing.
I also have a machine which looks like it has a stock 1.44Mb 3.5” drive but I can’t be sure it wasn’t some sort of very good replacement at some point.
Anyway, knowing the drives that originally came with the machine does help because the BIOS setup can be a pain in the backside.
In the BIOS there are options for 4 drives to be used in total – 160k 5.25, 360k 5.25, 720k 3.5” and 1.44Mb 3.5”.
BIOS Setup
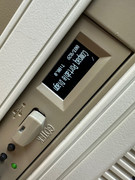
The BIOS setup is not stored in ROM so you have to boot from a Compaq Diagnostic Diskette to get into the settings. This is where some catch 22s come up.
When the CMOS battery dies, the machine will revert to expecting either a 360k or 720k disk only. This can present a problem because both of these drive formats are harder to find the drives for, harder to find the floppy disks for and if you do have the original drive, there is a fair chance it won’t work. So if you don’t have either of these drives, you can’t boot into BIOS settings.
Now you might be thinking you can use a 1.44Mb 3.5” drive because these are still common and cheap – and generally will ready 720k floppy drives just fine. Well, the Compaq Portable won’t. If you have a 1.44Mb drive fitted, you can’t use the bootable BIOS setup disks described below – the workaround is you get a bootable 1.44Mb DOS disk , then get out to command prompt, switch to the BIOS setup floppy disk and run setup from there.
In summary, if you want to use floppy disks, you want to stick with a 320k or 720k drive to make BIOS setups easier if your battery ever goes flat – OR keep in mind the DOS boot disk switch method.
BIOS Setup Files
These come as two files which are suitable for either making 2 x 320k 5.25” disks (one for setup and one for actual tests) or 1 x 720k disks. These files are not images or even compressed contents – when you run them in the dos environment, they unpack a couple of files for imaging a blank matching disk. QRST is the program that transplants the image to the disk.
• If you don’t have a 320k or 720k disk, the program will not complete.
• I had issues running the initial SP executable on some machines and had to copy it to a blank floppy, run it, which worked and then copy the files back off the floppy drive to a directory on my HDD.
For creating 720k 3.5” disks
For creating 320k 5.25” disks
You can't just copy the contents of the BIOS setup disk from disk to disk - when you image it, it does something with the floppy disk to make it 'reference' as IBM would put it.
CMOS/BIOS Battery
There are two types of battery in these machines – later machines have a 3 pin connector on the right side of the motherboard, leading to a 3.6v lithium. I extended the cable to a modern 3.6v battery inside the optical drive bay.
Earlier machines have a large 4 Terminal 3v Battery Module 107157-001 battery which is rare, unusual and not easy to tap into. I had to make some up, so I made a bunch for myself and 40 spares from a wonderful little design on github by this guy. I’ve listed them here on ebay to try and just cover my original costs of making them.
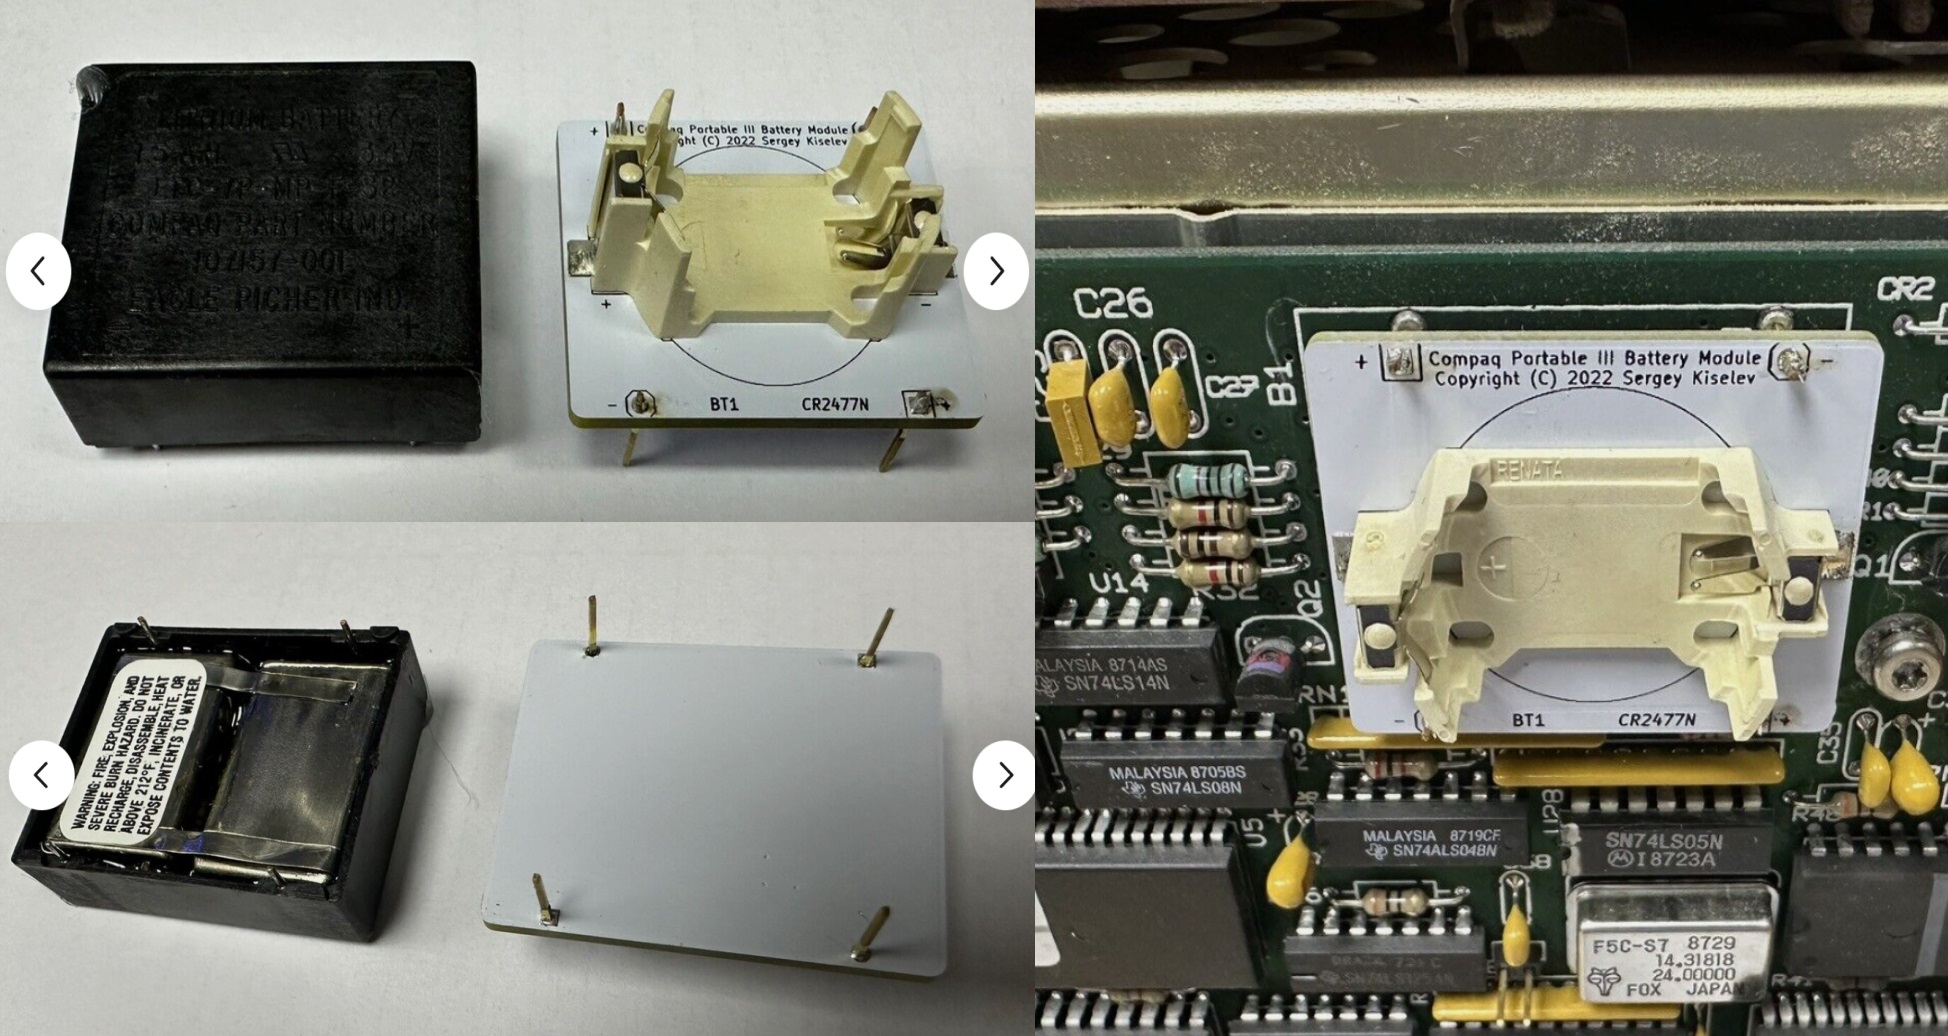
If you leave the machine plugged in, it retains it’s settings, so that’s the time to switch batteries. I’ve also noticed it can take 10+ minutes to lose it’s BIOS settings even when the plug is removed and no battery is installed. Must have some capacitor keeping the settings for a while.
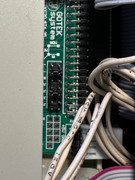
FlashFloppy and Gotek Compatibility.
I did have some success with Gotek although it all seemed really random as to what sized floppy images it wanted to boot from. Due to running out of floppy drives and having such a pain in the backside with the 720k bootup issue, I decided to try mounting a Gotek.
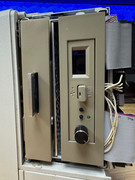
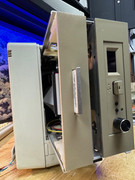
Due to the different sizes of the drive bays - the left is only suitable for a half-height 5.25" drive, whereas the right is full-size), I decided on this one machine to switch around the two drives - so the CF adaptor mount goes in the floppy bay and the Gotek went into what was the HDD-side. I had to cut about 5-10mm off the top of the CF mounting bay and drill some fresh holes as it was going into a space it was never designed to fit! - Click the images below for larger versions.
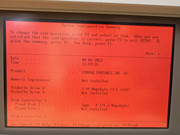
You can see here that I configured the Gotek drive as a 1.44Mb and it seemed to boot the single 720k image fine (unlike a 'real' 1.44Mb drive!) so with this, you *can* boot into the BIOS setup using easy-to-find modern tech:
Here you can see my jumper configuration for making this work on a regular Gotek drive: