I first encountered the IBM Palm Top PC110 about 5 years ago. I am an avid IBM Thinkpad collector and this machine was a diversion from the early IBM Thinkpad lineage. Many would argue (rightfully) that it's not a thinkpad. Why? Well, it wasn't made by IBM and it doesn't have a trackpoint. Having said that it shares a lot with other Thinkpads of this era - it has the same Easy Setup BIOS, it does have a red pointing device, it's black, it's bento.
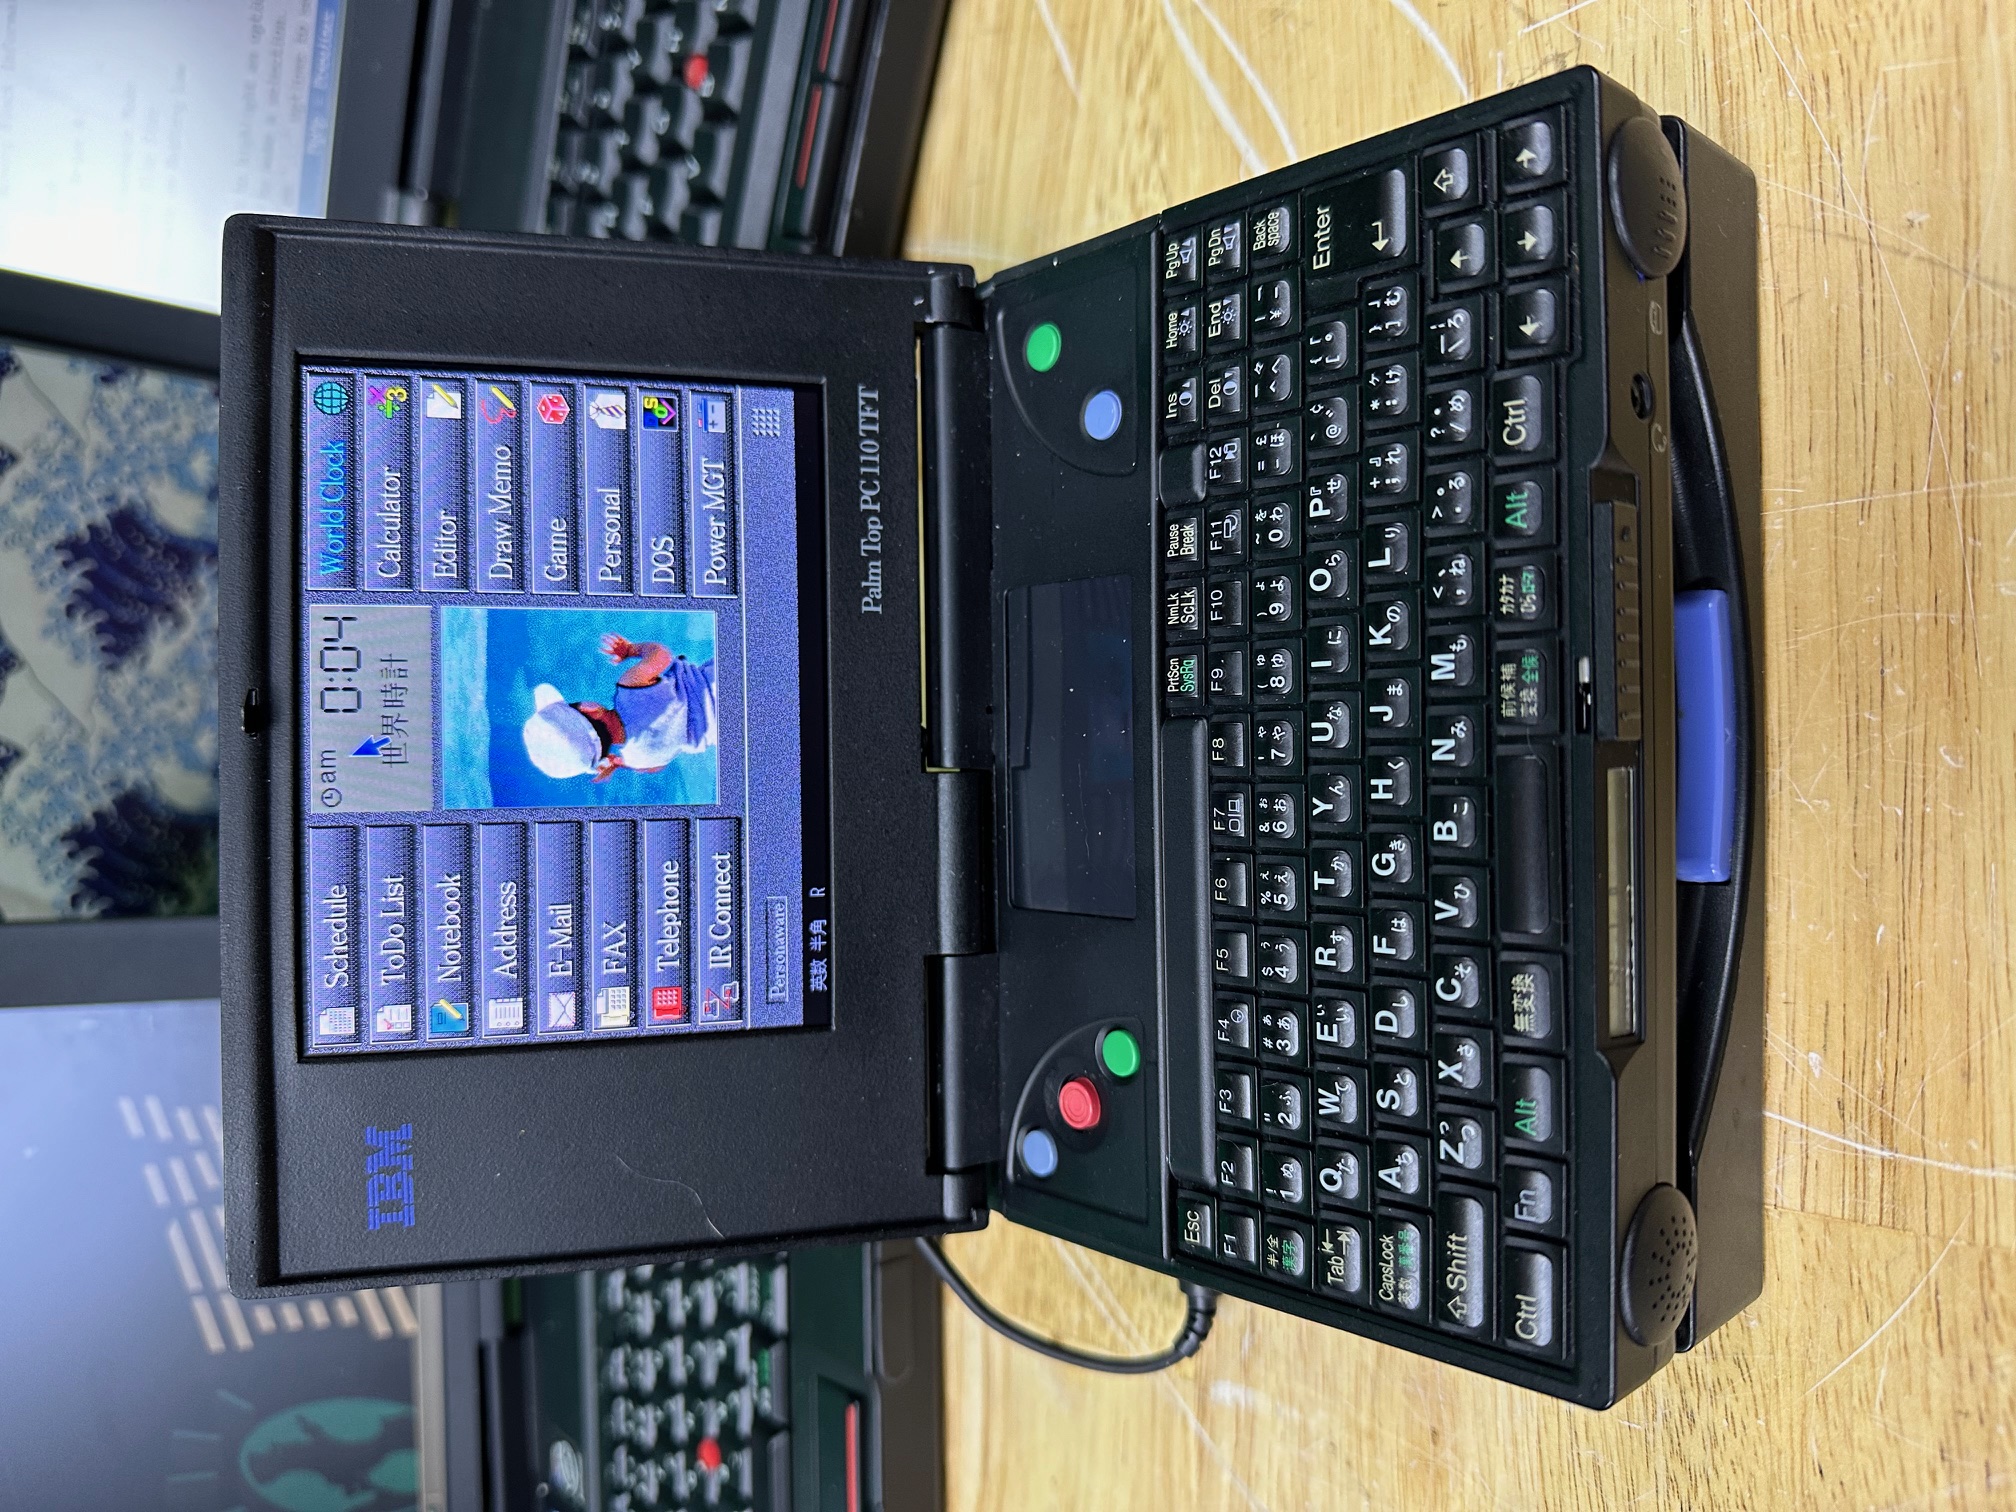
A docked PC110 with a fan-made TFT screen replacement.
Anyway, there are a lot of other articles, threads and videos about this machine, so I won't go into all the detail. However as it's been around for 30 years, a lot of the info on it is very old and I wanted to share my experiences of working on these in 2024.
Dismantling the machine can be daunting but essentially to get most of it apart, there are 6 screws around the lid and 7 around the base. Beyond that it's easy but you have to be very careful around brittle thin plastics and slim breakable ribbon cables. The best 'teardown' video I've found is here.
Physically, the machine suffers from 3 major issues. You should consider this when looking to buy one because if these 3 things haven't been dealt with, it's highly likely you will have to.
Problems
Problem 1 - The Display
This was a Japan-only machine and most machines built in the 1990s which lived out most of their lives in Japan have suffered due to the region's seasonal humidy. This has caused vinegar syndrome in almost all machines not taken out of Japan. In the case of the PC110, you have 3 options:
1) Run your machine via a dock for SVGA output (without a dock, you're stuck).
2) Refurbish your display. The display is relatively easy to remove by taking out 6 screws around the lid and then removing the screen. You will need to carefully seperate the layers of the glass and you'll find two layers of polarising film which will need to be removed. You'll need to spend a few hours, using IPA to loosen the glue and scraping it all into the centre. It's very messy. You can buy polarising film to replace the decomposing originals but I find colour definition is never great. You will also need to recap the tiny leaking electrolytic capacitors on the rear of the display - at least some of them rot.
3) Buy a frankly amazing fan-made TFT replacement. I've done this for all of my machines. This is probably the most awesome upgrade for the screen because if we're being honest, even if you had a working original DSTN display, you'd think it was pretty awful. The passive nature of the refresh is hideous and the colour reproduction is dull in comparison. This is a very easy swap and only requires taking out a few screws and reading the instruction.
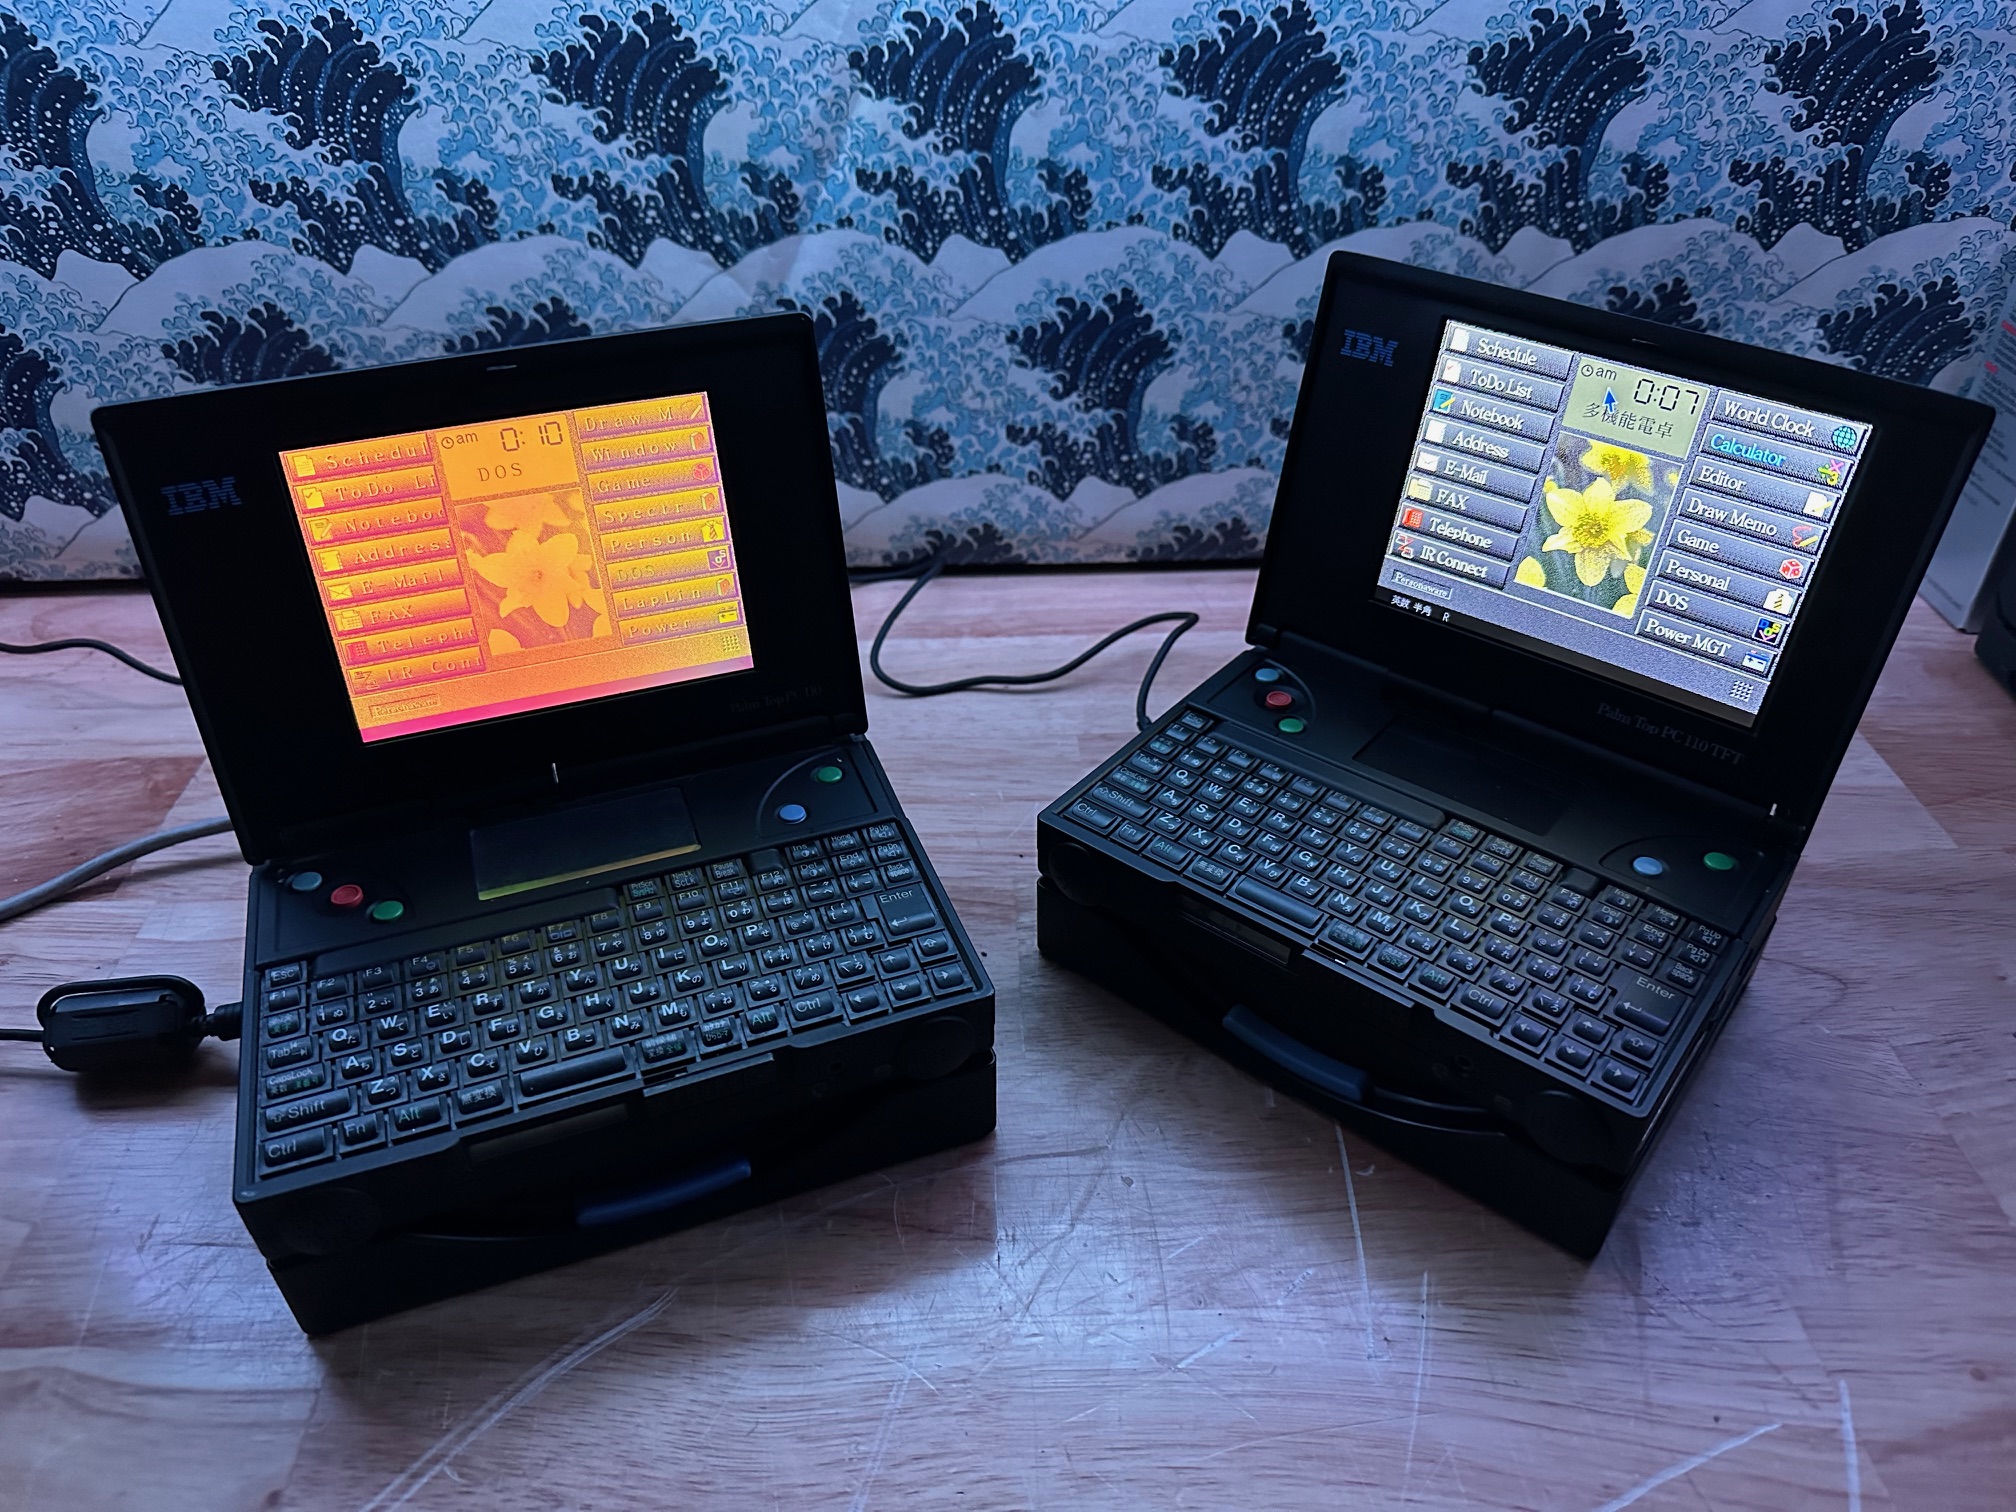
Showcasing the replacement TFT panel on the right and an original DTSN PC110 display which had vinegar syndrome - note due to the polarisers not being a perfect specification, the colour definition is off by about 30%.
There is a slight catch - the BIOS requires a modification to run the new TFT panel so there are two options - get a working camcorder battery (the firmware will only update with battery backup in place) and run the one-time BIOS modification which will accept the new display. This is a one-way ticket and not reversible. The second option is you can run a patch to run the same BIOS update but run it in hot shadow RAM - meaning it will do it for the entire time your machine is powered up but on a cold reboot, will revert to the original display. I have a specific config.sys file which opens a menu, with the TFT upgrade as the 30-second automatic default. Once the machine has soft rebooted and activated the new TFT display, you select another option from the menu and carry on.
Also note that the permanent, irreversible firmware update *must* be run from an IBM reference disk. This is provided with the display but the reference marker can be deleted by even running the floppy in a modern machine. You cannot run the firmware update from anything other than an IBM reference floppy disk - so don't bother trying to copy the VPATCH executable to your CF card. This does mean also that not only do you need a working battery, but you also need a working dock and PC110 external floppy drive.
Problem 2 - Hibernation Battery
The hibernation battery inside the machine leaks gas and corrodes everything around it. I've found several machines which look perfect on the outside but are almost completely destroyed on the inside. First thing you need to do is remove the 7 screws on the metal base, lever off the bottom (with the power button being the 'lever' and lifted away) and remove the battery.
Problem 3 - Camcorder Battery Leakage
It's not definite, because it depends on the battery, but I've seen PC110 machines with battery leakage corroding the causing damage to the battery bay.
Architecture
The machine is fairly unique in that it does not have a hard drive. It has several bootable, 'large' storage spaces but none of them are a typical hard drive of the era. There is a 4Mb rom onboard which you can use as a fixed disk - this appears as HDD 1 in the BIOS. This is usually there to hold a very minimal OS (by default it's a Japanese PC-DOS variant, along with some software including a custom made bit of PDA-style software called Personaware.
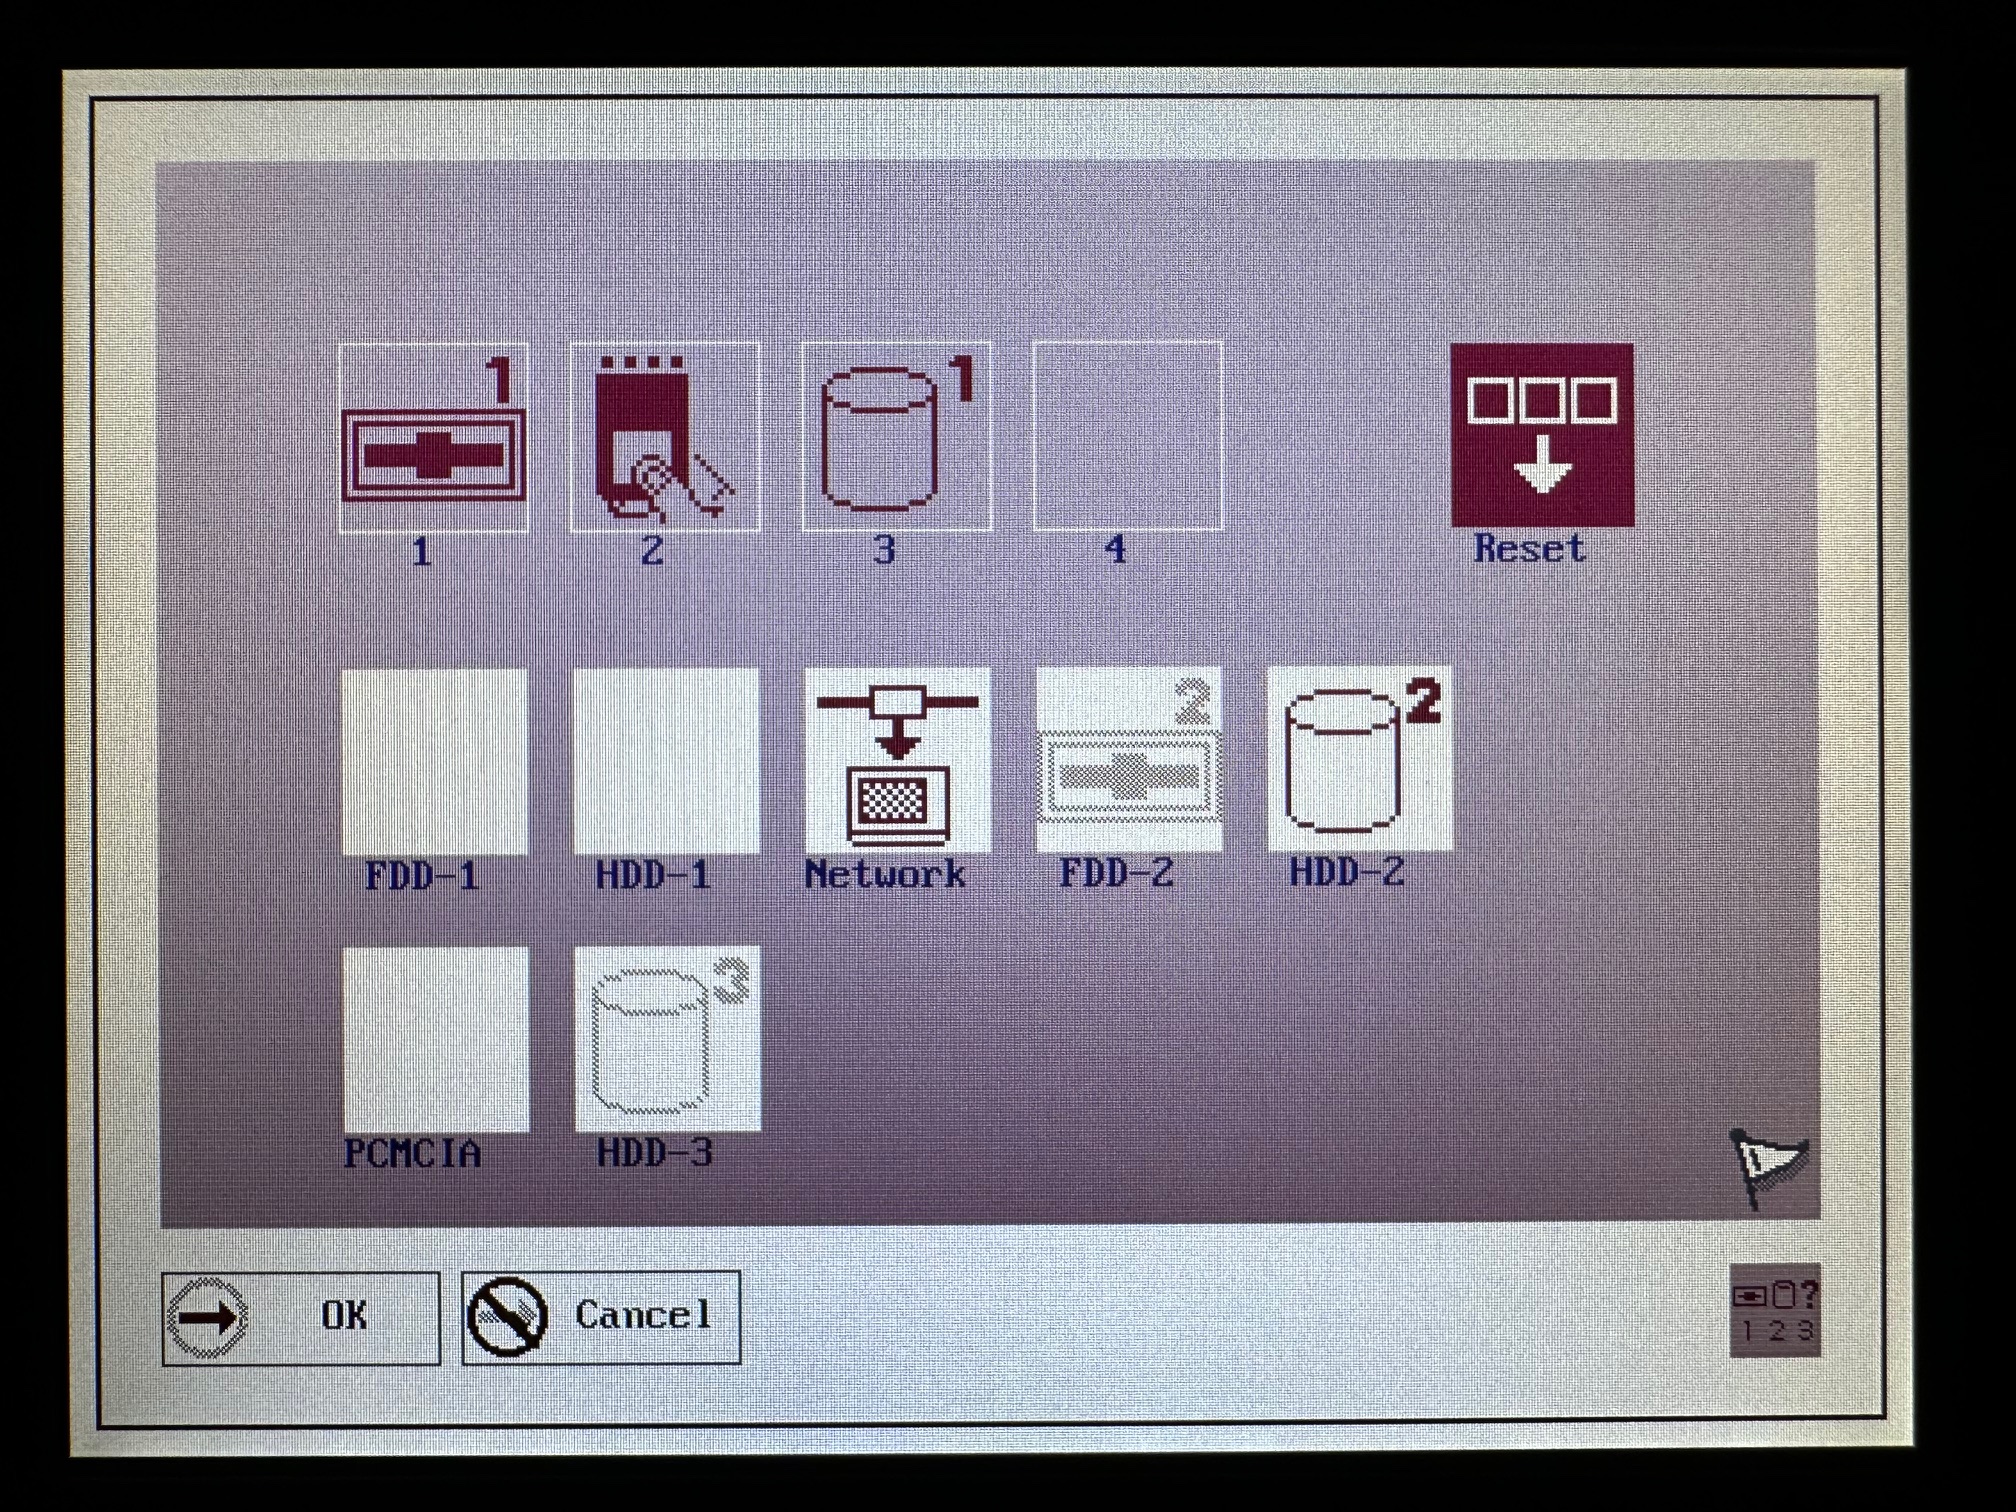
This picture shows the default boot sequence, of Floppy, then PCMCIA then 4Mb Flash 'HDD1'. If you want to switch to CF card, you need to clear all the items and replace with a HDD2 as the primary.
You can also boot from a fixed Compact Flash card slot ( HDD 2) and from a PCMCIA storage device. I tend to leave the built-in 4Mb alone, as it's not very big to do much with and use the fixed CF slot to switch out cards.
I've found the presence of the 4Mb internal disk can cause problems - for example, it's always there, so some operating systems can treat it as the primary partitiion/drive even if you're not using it, and if C: is somewhat fixed in the way the software functions, it causes problems. In addition, when installing DOS 6.22 onto a CF card, it will only allow you to use the 'upgrade' version of the installer because it can 'see' another version of DOS present on the machine.
Note, after installing MS-DOS 6.22 on the machine and rebooting, I recieve a flashing cursor and nothing else. However if I reboot using the MS-DOS 6.22 setup disk again, F3 out and run a FDISK /MBR, this seems to solve the problem.
The Dock
You can't do much without the dock. The dock provides the only way to connect an external display, a floppy disk and PS/2 keyboard and mouse. If you're buying a damaged PC110 - i.e. non working display or keyboard, or no operating system you really need a dock (and, likely a floppy drive!)
Language
The machine was built for the Japanese market and only ever released there. So whilst the IBM BIOS is all in English, the built-in flash storage 'likes' using Japanese DOS. All the recovery disks restore everything in Japanese. The Personaware is a cool little tool and has been adapted to work almost entirely in English by a fan. I've saved a copy of this here. Note, you need to copy the PWE folder to the root of the C: drive for it to work.
What Software?
Whatever you use, you'll probably want options. I've succesfully installed and run DOS, J-DOS, Windows 3.11 and Windows 95 on mine, however it's also possible to run OS/2, Windows NT4, Linux and possibly even Windows 2000. I have made a basic image here of one of my Compact Flash cards which is a triple booter. You'll need a 1Gb partition and I used Pretec compact flash cards with Active @ Disk Image tool to restore the DISK to a Compact Flash card. If you restore successfully, it'll offer you the following:
1) DOS 6.22
2) Windows 3.11 (Sound and Display drivers here)
3) Windows 95 PLuS
4) Personaware
The Windows 3.11 installation has the necessary video and audio drivers installed. The Windows 95 installation has a fan made tool installed which allows you to use the touchpad thing as a trackpad.
Note: due to the way Windows 95 works (it uses MSDOS.SYS amongst other things to work), it's necessary to have the hard-coded Windows 95 boot menu upon startup. If you select 'Previous Version of DOS' then it will load up high memory and dump you at the MS-DOS 6.22 Prompt. At this state you can navigate to Win311 directory and run win.com for Windows for Workgroups 3.11, or run the English version of Personaware from the PWE directory.
Personaware requires more than 500kb conventional memory to run, so make sure your autoexec/config.sys files have HIMEM.SYS and EMM365 loaded.
If the image doesn't work, what you need to do is the following:
1) Get a 1Gb+ 'industrial' or 'fixed' type Compact Flash card
2) Without a floppy in the drive, hold down F1 on power up and modify the startup sequence to be Floppy then HDD 2 (CF card)
3) Make 3 "MS-DOS 6.22 Upgrade" disks and put 1 in, then boot off that.
4) At the first screen, press F3 to exit and run FDISK. Make 1 primary paritition of at least 1Gb and ensure it's active then reboot.
5) At the first MS-DOS install screen again press F3 and format C: then reboot
6) Install MS-DOS 6.22 Upgrade using the 3 disks and reboot.
You now have a 1Gb CF card booting with MS-DOS 6.22
7) Take out the CF card and copy over the complete Windows 311 installation files into it's own folder, copy the English Personaware files into C:\PWE and copy the complete W95 install CD files into a W95 folder.
8) Go into the Windows 311 folder and run custom setup and change the installation folder from Windows to Win311 and install Windows 3.11 and reboot
9) Go into the Windows 311 folder and rename win.com to w1n.com and rename winver.com to w1nver.com
10) Navigate to the W95 folder and run setup. Also do a custom install and change the installation folder to Win95. Install Windows 95 here.
When the install is finished the machine will now autoboot into Win95.
11) Rename the w1n.com and w1nver.exe files in the Win311 folder back to the original names.
12) Go into Win95 and then navigate to MSDOS.SYS file and open in notepad. Change the following:
[Options]
BootGui=1
BootMulti=1
BootMenu=1
Logo=1
Bootdelay=10
This will ensure every time you turn the machine on it will show the 'Windows 95 Boot Menu'. From here you can boot into Windows 95 or if you select 'previous version of DOS' it will boot into MS-DOS 6.22 which will allow you to navigate into the Win311 folder and run Windows 3.11 or Personaware.
Digitiser
There is a shiny black 52mm x 28mm touch-sensitive pad located above the keyboard, referred to as a 'digitiser'. It was only originally supported under DOS but some wag made a nice little bit of software for Windows 95 which essentially turns it into a trackpad.
WMousePd runs as either Relative or Absolute mode. Relative modes behaves like a traditional mouse trackpad which responds to movements on the pad. Absolute mode relates the area of the pad directly to the area of the display.
Restoring the 4Mb Flash ROM
It's weird if you don't know how and easy when you do. Using Google Translate and a camera phone will make everything easy.
The original packaging for the PC110 included 4 disks - a Restore Disk, a Personaware Disk and 2 utility disks. You can get images of all 4 of them here.
You use the Restore disk (the one without a number or personaware written on it) to boot, and then you select the top option, press N (to decline making a backup), Y (to continue) and enter. The machine will reboot and restore the internal drive. At the end it will ask if you also want to restore Personaware, which is worth doing, using the Personaware disk.
This pic highlights the size difference between the PC110's closes cousins - Back middle is the 235 - another RIOS-made ultraportable 'Thinkpad', which runs off the same camcorder batteries as the PC110. Back-right is an IBM Thinkpad 701c "Butterfly" - same era but from a completely different design team. And cut off, far right is another Asia-Only ultraportable from about 5 years later - the iSeries/S30.
Getting Stuck on the 4Mb Boot Sequence
When you restore the PC110 and boot via HDD 1, it will run through a fair bit of DOS text partially in Japanese. One big thing that caught me out for a long time is the boot sequence will halt at a line which ends in the words "PAD". Press escape key and it will continue. If you have installed Personaware, it will boot into this.
My Repository
I used a variety of methods to make images and files related to the PC110. I uploaded these to archive.org here.