The IBM ThinkPad 701 was a mid 1990's attempt to create a subnotebook computer that did not have the usual disadvantages of the class - cramped keyboard and tiny screen. This was achieved by having a keyboard that folded out as the lid opened, and squeezing a 10.4" panel into that lid.
At the time, IBM's portables development took place in three different laboratories: Boca Raton (US), Raleigh (US), and Yamato (Japan). These worked largely independently of each other, often in competition. Boca Raton and Raleigh working under the close direction of the US PC Company, whilst Yamato produced designs either for the Japanese domestic market under their own initiative, or for global markets under the direction of the US PC Company. This led to a confusing array of products and naming in the portables space, with some models marketed worldwide by IBM - perhaps with different names in different geographies - and some seen as niche models, usually restricted to the Japanese market.
The 701 design project was undertaken in Raleigh as effectively a continuation of the work which had delivered the lacklustre 500 and 510 subnotebooks in the summers of 1993 and 1994 respectively.
However, by late 1994 the 701 was mired in delays, not only due to the complexity of making the sliding keyboard mechanism robust enough to withstand the target of 30,000 operations, but also the general design complexity of what was planned to be a cutting-edge 486 subnotebook. Engineers at Yamato in Japan were brought in to apply their expertise in notebook design - their Japan-only 220 subnotebook model released in early 1993 had been a significant commercial success.
With the combined efforts of Raleigh and Yamato, the 701 was eventually ready for production some six months behind schedule, hitting the market in March 1995 (as a 486 notebook) in the same month that the Pentium processor was released. However, the 'wow' factor of the sliding keyboard mechanism and 10.4" screen in such a diminutive chassis resulted in the 701 being praised by the press and briefly rather fashionable. Without any possibility of an upgrade to a Pentium-class processor, the 701 was an increasingly dated design and thus became a hard product to sell. With modest price cuts in June 1995 being followed by more significant cuts in February 1996, it was eventually withdrawn in June 1996.
The 701 was to be the last IBM notebook designed at Raleigh, and indeed by the time of its launch IBM had decided that all future PC portables would be designed in Yamato, Japan.

A hastily translated Japanese 701c Brochure...
Why was the Thinkpad 701c special?
- IBM believed that the lack of a full-sized 'proper' keyboard in it's Raleigh-developed 500 and 510Cs subnotebooks was a large factor for their failure within Western markets. It also felt that the 'proper' keyboard inside the highly successful Thinkpad 700 was very much a part of it's success. IBM had huge expertise in typewriter design at it's Triangle Research Park (Lexington, Kentucky) offices and the folding design of it's keyboard not only solved the problem of how to fit a decent keyboard inside a tiny case but also provided a mind-bending 'party trick' which caught people's eyes - a real 'halo' design.
- The 701c sported the same-sized 10.4" TFT screen as the PS/2 CL57 and Thinkpad 700C but the bezel had shrunk by an incredible factor. Remember that IBM's March 1992 PS/2 CL57's huge lid had slimmed down first into the Thinkpad 700C by October 1992 and now in 1994 we had a panel that almost had no bezel at all. Not only did the 701c manage to squeeze a 10.4" TFT panel into a tiny chassis, but significantly increased the colour depth to 65535 colours.
 This picture shows how IBM's original 10.4" TFT panel evolved from IBM & Toshiba's initial, expensive design inside the huge PS/2 CL57 (left), with huge CCFL tubes behind that bezel, to the smaller, but still multi-PCB layout of the 10.4" panel in the 700C (centre) and finally to the mass-produced single-PCB Sharp 10.4" panel in the 701c (right). The 701c's panel could also display 16-bit colour (65k colours).
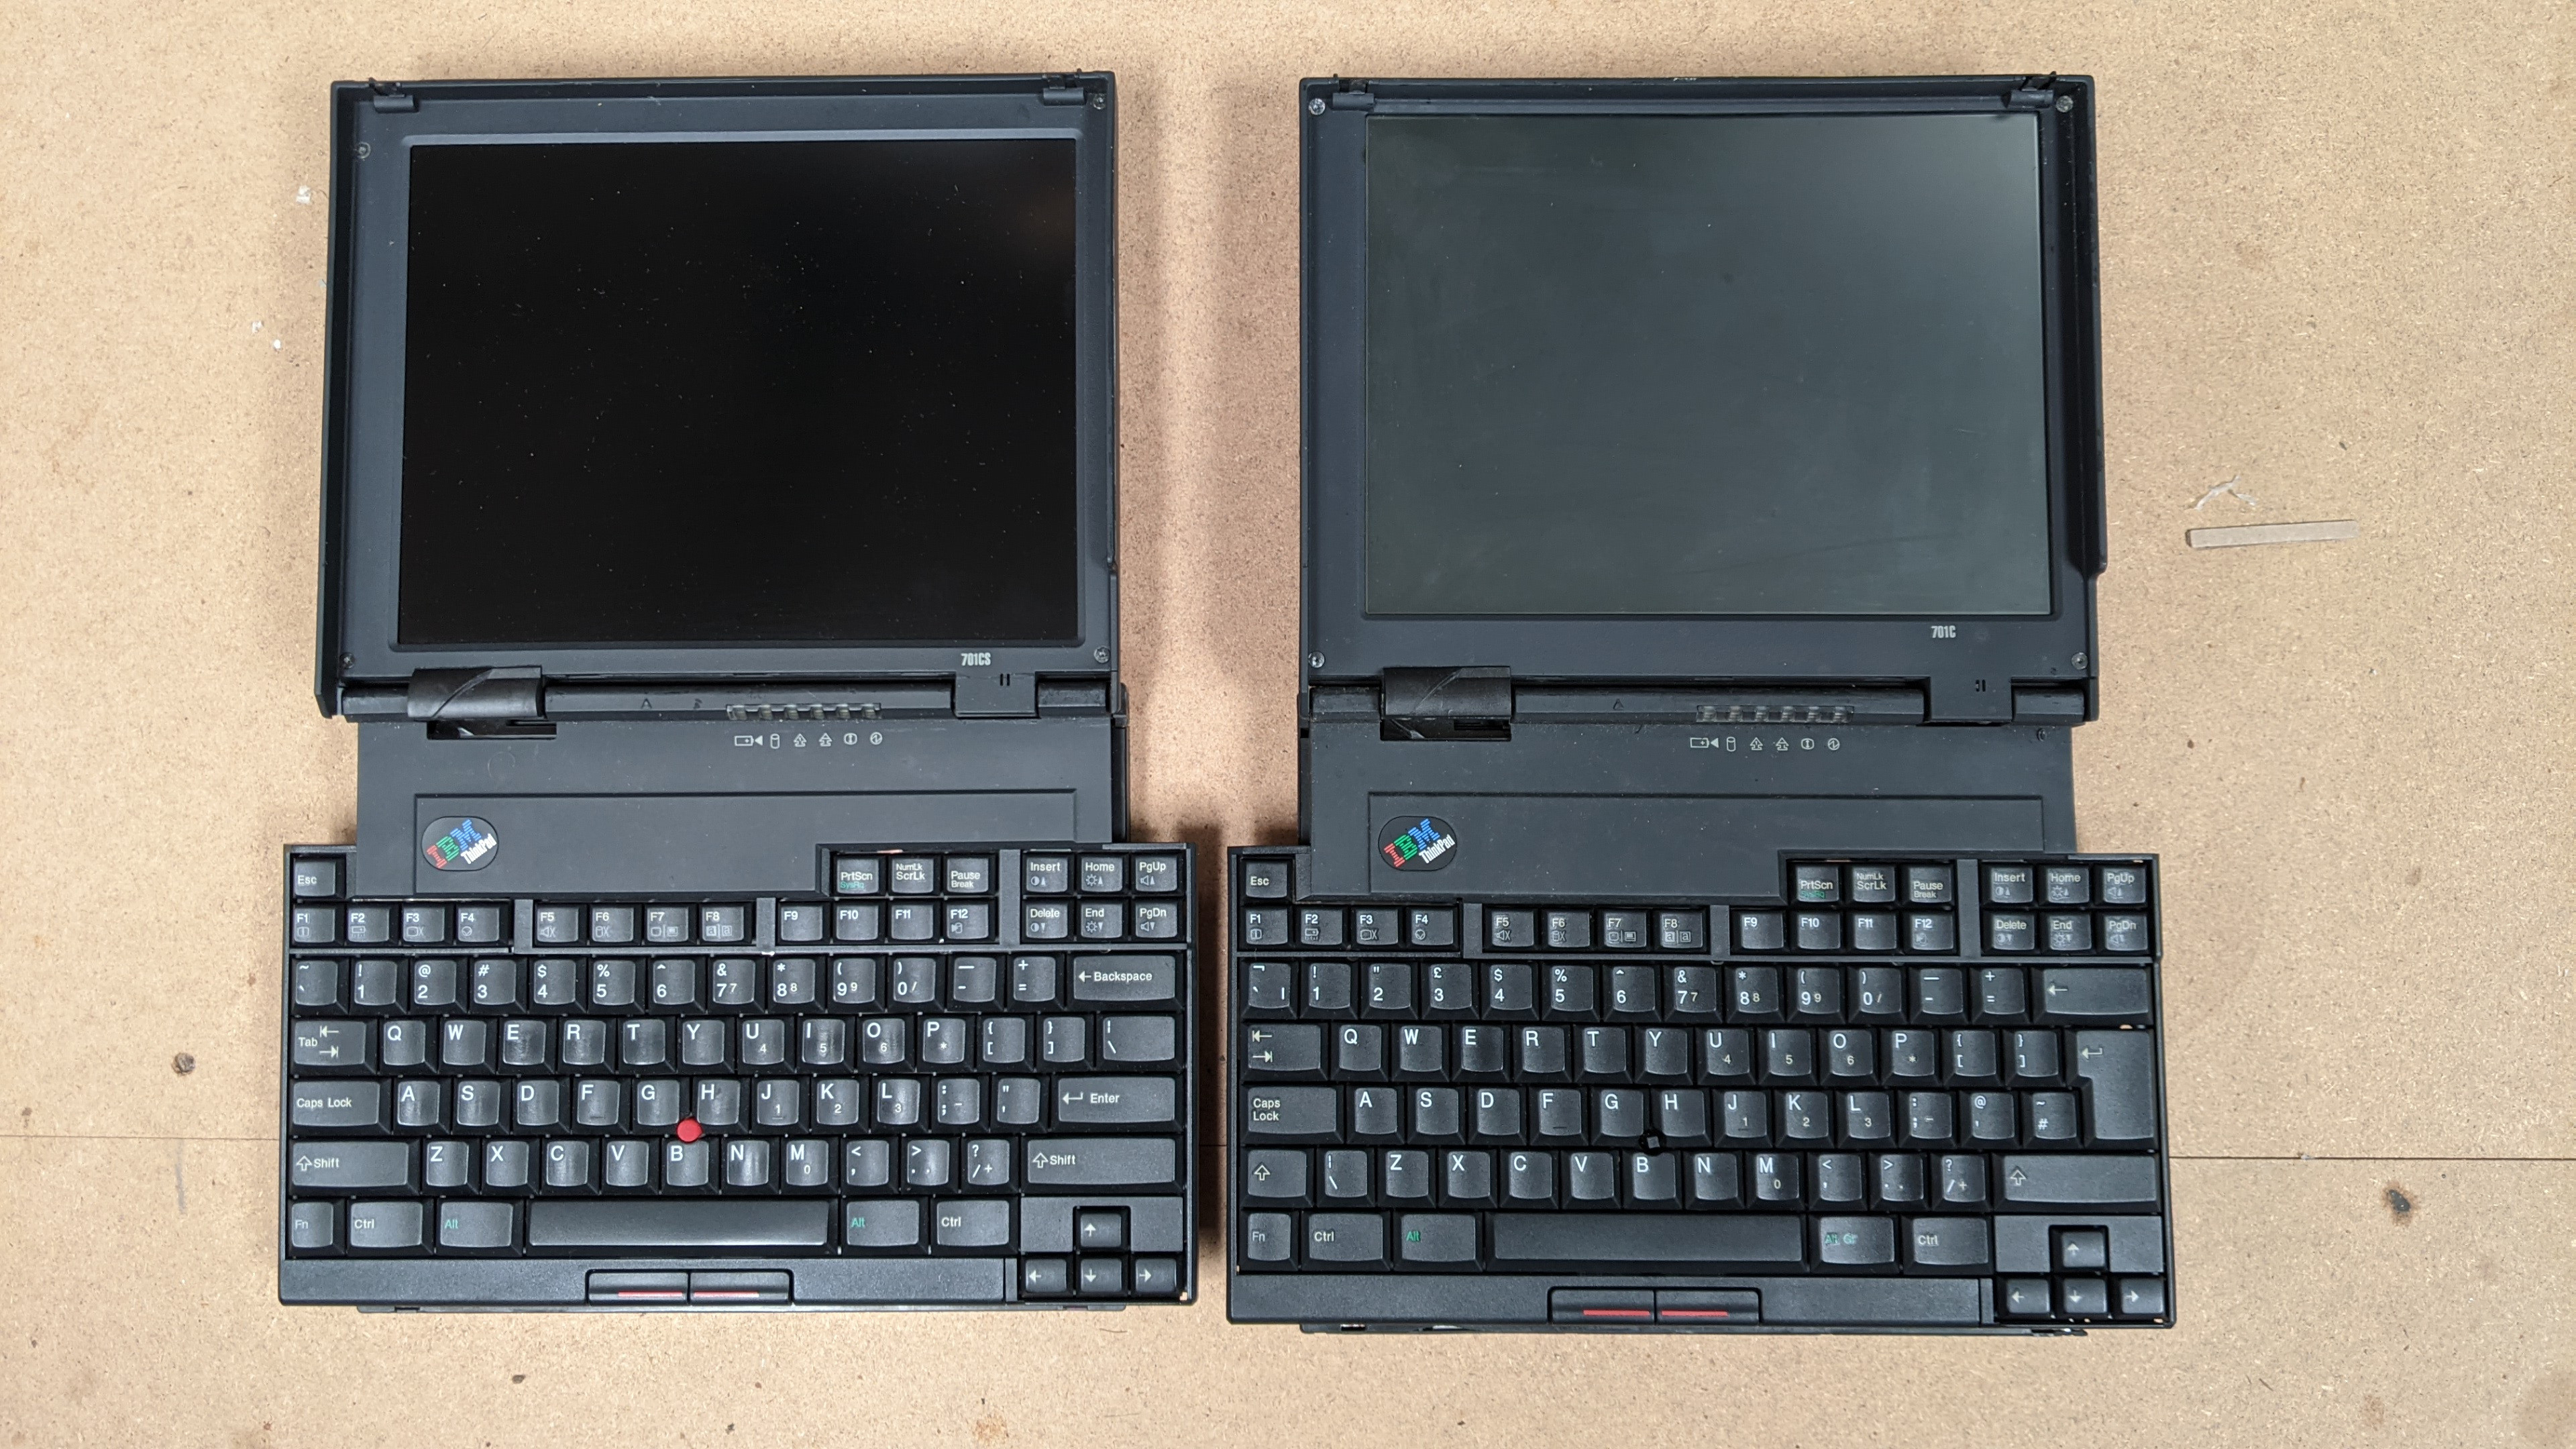
 And here's a picture of the PS/2 CL57 (left) back to back with the 701c (right)
- It brought a new bios architecture which could be accessed at any time improving support for plug and play
- The machine had better power management than machines which came before.
- The two main PCBs inside the chassis sported "Interlocking dual sided planars"
- It had the fastest modem for any subnotebook of the time.
- Integrated telephony and extremely capable sound (with an integrated ESS audiodrive ES688), a removable hard drive and Infrared support were all standout features on notebooks of the era.
At the time, IBM had no overall manager for it's note or Thinkpad brand who could have approved or killed portables under either brand name and therefore there was little control over how cohesive IBM's overall strategy was.
IBM's PS/1 consumer desktop unit was based in Lexington and had picked up the early Raleigh notebook called the PS/note (widely known as the 182) but to little success.
IBM Raleigh, a large lab in it's own right was also assigned the development of a 'value' notebook - The note 425/ Thinkpad 350. IBM wanted Yamoto to know they had competition on value notebooks - first from Zenith with the note N45SL/Thinkpad 300 and other internal labs.
The team in Raleigh continued develop the next machine in an environment which had grown from 9 engineers to 32. John Karidis was it's chief engineer and had overseen the development of a butterfly keyboard at IBM’s Watson Research Centre. Karidis reckoned that the 700 succeeded and the 510 had failed due to their keyboards. I think it's a push to say the 700 (only) succeeded because of it's keyboard but it's fair to say that it's keyboard was a key component of it's winning design and that the 510Cs failed partly because of it's small, cheaper keyboard against big, fat American fingers! Consumers had become 'used' to Thinkpads having industry-leading, full sized, high quality keyboards and the 500 and 510Cs distinctly did not have these.
Karidis speculated that the width of the keyboard dictated wasted space either side of the screen and the height of the screen dictated wasted space above and below the keyboard. How to solve this mismatch? The 4:3 display couldn’t be changed so he focused on the keyboard by cutting out the keyboard in steps and shift shifting it into a closed space which matched the 4:3 display.
This development was happening in 1993 with a release date of autumn '94. If it didn’t ship in '94, it was to miss the boat because IBM were aware that by 1995 good notebook screens were going to be getting bigger and processors were moving to Pentium. However, the 701 was delayed due to the complex design of the keyboard and the designers knew that it couldn't handle the Pentium processor which generated simply too much heat. It had to stay as a 486.
It's worth noting that there was a Dual Scan (DSTN) colour LCD model called the 701Cs ($2499 as opposed to $2999 for TFT). This was released at a much lower price-point as these screens were much cheaper to manufacture. This is one to avoid now as the screens are very blurry when anything is in motion and the contrast ratio is much worse than a TFT leading to most colours looking washed-out.
Branding
The branding was also interesting. Many felt that because 'IBM' and 'Thinkpad' were winners, that 'Butterfly' would also be a good brand for the machine. The IBM Butterfly, or the IBM Thinkpad Butterfly? However for many reasons (such as IBM not being able to stomach a 3-tier branding hierachy) IBM decided the machine had to simply have a number. But which number?
The machine clearly sat within the size and specifications of the existing 500 'subnotebook' category. However the 500 series was considered tainted after the 500 and 510Cs had not been a success. Many had considered the 500's usability to be compromised by a keyboard that was too small, a processor which was too slow and a display which was too lame. It's true, the 701c's amazing TFT screen and full size keyboard was something the 500-series had failed to deliver.
So, the 600 series then? No, at the time that whole series had been earmarked for a future range of Power PC portables (which in itself was derailed).
So, the 700 series then? On one hand, it had the same cutting-edge TFT as the 700C and it had a brilliant 'proper' keyboard in a wickedly impressive set of subnotebook dimensions, but it lacked the 700-series' ethos of having 'the best' processor and the biggest/best TFT display of the time.
There was no way to satisfy everyone so I guess they went with the 701c as it could be interpreted as the 700C but faster and smaller. Another tidbit worth noting is that 701 was a revered number at IBM: it was their first commercial computer and established a line of mainframe models in the 700 and 7000 series during the 1950's and 1960's, before bieng replaced by the System/360 mainframe series in mid 1960's.
So 701 was not chosen lightly. Also, the naming had to be approved by IBM's product naming committee - they who had refused Butterfly - whose members would have been fully conversant with the significance within IBM of '701'.
My final remark on branding was that the 'butterfly' keyboard went through IBM's branding machine and they decided instead to market it with a "Espanza" keyboard. However, IBM Brazil noted that within it's borders, Espanza has sexual connotations. In the end they reused an existing brand name created for it's Thinkpad tablets 'Trackwrite' which nobody ended up using and all the marketing referred to the keyboard as a butterfly!
Conclusion
The 701c was too slow (a 486 CPU with no cache) and therefore too out-of-date to compete at the Windows 95 multimedia party. Additionally the following year everybody wanted a larger TFT screen, which completely removed the need to do some fancy-mechanics to squeeze down a full-sized keyboard.
It's place in history was ultimately saved by the way the press and award cermonies responed to it's keyboard. IBM kinda got away with it. The machine didn't even make it until the end of 1995 before it was withdrawn. Whilst the machine is ultimately a commercial failure, it taught IBM that timing is just as important as innovation.
If any further lesson was learned it was that the timeline successor to the 701c is the quite boring 560 subnotebook which had very little in the way of party tricks but was doing subnotebook computer quite well. IBM could have tried to capitalise on the goodwill of the 701c and the desire of it's up-scale 'professional' client base for something lightweight, powerful and with a good screen and keyboard. But they didn't.
Finally, if you check the timeline, the missing Thinkpad 520 matches the exact original release-date of the 701c. Seeing as the only reason it wasn't a 5xx machine was because IBM thought the series was tainted at the time, I think it's fair to also call the machine the unreleased IBM Thinkpad 520.
| Model | IBM Thinkpad 701C/CS |
| Machine Type | Type 2630 (yes it's odd that it has a '26' consumer type along with 300s/500s!) |
| Release Timeframe | Released March 1995 |
| Preceded by | Chronologically, the 530Cs and 535, but IBM themselves would put the 560 as the successor to the 701C |
| Superceded by | Technically the 535, or the 560 in the subnotebook category. The s30 certainly draws on some design cues. |
| Motherboard Specs | 486 DX2 50/ DX4 75Mhz (AMD 133Mhz via this mod) |
| Display Specs | 10.4" TFT, 8Mb RAM onboard. |
Working on the machine in 2025?
The build of the 701 feels very unique and having disassembled and re-assembled many 701 machines the uniqueness definitely extends beyond that of it's iconic keyboard. The diminuative display, chassis, PCBs, batteries, obviously the keyboard, the design, docks and layout all feel quite Skunkwork-y and blazing it's own trail.
The 701c's 486 CPU is somewhat endearing in 2025 and more interesting now than if it had sported a Pentium.
The machine's latecoming meant it was released just as Windows 95 hit and pushed most user's requirements up beyond a 486 CPU's upper limit. However, I think today if it had a Pentium, it would be slightly less interesting. When I say 'most', some people have de-soldered the 486 and added a faster AMD 5x86 CPU - but these are rare.
More than 30 years after it was released, there are several problems which have developed in the machine. The 701 is incredibly touchy when it comes to RAM, false-RAM errors, System Board errors and it's hard-to-get-to CMOS battery. These machines do seem to be rather temperamental and I've have several perfect working machines just suddenly freeze on me and then work normally again.
All the main batteries have since tried to eat up the machine around them (and taken some sound components with them). The coating on many machine has often gone to rot, although interestingly some have survived unscathed. Luckily a very sympathetic hand and some eucalyptus oil can reveal a relatively unoffensive satin under-plastic.
Luckily the hinges, the LCDs, the keyboards and keyboard mechanisms all seem to have lasted well.
Most of the hard drives by now are having problems, but at least the machine is fairly happy to accept a modern equivalent (of less than 8Gb) and as long as you know what you're doing with the incredibly clunky factory restore options or imaging a disk.
As you can see below, I have five 701c machines and all of them are in fairly good working order. Each one has been stripped down, issues dealt with, rebuilt and sometimes repaired. I have a few tasty accessories to try out with it too including the Adaptor kit for the ThinkPad Dock II (3546).


Owner's Thoughts
- 201 memory errors are almost always cured by replacing the CMOS battery with a working one. Do not trust any error giving specific memory failures until you have a known good, time-keeping CMOS battery.

- Thinkpad 350, 500 and 510Cs seem to share similar BIOS managers (possibly due to all 4 machines being developed in the USA between Lexington and Raleigh?)
- Unusually amongst Thinkpads, the "Post Configuration Utility" otherwise known as the BIOS or CMOS settings can be accessed at any time via a hotkey combination of fn+F1.
- The CMOS battery placement is possibly the worst of many Thinkpads. It's a 3v BR1225 located on the main systemboard (FRU 25H4883). The solder pad CLOSEST to the SO-DIMM slot connects to the *front* of the battery. The solder pad furthest from the SO-DIMM slot connects to the *back* of the battery. You'll notice it's a BR not CR coin battery which means it's capable of withstanding higher operating temperatures than a CR due to it's poly-carbon monofluoride chemistry. I think a CR should be ok though. If you want to solder in an easy clip-in and out replacement, i've used this one. or this one.
- My machine had 4 memory chips, each with a capacity of 2Mb, along with a socket for an extra stick.
- A *false* memory error will show a little bit of Kb missing which is a red herring - it’s something to do with the memory count excluding either video ram or shadowed BIOS.
- If you have a *real* memory error, you can desolder all 4 chips at which point the machine will refuse to boot (nothing on screen, long beep) but you can insert, say, a 16Mb stick and the machine will boot without errors.
- If you replace the CMOS battery with the wrong polarity, the machine will not boot and give off a long beep.
- Using a rare 64Mb memory stick will also cause the on-board memory to be ignored, circumnavigating a genuine on-board memory error.
- When trying to use a 64Mb FPM module, the system will boot and will recognise all 64MiB of memory however, Windows will fail to set 8/16-bit color mode and only work with 4-bit color. Apparently, the 64Mb RAM interferes with the linear framebuffer used by the Chips & Technology driver, so you need to load a TP701MEM.SYS driver that I got with my memory module. Problem is, every time I try to load it (in config.sys) I get "TP701MEM.SYS V1.02 (c) Copyright Takeshi ISHIMOTO 2002 ... Not installed [E06]" message on boot. - Maybe an AMD issue?
- If you power your 701 on and get a combination of 702 (System Board), 1104 (Serial Port) and 611 (System Board) errors, it’s been known to be caused by oxidisation on the optional memory stick connector. Remove, clean with contact cleaner, de-ox-it or the eraser-head of a pencil.
- Oxidisation can also occur on the PC87334VJG (U528 big IC chip next to the battery connector and removing, cleaning and reinstalling may help.
- The Lid, LCD, Bezel and Ribbon can easily be swapped between 701 machines.
- The LCD and Bezel sizes are different between the 701c and 701cs
 This picture is not mine. I don't know who took it, but it perfectly shows the difference between the DSTN and TFT 701 Panels
- Apparently, the lid itself and the ribbon cable between either LCDs and the mainboard are the same on both displays (TBC)
- The rubber used on 700, 701c, 720 up to and including the 770 are different and decay in certain conditions. 220, 230 and 235 suffer, as do 530 up to 555. Light scraping with a spudger and eucaluptus oil. If you want to try and slow down the rot, I think the solution is spacing, a dry, mild environment and lots of silica gel! Storing the machine in silicone release Mylar is one way to store it safely. If it has to rest up against something, rest it against the kind of paper sheets which provide the backing to paper stickers.
- The main battery is a nickel cadnium battery which leaks. It wrecks both the coating and the plastic around it. Remove it at your earliest opporunity and when buying a 701c try to see inside the main battery compartment to see how bad any damage is.
- Page 142 on the HMM has a breakdown of boot error codes.
- If you have no sound, it is possible there is corrosion of oxidisation in the 3.5mm headphone jack which is causing the machine to believe there are headphones arranged. Spray some deoxit inside and insert/remove a headphone jack a few times to try and clean the connectors.
- An alternative modern screen is Sharp LQ10D031 apparently fits 701c (pending trying this). You can get these easily on AliExpress for around £90 delivered (2025).
- Casual HDD upgrades should be below 1Gb although some finessing with BIOS overlay patches can make <8Gb SSD usable.
- I've successfully imaged a 701c restored hard drive using Disk @ Image (using 10.0.0) from a variety of cards but tend to favour Transcend or Sandisk Ultra. IBM Thinkpad 701c Factory Restore Disk Image with OS2 Warp and Windows3.1 here.
- Another really useful page going into detail about restoring a 701c to CF card is here.
- If your 701 freezes at a green 5B boot check (bottom-right) it’s likely that isn’t anything related to that error code - it’s just the last item to be checked and the machine is then hanging instead of booting. I’ve found it’s an issue with a boot device and the machine doesn’t know what to do next. A dead CMOS battery will also cause this hang even with one or more valid boot devices.
- The area around the ‘top board’ where the 3.5mm jacks are is often most likely affected by a leaking main battery. Many times small components will become brittle and fall off, but the machine should still be usable (possibly without some sound functionality).
- When using the small port replicator/expander, make sure you power both the 701c and the dock using the dock’s own power connector.
- A ZIP containing the CD and pre-load software is here: 701_Preload_CD.zip
- The 75Mhz 486 models tend to run like 50Mhz 486 machines due to a lack of L2 cache (reduces performance by about 25%)
- This is a really cool page about the popular mod which upgrades the stock 486 to an AMD 133Mhz
- T-1 torx and a T-6 torx are required to work on these machines - the T1 really is tiny and there are almost invisible T1 screws to remove along the front plastic beneath the keyboard assembly and do often become oxidised making it hard to insert a T1 bit.
- Official restore disks allow recovery by a Laplink cable, by using a Thinkpad Dock I or Dock II with a CD (scsi, IDE or even ISA) but not a PCMCIA CD but it is only meant for use with a 755CE. However you can use other machines to run the restore by reauthoring the 755CE restore disk, removing the original “preload” and “zip” folders and replacing them with these (broken link!). Leave the “floppy” folder and the loadsoft executable in place. Launch the loadsoft from the CD and it makes a bootable floppy which you then put in the target 701C, using the external floppy drive. Connect the laplink cable from the “host” to the 701C using the little port replicator bar on the 701C. Takes a couple hours to transfer but you wind up with a snazzy original factory load with DOS 6.3, Win 3.11 and OS2.
- There is a fairly rare hardware upgrade you can make to the ThinkPad Dock II (3546) to make use of a hidden connector on the left. Usually you would use the connector on the right to attach a 755 or similar machine, but with an optional extra Dock II Adapter Kit 04H8353 for ThinkPad 701C you can make use of this left-connector to attach a 701c to this dock. I have one of these and will detail it below.
- V3O BIOS Update is reputedly needed for Windows 95 support. You can download it here. You'll need either a working battery or to simulate a working battery to perform the update via floppy disk. (fixes some DMA issues in W95 amongst others)
- Resources and Files ZIP file is here containing a lot of pertinent software and drivers.
- Here is the hardware maintenance diskette for the 701c. And a different HW maintenance diskette is here. (not sure of the difference)
- The Thinkpad Online Reference doc containing the 701c is here.
- With the Dock II Adaptor Kit comes a 701c System Upgrade Disk and I have imaged the disk along with saving it's raw files and dumped it here.
- The external floppy drive connector is wider and fatter than most other Thinkpad's floppy connector, which means it's quite hard to find compatible external floppy disk drives.
- Someone's 133Mhz AMD CPU mod is available here
- Unusually for Thinkpads, the main battery will not charge when the machine is powered off or the battery indicator LED light not up unless the battery is not charging (later machines will have amber or flashing for charging and solid green for a high state of charge).
701c Main Battery and BIOS
The main battery and BIOS updates are intertwined as you cannot do a BIOS Update without a charging, holding battery. I have stripped down a dead, leaking battery and you can reconnect the BMM and charging pins and it will still refuse to update the BIOS without it seeing a healthy charge.
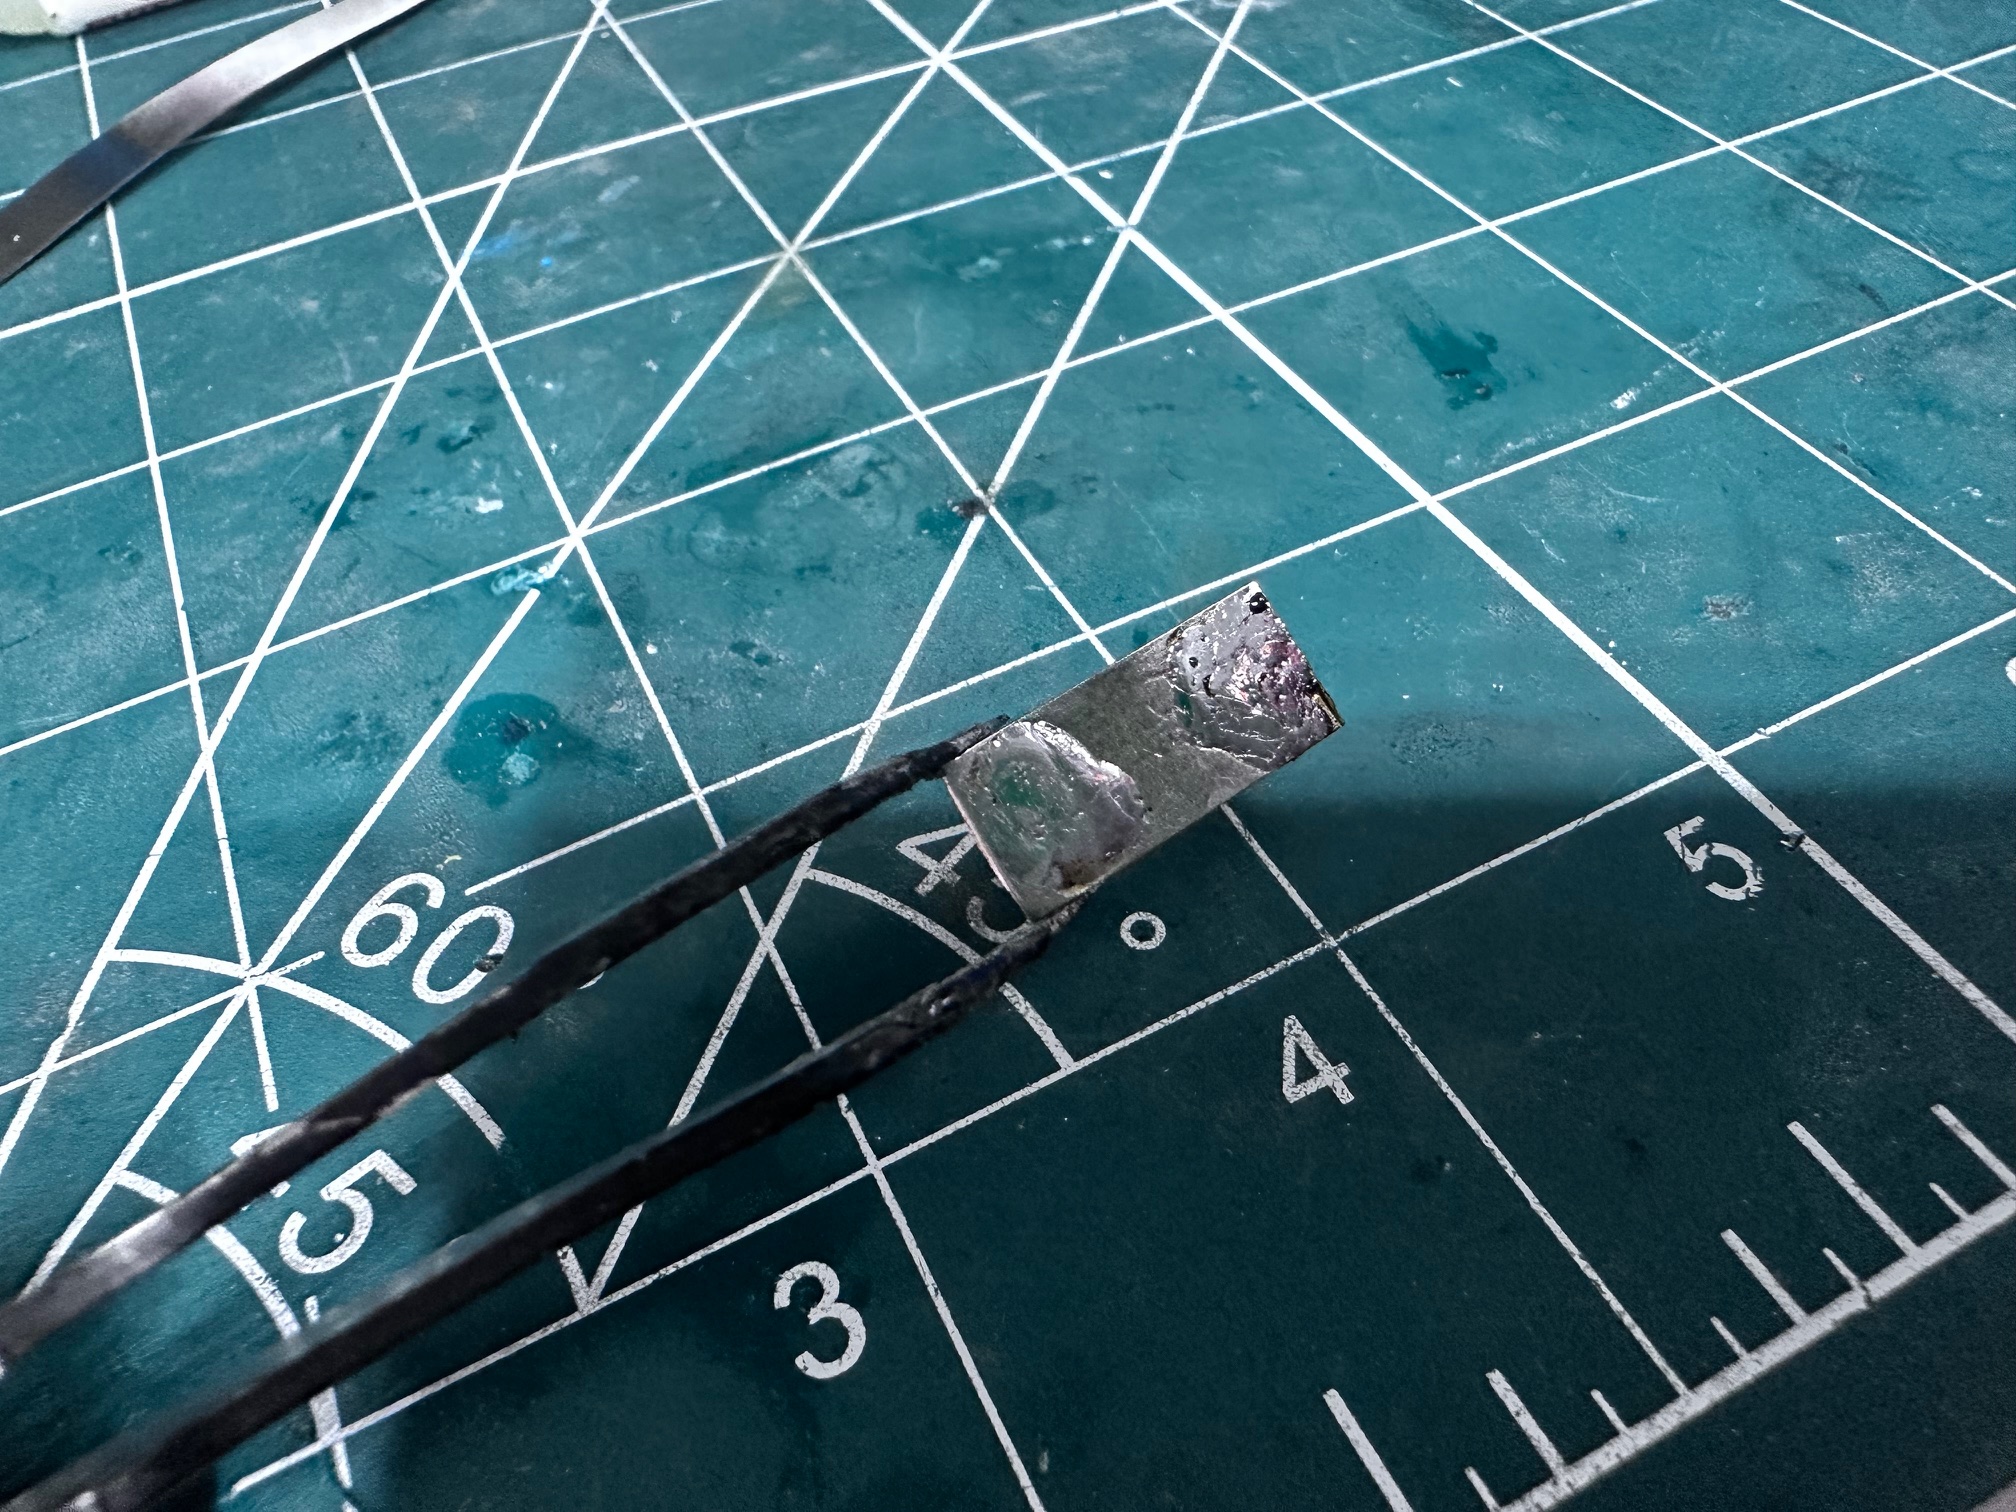
The battery case can be broken down and even with serious deterioration can probably be recovered. On both of my manuals, the PCB had been eaten away but with some solder, some aluminium/nickel strips and some wires, its a simple layout that's easy to recreate. Here is a quick diagram of the board with it's simple 3-pin Dallas component which does some battery management:
 Incase you were wondering, the two pins either end connect to the main 16v rail in the machine and you wire these directly Positive to Positive and Negative to Negative of the two ends of the series batteries.
I used some AAA Ni-MH batteries from Amazon, because they were quick and cheap. I wasn't that bothered about powering the machine for a long time.


You can spot weld them, but I don't have that skill. I can solder though and so I bought a strip of nickel and was able to solder the ends without applying the heat for a long time. I tape them together in threes and held them loosely in a vice whilst I solder-tacked them in series.

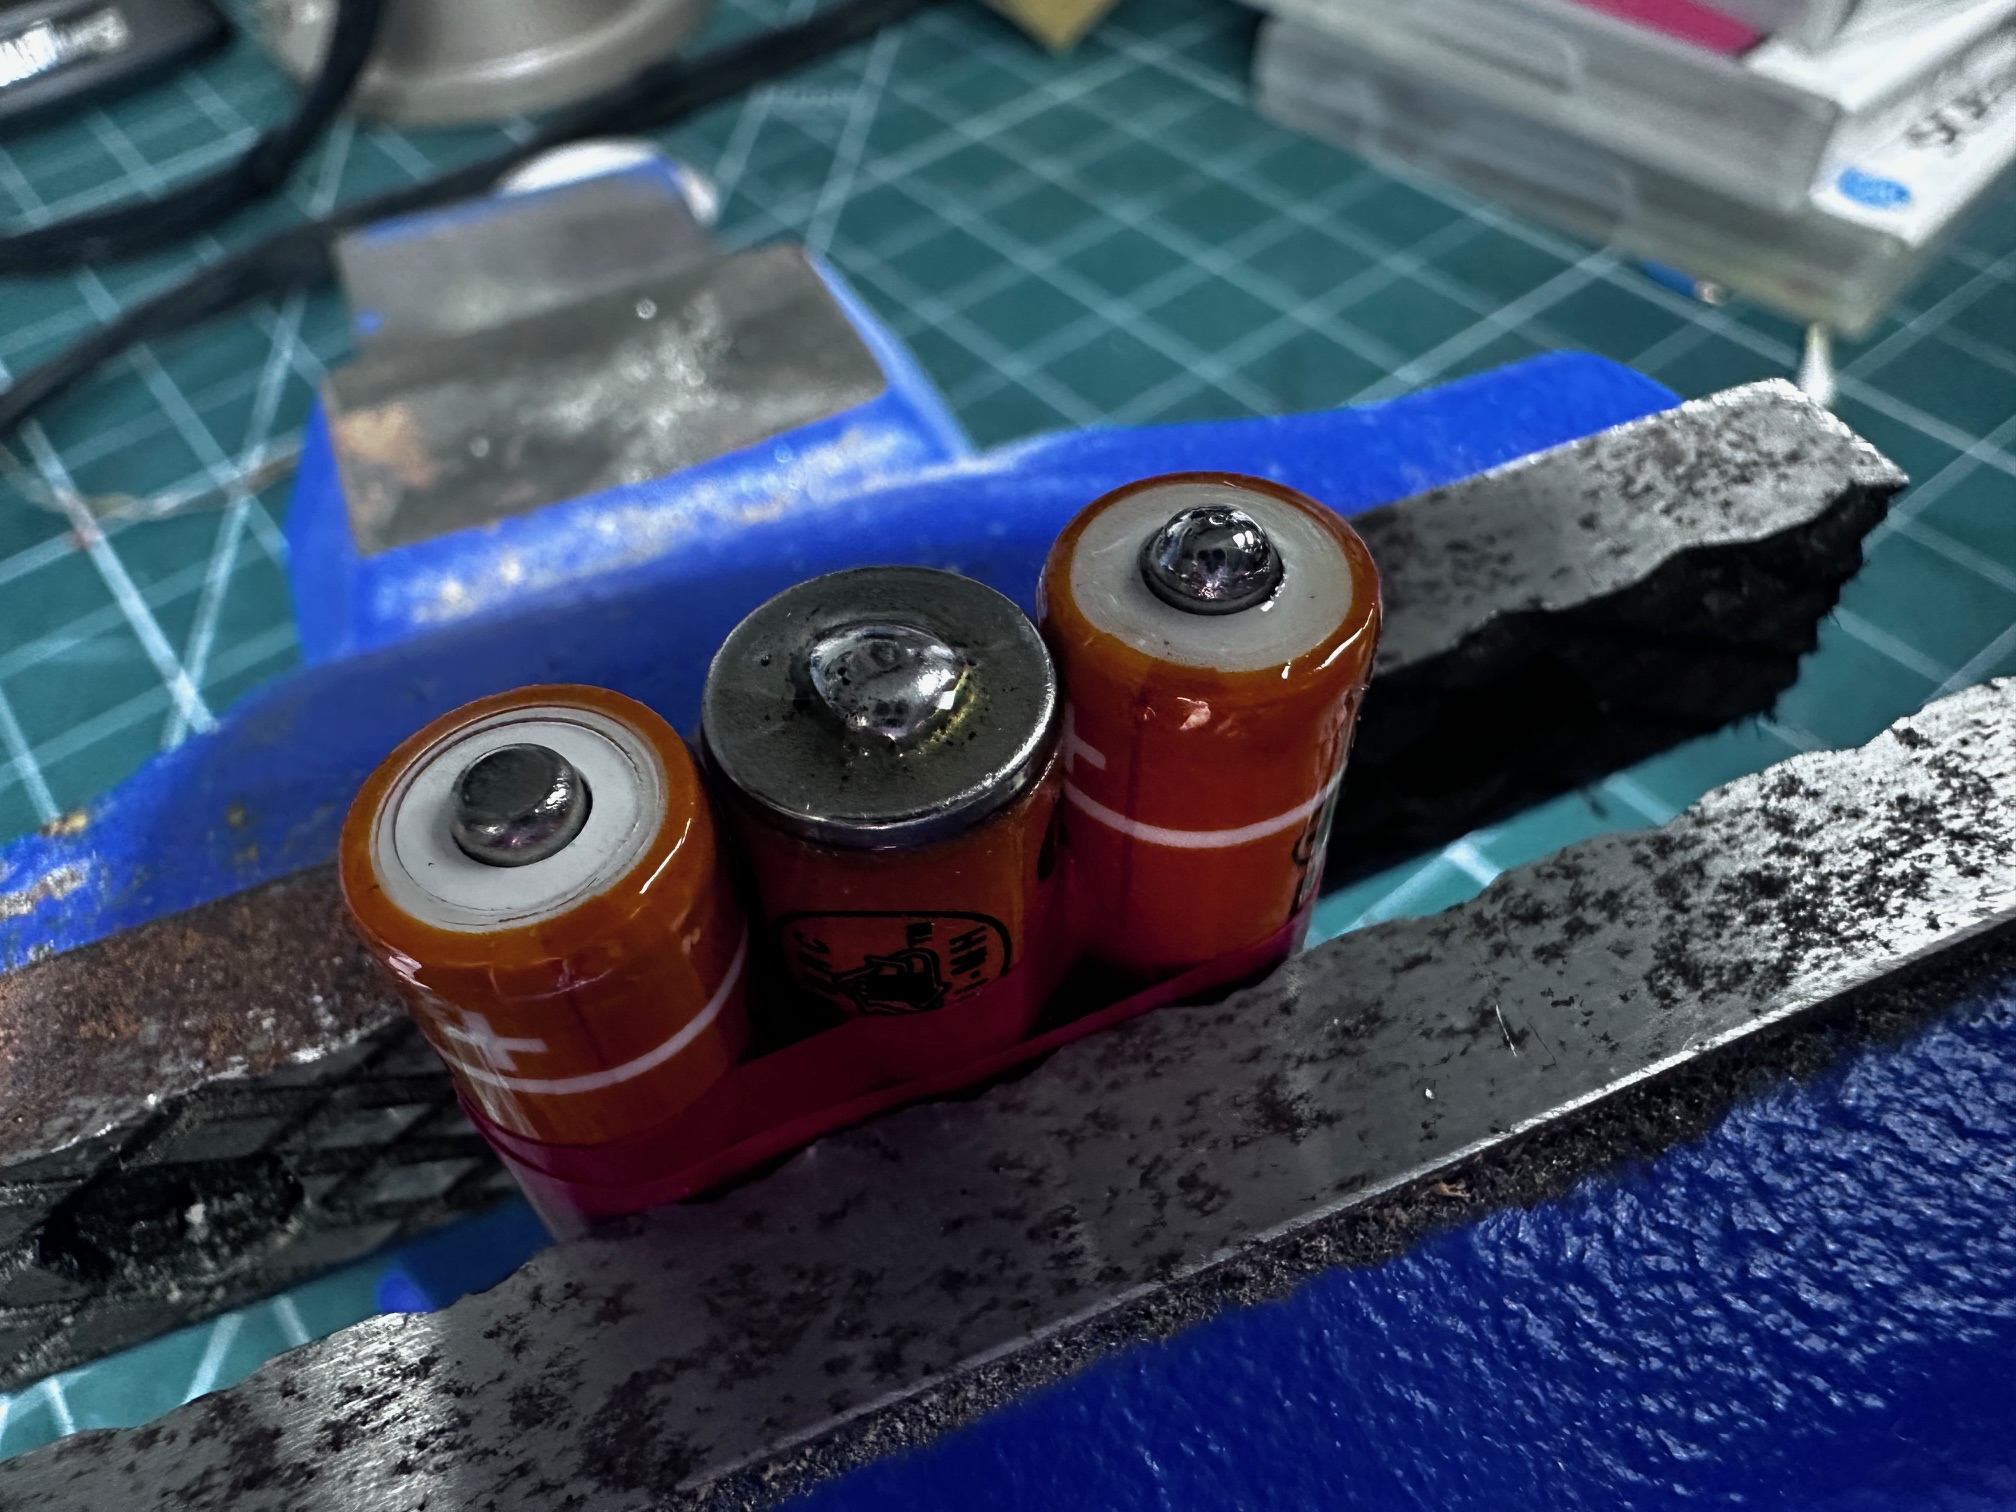
When you combine them in three packs of three cells in series, it makes up the 10.5+V required by the main battery:

Here is the messy but safe battery pack with all the connections insulated with electrical tape and the connections to the end connector heathshrinked:
One last note, after i had replaced my battery cells, two of my 701c machines both shows no charge at all, even though the state was 'charging'. This was the case for about 20 miinutes of leaving the machine on and then suddenly it kicked into life. So when you've done yours and you feel it might not be working, leave it in a powered-on machine for a while to truly tell.
This is a really useful link about the 701c battery.
BIOS Update
Now we have a working main battery, it was time to update the BIOS. Later versions of the BIOS contained some much better compatibility for Windows 95 and integration to the Dock II.
This is a slightly risky exercise because despite it being clever enough to test for both mains supply and charged main battery, the update involves holding down the twitchy mains power push-button whilst the update take place - which takes about 45 seconds. I really don't know what would happen if you let go, which sometimes powers the machine off and sometimes doesn't, but it really seems precarious to have a human hold a spring-mounted button whilst the process takes place.
This is the battery meter you're looking for, which shows in the BIOS or at any time will flash on screen by holding Fn+F2.
Once you have established a charge, you can apply the 3O (O for Oscar) BIOS fie which contains all the regional variations:

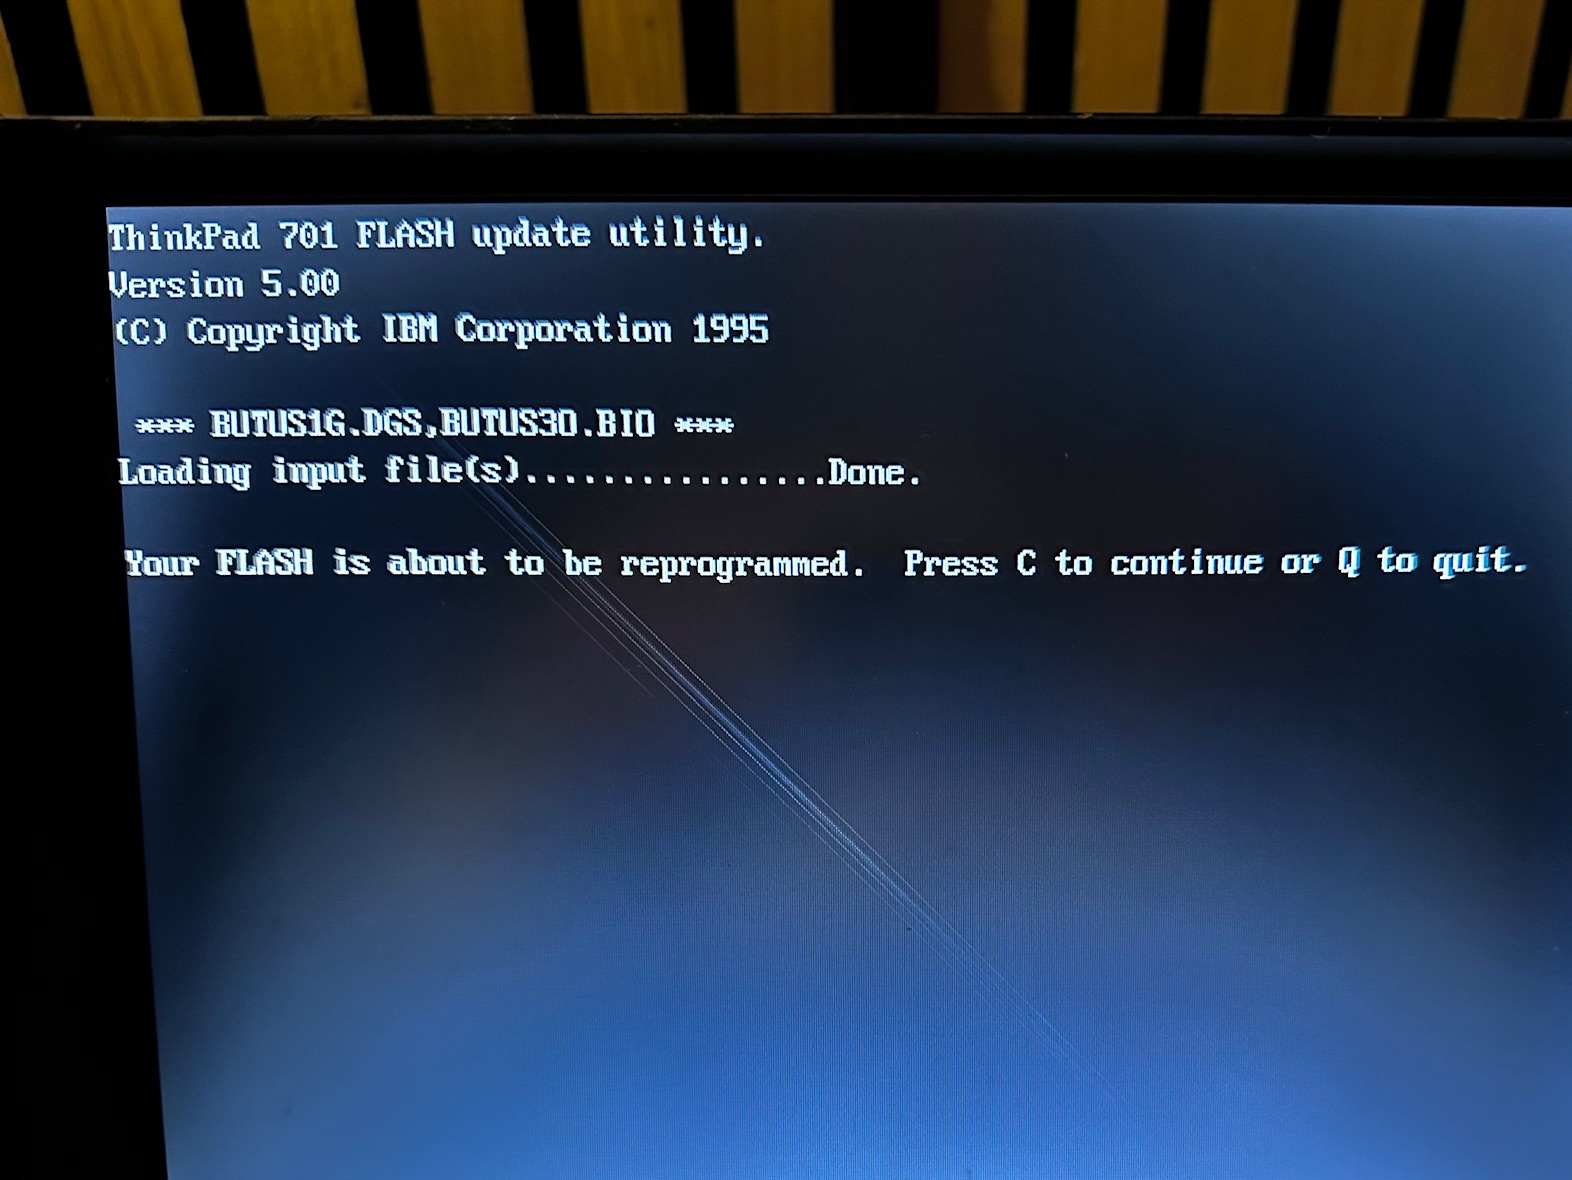

At this point, make sure you're sitting comforably with a firm grip on the power button, as this will take 45 seconds of so.....


And here is the BIOS version you'll be aiming for:

3D Print Files
I've collected a bunch of STL files made by other owners with the hope of being able to replace some of the parts. These aren't my designs and all due respect to those who made them. I'm just re-sharing here as a point of reference.
Plastic Lid: LidStl.zip
Plastic Lid: 701CLid2.zip - not sure if these are the same or not.
Polymatt's 701c battery enclosure.
Sticky Coating Notes
Some attempt to remove the sticky coating and re-paint in a coating which is as close to the plasticised original paint job as possible: https://thinkwiki.de/Gummierung_erneuern
Notes from another user:
I've been having to do some "body work" on a TP 760EL for my mother in law'sbox. I used an Epoxy putty to reform a wall that cracked out in the displaycover. After I used sandpaper to smooth out the surface. But here was myproblem, how to cover it. I first tried some flat black paint, but it justdid not look great. I remembered someone saying that they used Plasti-dipfrom Performix or this purpose. So I tried painting it on. Not only werethere streaks, but after it dried, it pealed off easily. I then thinned itout with some Naphtha and sprayed it on using my testors modeling spray gun.After applying a couple coats, the texture and color was dead on. But itwas very rubbery and also pealed off easily. So once again I pealed it alloff. This time I mixed the Plasti-Dip with some flat black enamel paint(with about a two to one ratio Plasti-Dip to Enamel). Again I thinned themixture with Naphtha and tried again. This time the finished product had a firmer hold and was smoother to the touch. Still a little more rubbery thanthe original TP coating, but it was a lot closer. I haven't tried it, but Isuspect that a 50-50 mixture of the Plasti-Dip with Flat Black Enamel woulddo the trick. The reason I used Naphtha is because it was recommended by Perfomix for thinning Plasti-Dip. It seemed to perform well in allowing multiple thin coats to build up without dripping. It evaporates quickly.
My summary is this:
Mixture should be as following:
-
1 Part Plasti-Dip
-
1 Part Flat Black Enamel
-
2 Parts Naphtha
Place mixture in a bottle and connect the nozzle, hoses and any other part of the spraying mechanisms. Apply propellant source.
Test and adjust sprayer so that it does not spit out drops.
Spray on a minimum of five light coats on the surface to be painted. Let each coat dry to the touch (about 15 minutes each)
In spraying, use the overspray method in a back and forth motion. Never start the spray on the surface you are covering as this will cause dripping.
When taping off an area, be sure to use care in removing the tape. The paint may tend to peal as the tape is removed.
Comparing to the PC110
I took this picture showing how the 701c compares to the diminuative PC110:

Preinstalled Software:
PREINSTALLED APPLICATIONS
- IBM DOS 6.3 - of course IBM had to ship it's own DOS!
- Windows 3.11 - this machine was concieved in a world of 386, Windows 3.11 and O/S2.
DX4 systems include OS/2 Warp 3.0 (dual boot) with selected BonusPak:
- IBM PC Card Director for PCMCIA
- IBM ThinkPad Demo
- Online Users Guide
- ThinkPad Features
- Diskette Factory
Included with Windows 3.11 were:
- Lotus cc:Mail - "e-mail for the Global network"! - for a machine with a modem, having it's own, decent, pre-packaged email program was really nice!
2. Lotus Organizer 1.12 - this was a piece of software many people spent good money on back in 1993!
3. Lotus ScreenCam 1.0 - allowed users to author shockwave files for presentations with a VHS interface.
4. Triton CoSession Host
5. PRODIGY
6. America Online - an early version of AOL software for browsing, email, news, etc.
7. SofNet FaxWorks Voice 3.0 - fax software to go along with the built-in modem
8. Video For Windows 1.1 Runtime - early decompression software for decoding video within Windows 3.1
9. Monologue (text to speech) - would read out text on screen with a synthetic voice
10. Puma TranXit (infrared function)
11. Taxi
12. AlphaNet FollowFax
13. SEDONA REPRINT
14. COMPEL Personal Edition - another bit of presentation software including clipart
15. Audiofile TalkWorks - enabled you to use your fax modem as a voicemail client!
16. ReutersSM Money Network
Additional 701c Links and References
Thinkdan's driver matrix page (regularly updated for 2026!) here.
There is a very useful iFixit disassembly guide here.
Polymatt has made some excellent videos regarding the 701c including 3D printing his own complete replica and repeating in solid metal:

Laptop Retrospective has digitised a VHS cassette produced by IBM as a training video on the repair of the 701c:
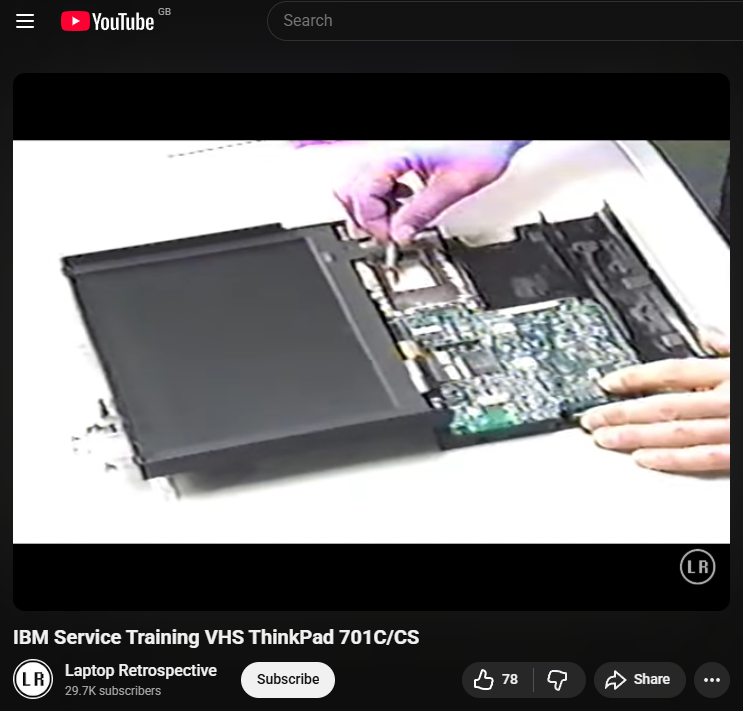
Comment from Thomas (Laptop Introspective) "In spring of 1995 when the 701 launched, we (European Helpcentre) were in the dark about it until launch, and (like everyone else) were amazed by the expanding keyboard. Being 1995, there was just a short clip (perhaps a GIF stills animation) doing the rounds, plus 1-2-3 still shots of the lid being opened and the keyboard expanding. We got a chance to see and handle an early unit as Greenock geared up for production shortly afterwards, but it was a few months before we properly got one for the Helpcentre. At the time of launch, I was house-sharing with two of my IBM support colleagues, and being equally enthused by the TrackWrite keyboard, we managed to get hold of a VHS copy of the service video circulated around the IBM Service Points, and spent an evening back at the house watching and re-watching the video. Yeah, that was when geeks were proper geeks, back in the mid 1990's! Given that we were all conversant with stripping and rebuilding the 360/7x0/75x machines, the small size coupled with the complexity of the keyboard mechanism made the 701 look intimidating to repair. Having started to overhaul my own machines now, I see that it's much simpler than we feared back then, particularly as the keyboard mechanism is generally robust and has lasted extremely well, to the point that it can be treated as a sealed assembly. Bear in mind also that we had no direct experience of the sub-notebooks, as the 5xx were never sold in Europe.
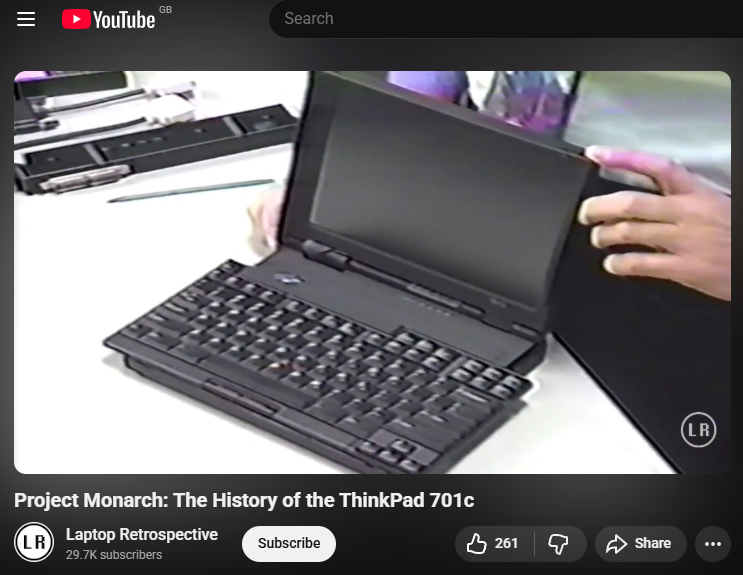
Laptop Retrospective also did an excellent look at the 701c here:
MadCatSE also did a good video showing the 701c in normal use cases:

IBM did their own video here:

Here is a Dutch-translated 30 second IBM commercial - definitely 'of the era', featuring the bad guy from Aliens:

Here is a brief USA TV spot:

And here is a brief Lenovo John Karidis strangely from Lenovo in Turkey. After watching a few videos filmed at the same time, it is obvious to collectors that the 700C they have clearly is incapable of being opened and closed (due to the bad hinges). I do wonder if they've been fixed in position to stop anyone doing it and smashing the thing up. It must have been such a pleasure to open the 701c on camera as nature intended:

Thinkpad 701c + Thinkpad Dock II + 701c Dock Expansion Kit
A while back I picked up a new, old stock 701c Dock Expansion Kit to use with my Thinkpad Dock II which I usually have hooked up to a 755CE.

The Thinkpad Dock II was a large fixed desktop unit (Model 2877) was the most feature-packed dock IBM sold. The the Dock II can transform a regular Thinkpad into a full blown workstation with multiple monitors (via a PCI video card), higher fidelity audio (PC Card audio), and additional storage Ultrabay 2000.
- Passthrough ports:
- PS/2 Keyboard
- PS/2 Mouse
- Serial (DB9-M)
- Parallel (DB25-F)
- Audio-Out
- Headphone connector
- VGA
- External Diskette drive (26pin)
- Security Hook
- Stereo Speakers
- Audio-In (direct to speakers, no capture possible)
- External SCSI II connector (50pin)
- Optional Internal SCSI device
- Optional Internal IDE device
- (1) Type IV, or (1) Type III + (1) Type II, or (2) Type II PCMCIA slots
- (2) Full size ISA 16 bit slots
My dock has been fitted with an optional IDE CD-ROM drive. The dock has a metal and plastic black 'lid' that sits on top which you can simply lift off if you like - this bit is often lost and provides extra heft to hold up a heavy CRT monitor.
As a bonus, you can hook speakers up to that drive and it will play audio CDs, even without a computer connected.
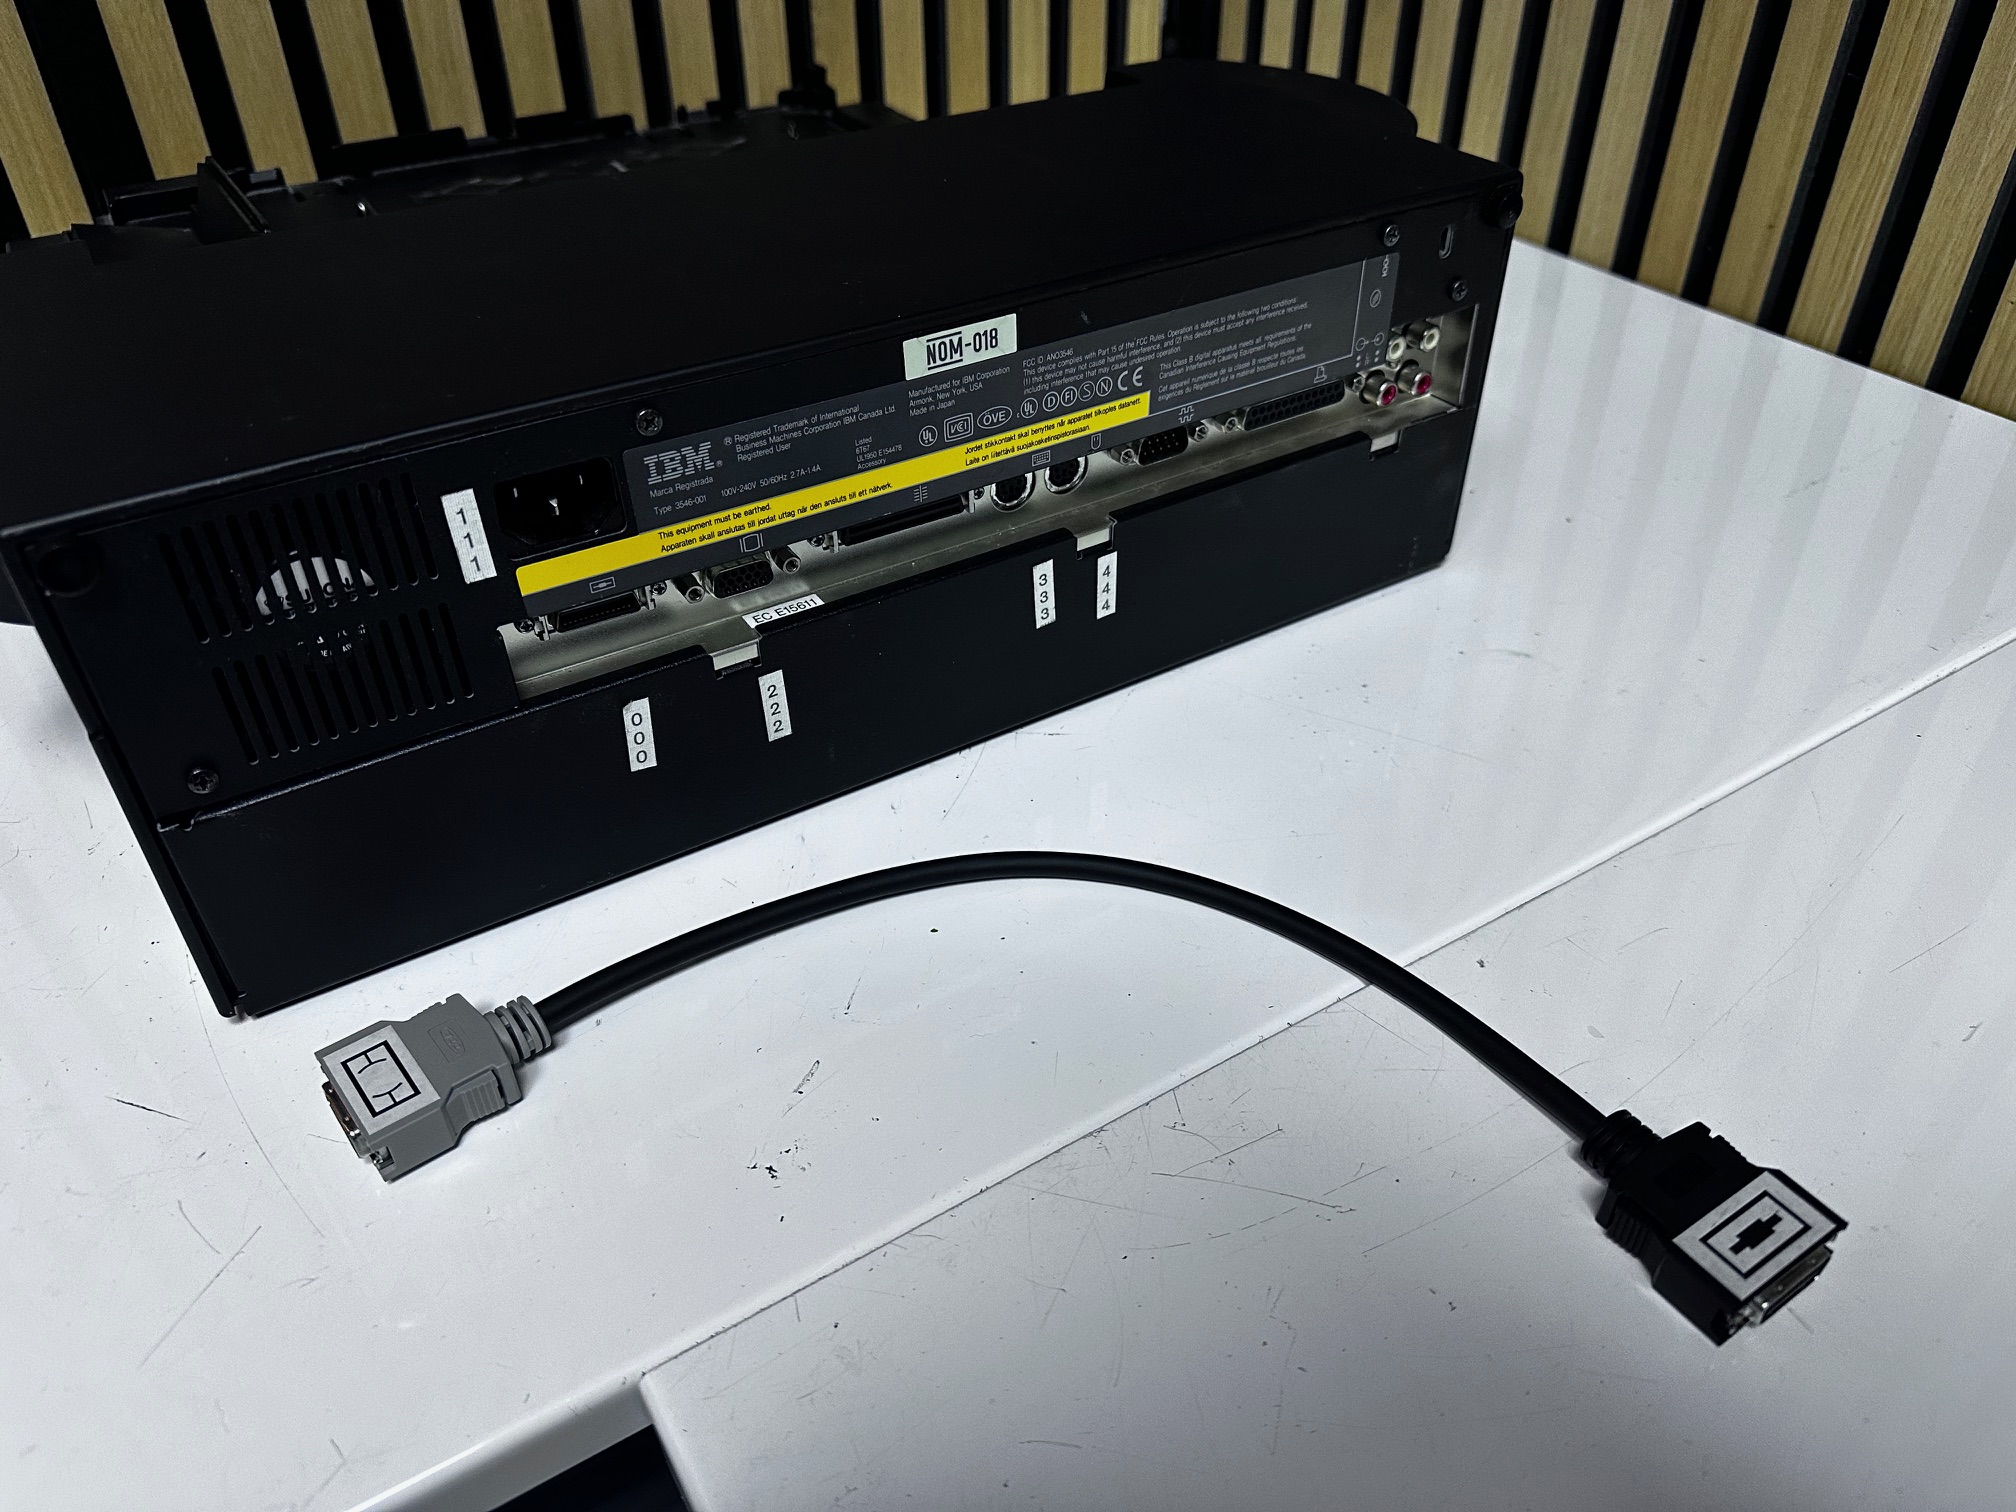
The standard dock has a docking connector on the right hand side which many Thinkpads of the era supported. However there is a curious blanked off slot on the left which can be removed to install the optional Thinkpad Dock II (3546) Adaptor Kit which is a small docking adaptor which can be attached ontop of a hidden lifting tray. It's relatively simple, with a long flat connector, a DC power cable and a connector which strangely attaches ontop of some hidden dip switches (which is something to controlling Master/Slave on the IDE bus).
As you can see here, it's a rather wonderful looking battlestation, although it does somewhat hide the 701c's party piece (as it's generally closed whilst using the dock to it's full capacity with a PS/2 keyboard and mouse).
There is a rather clunky additional FDD cable which is used to connect the 701c to the floppy connector on the rear of the Dock II - seems they couldn't fit FDD functionality through it's tiny FDD connector.
With the Dock II Adaptor Kit comes a 701c System Upgrade Disk and I have imaged the disk along with saving it's raw files and dumped it here.
Installation of the Dock II Adaptor Kit for the Thinkpad 701c
Here is the dock in it's reasonably standard form. You have to power it up and press the blue button to have the Thinkpad tray pop out to easily access the blanked-off plastics:
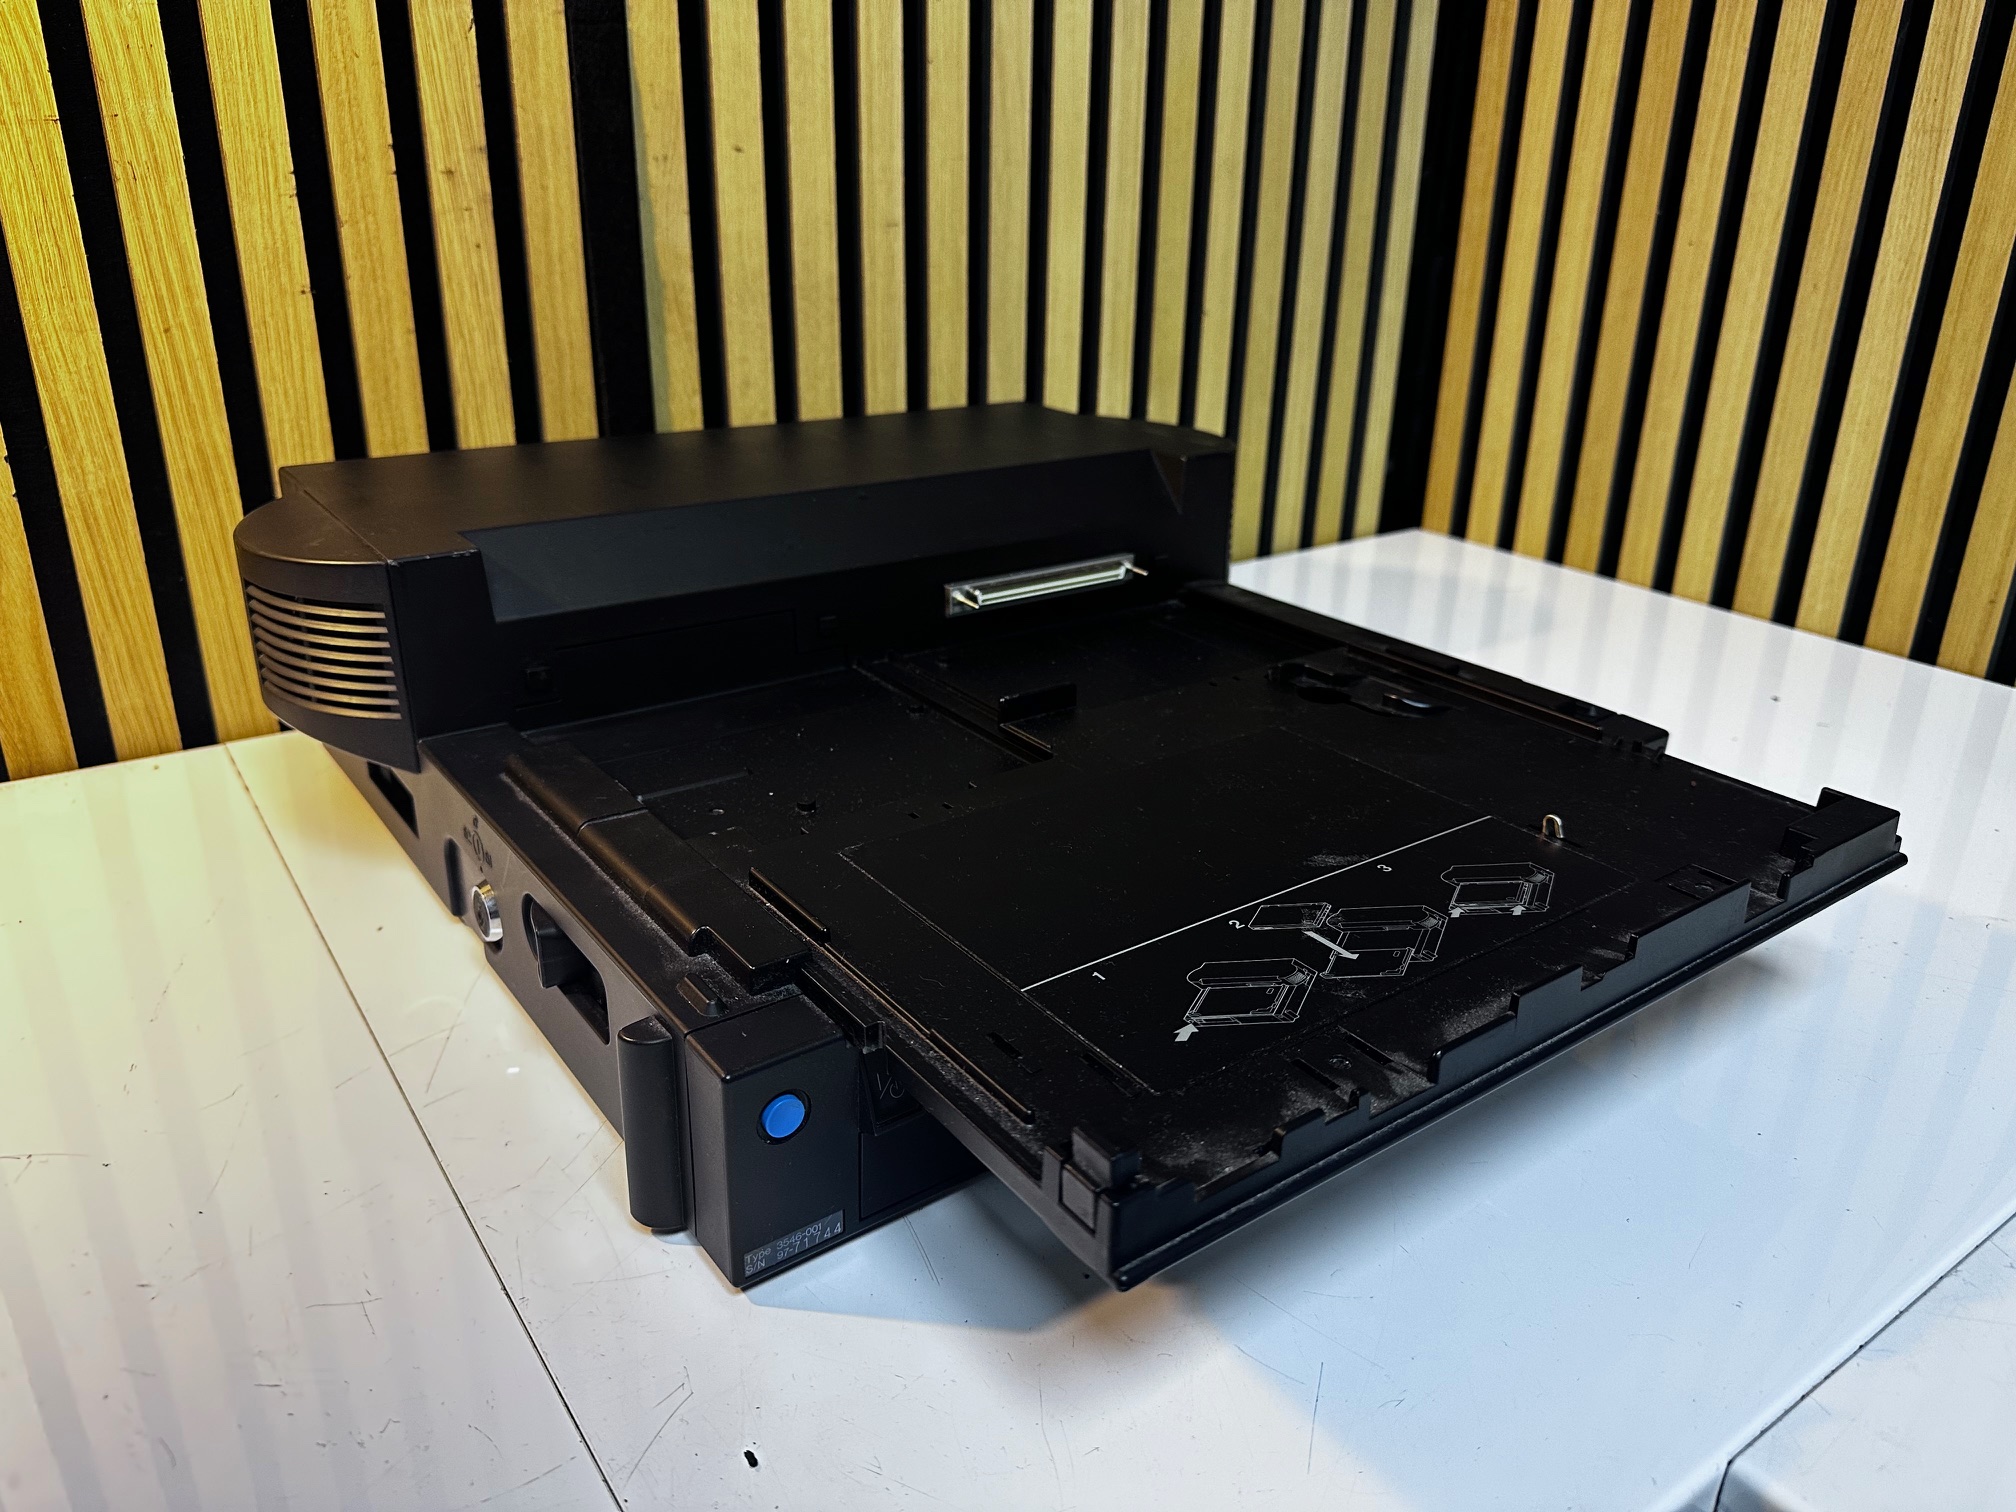
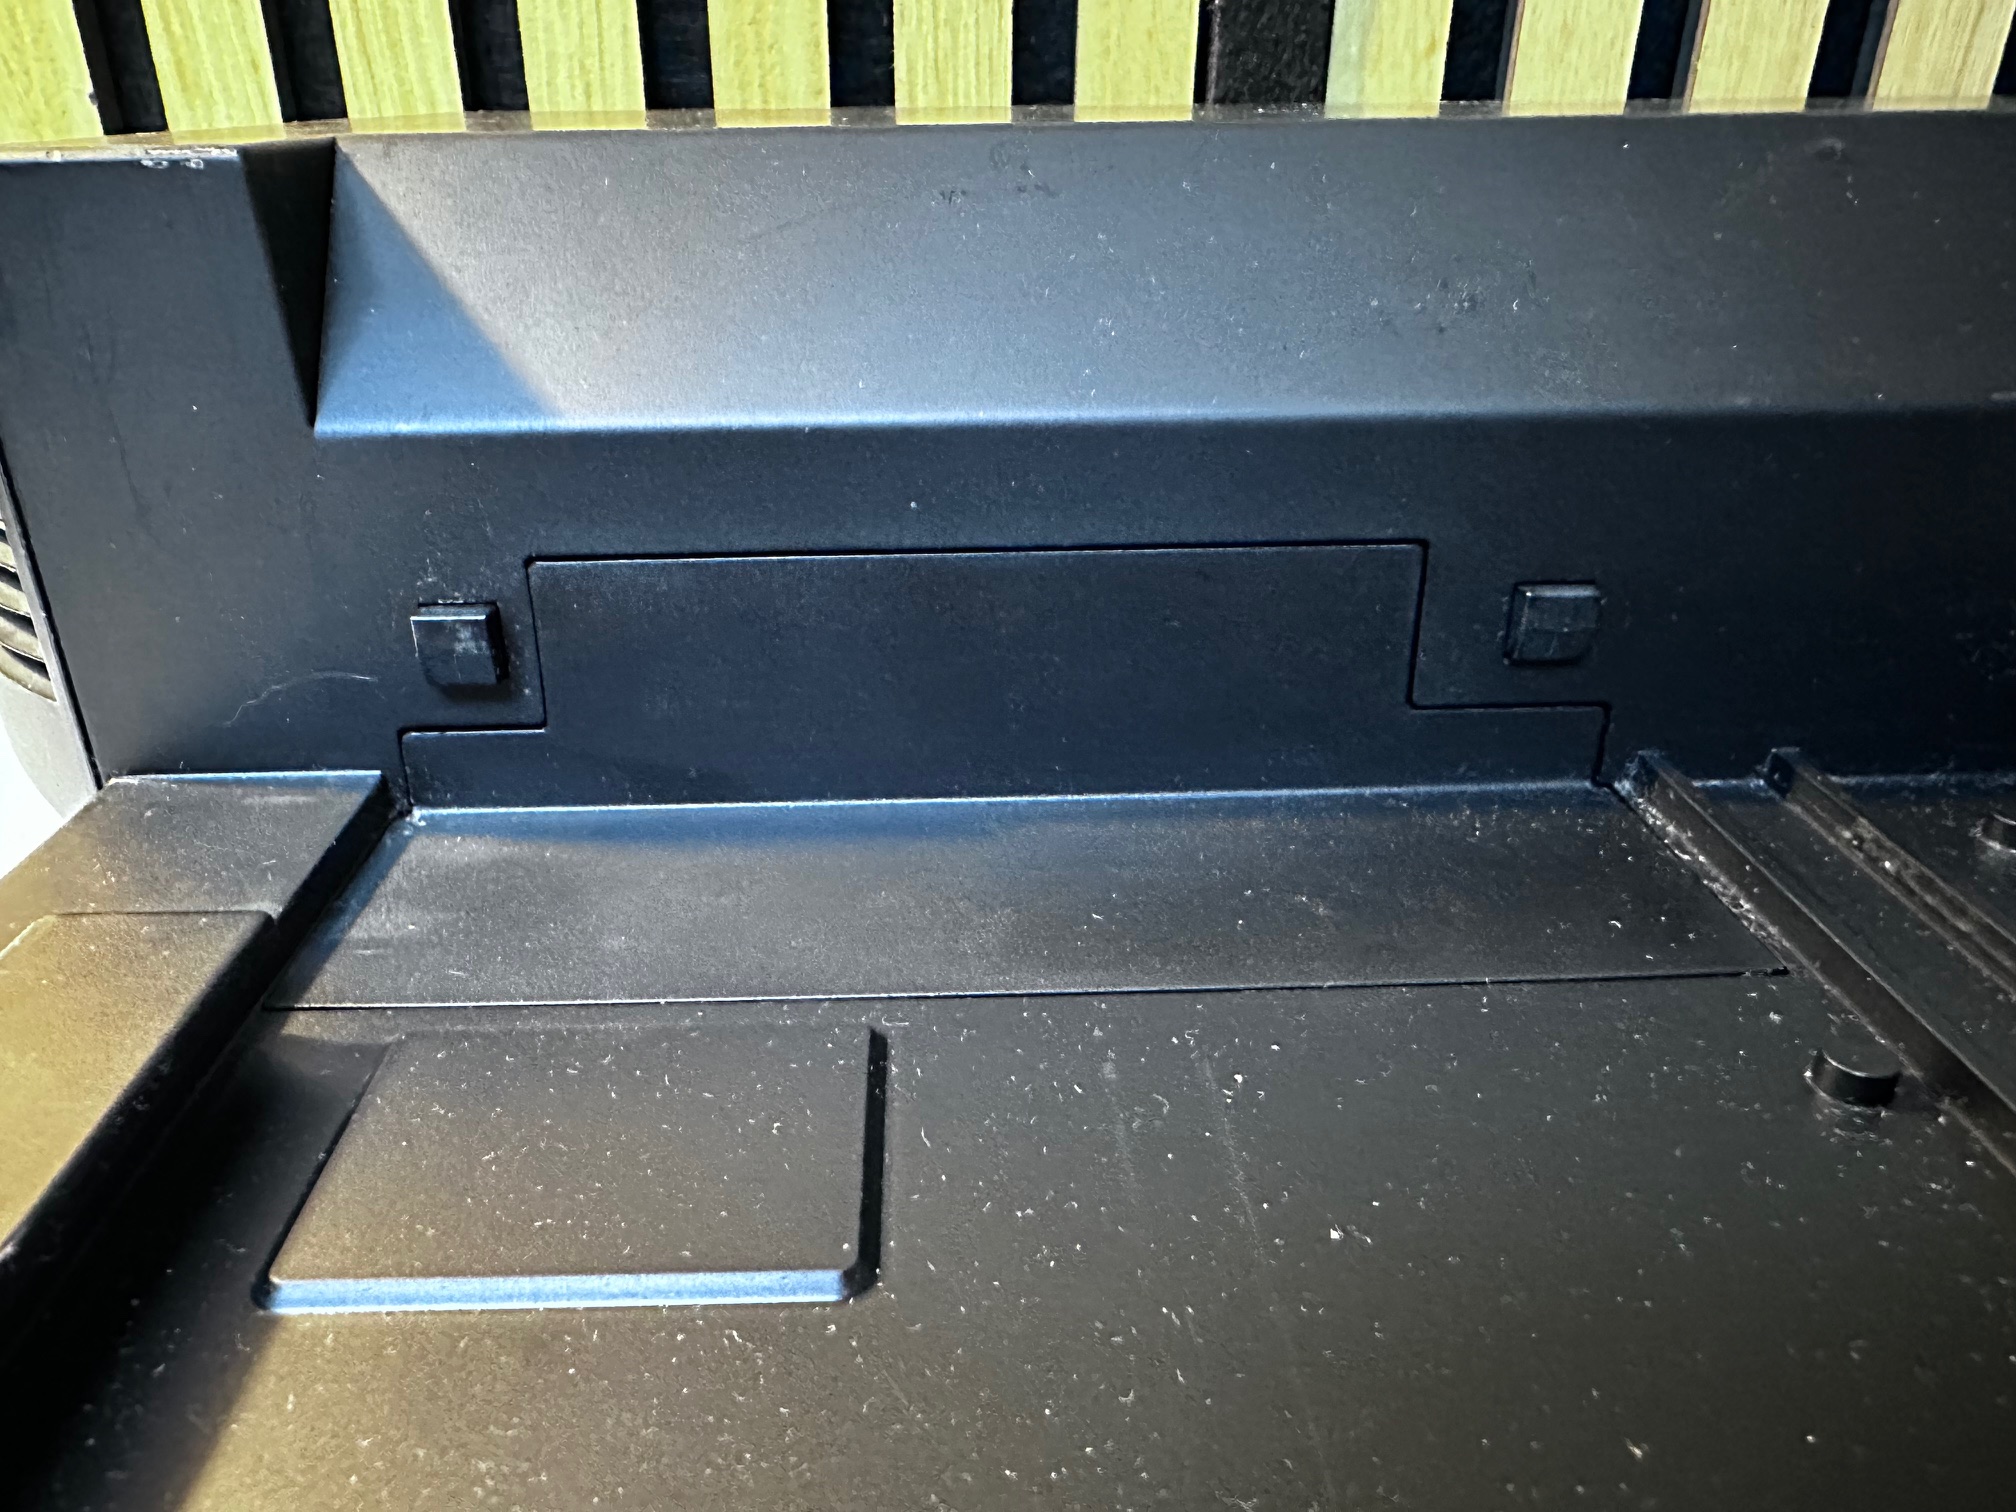
Here is a close-up of the blanking plastic at the rear-left of the tray area, where the Thinkpad 701c will connect:
At the rear of the Dock II you have to thumb-unscrew these two top screws:


At this point, the entire top of the Dock II will slide forwards by a couple of CM and can be lifted up:


Here is a picture of underneath the blanking panel which needs to be popped off:


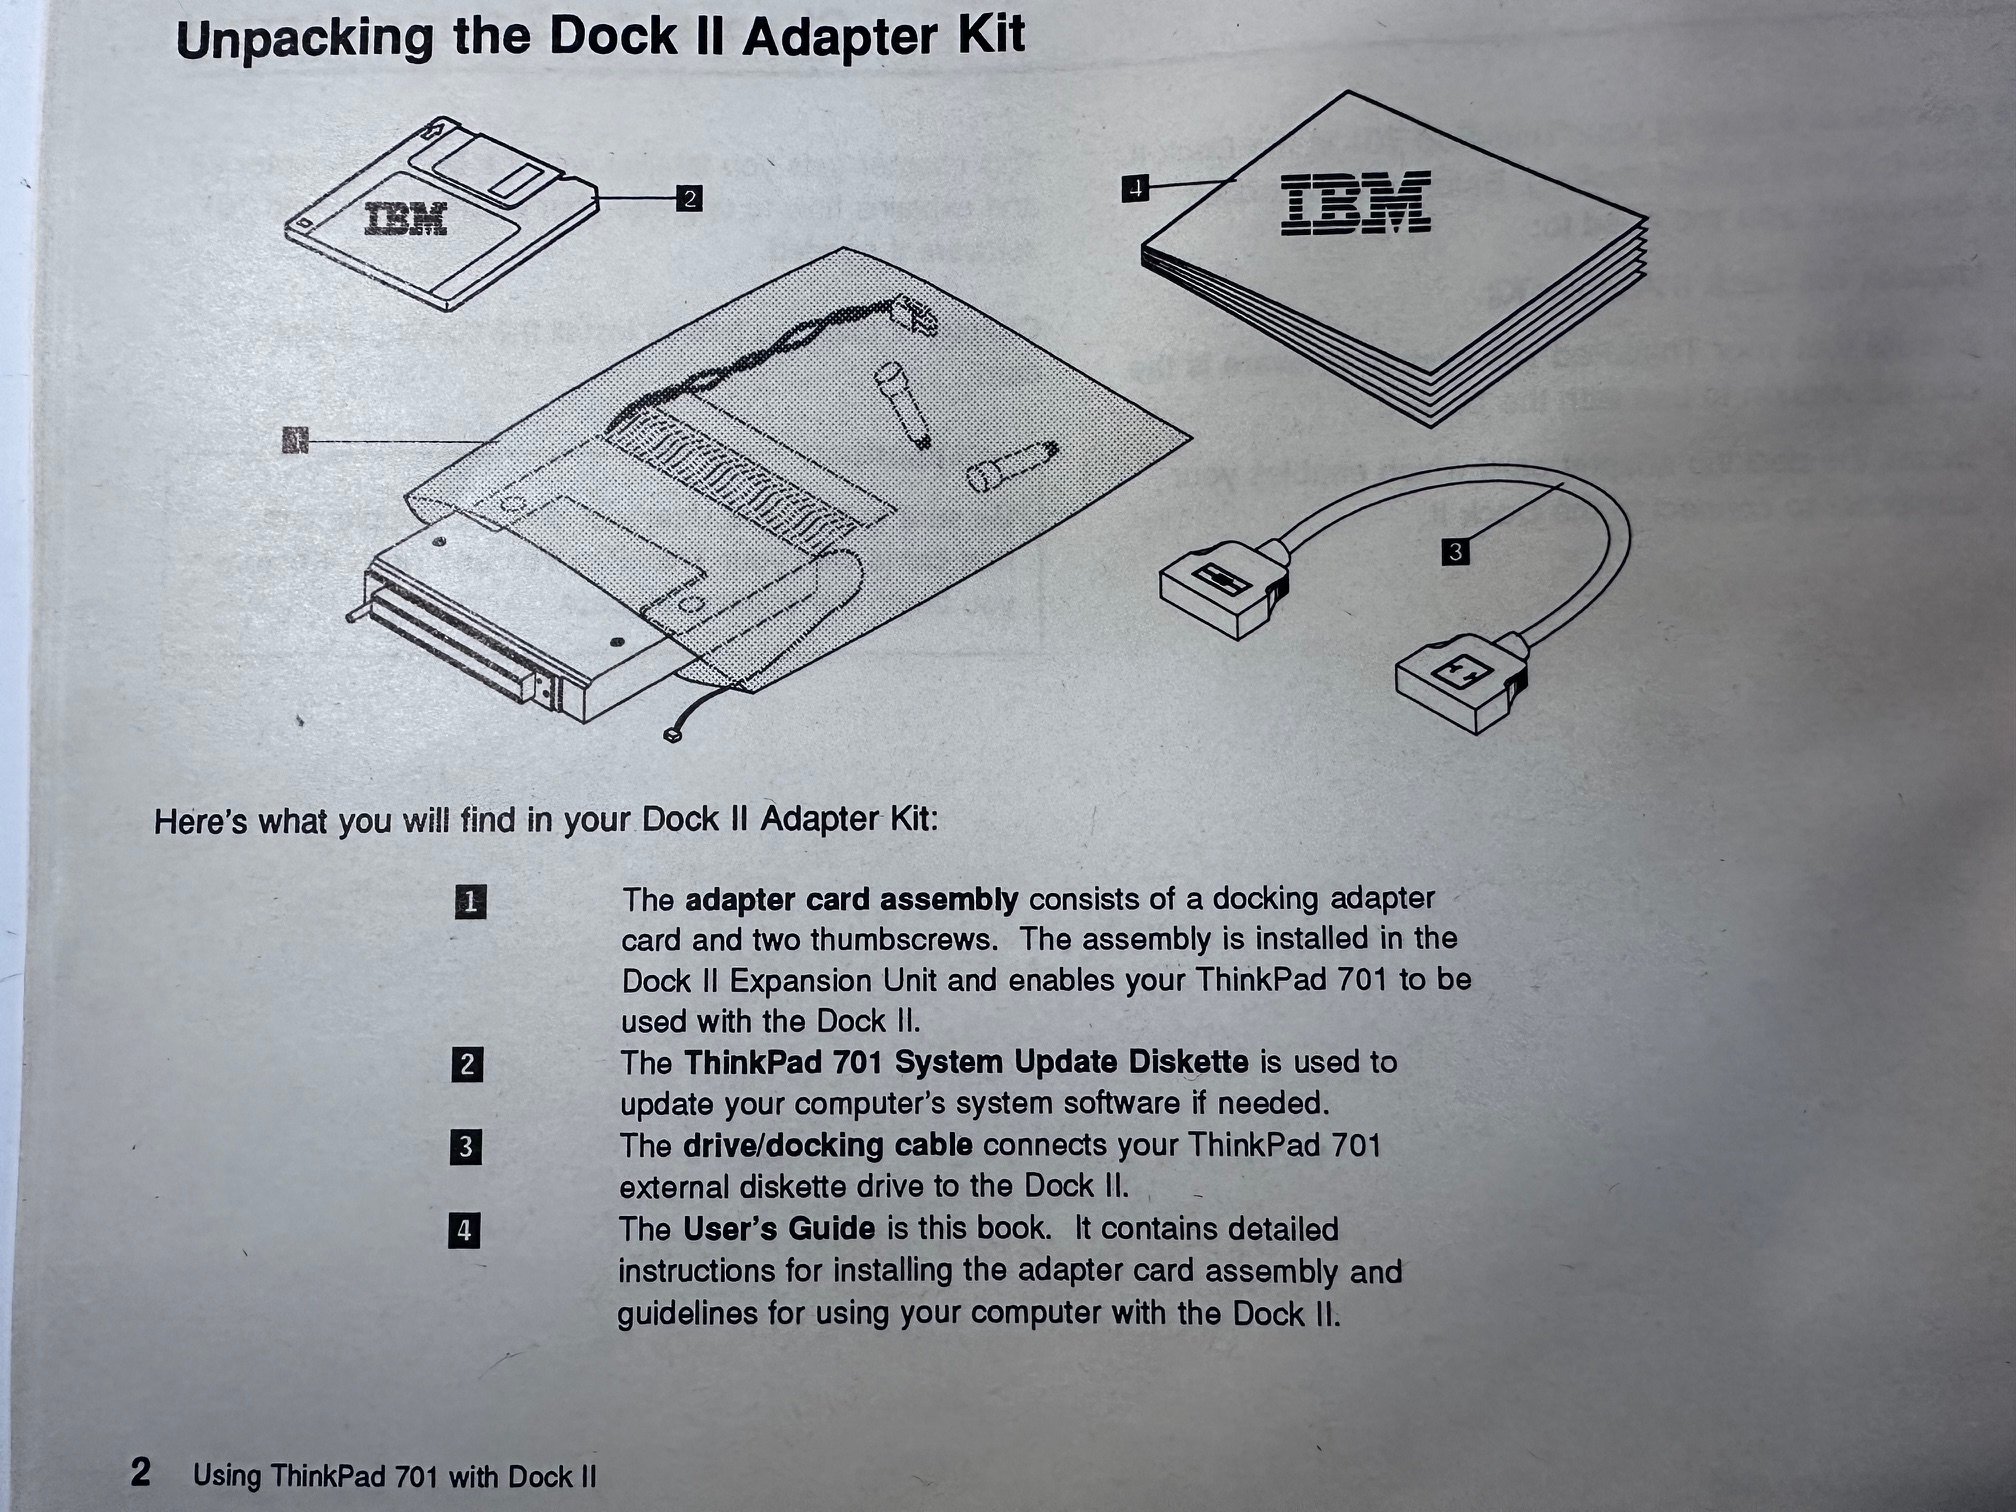
We're now ready to fit the kit, which contains the connector, 2 more thumbscrews, a floppy drive cable, manual and system update disk.
Once unboxed, looks like this:

First, you need to press a small internal bit of plastic to release the back slider which lifts and lowers the 701c Dock mechanism. Here you can see it in it's factory position and then released to move freely by pushing in a small internal bit of black plastic:


Here is a picture of the tray for the 701c lifted upwards, ready to have it's Expansion connector fitted:

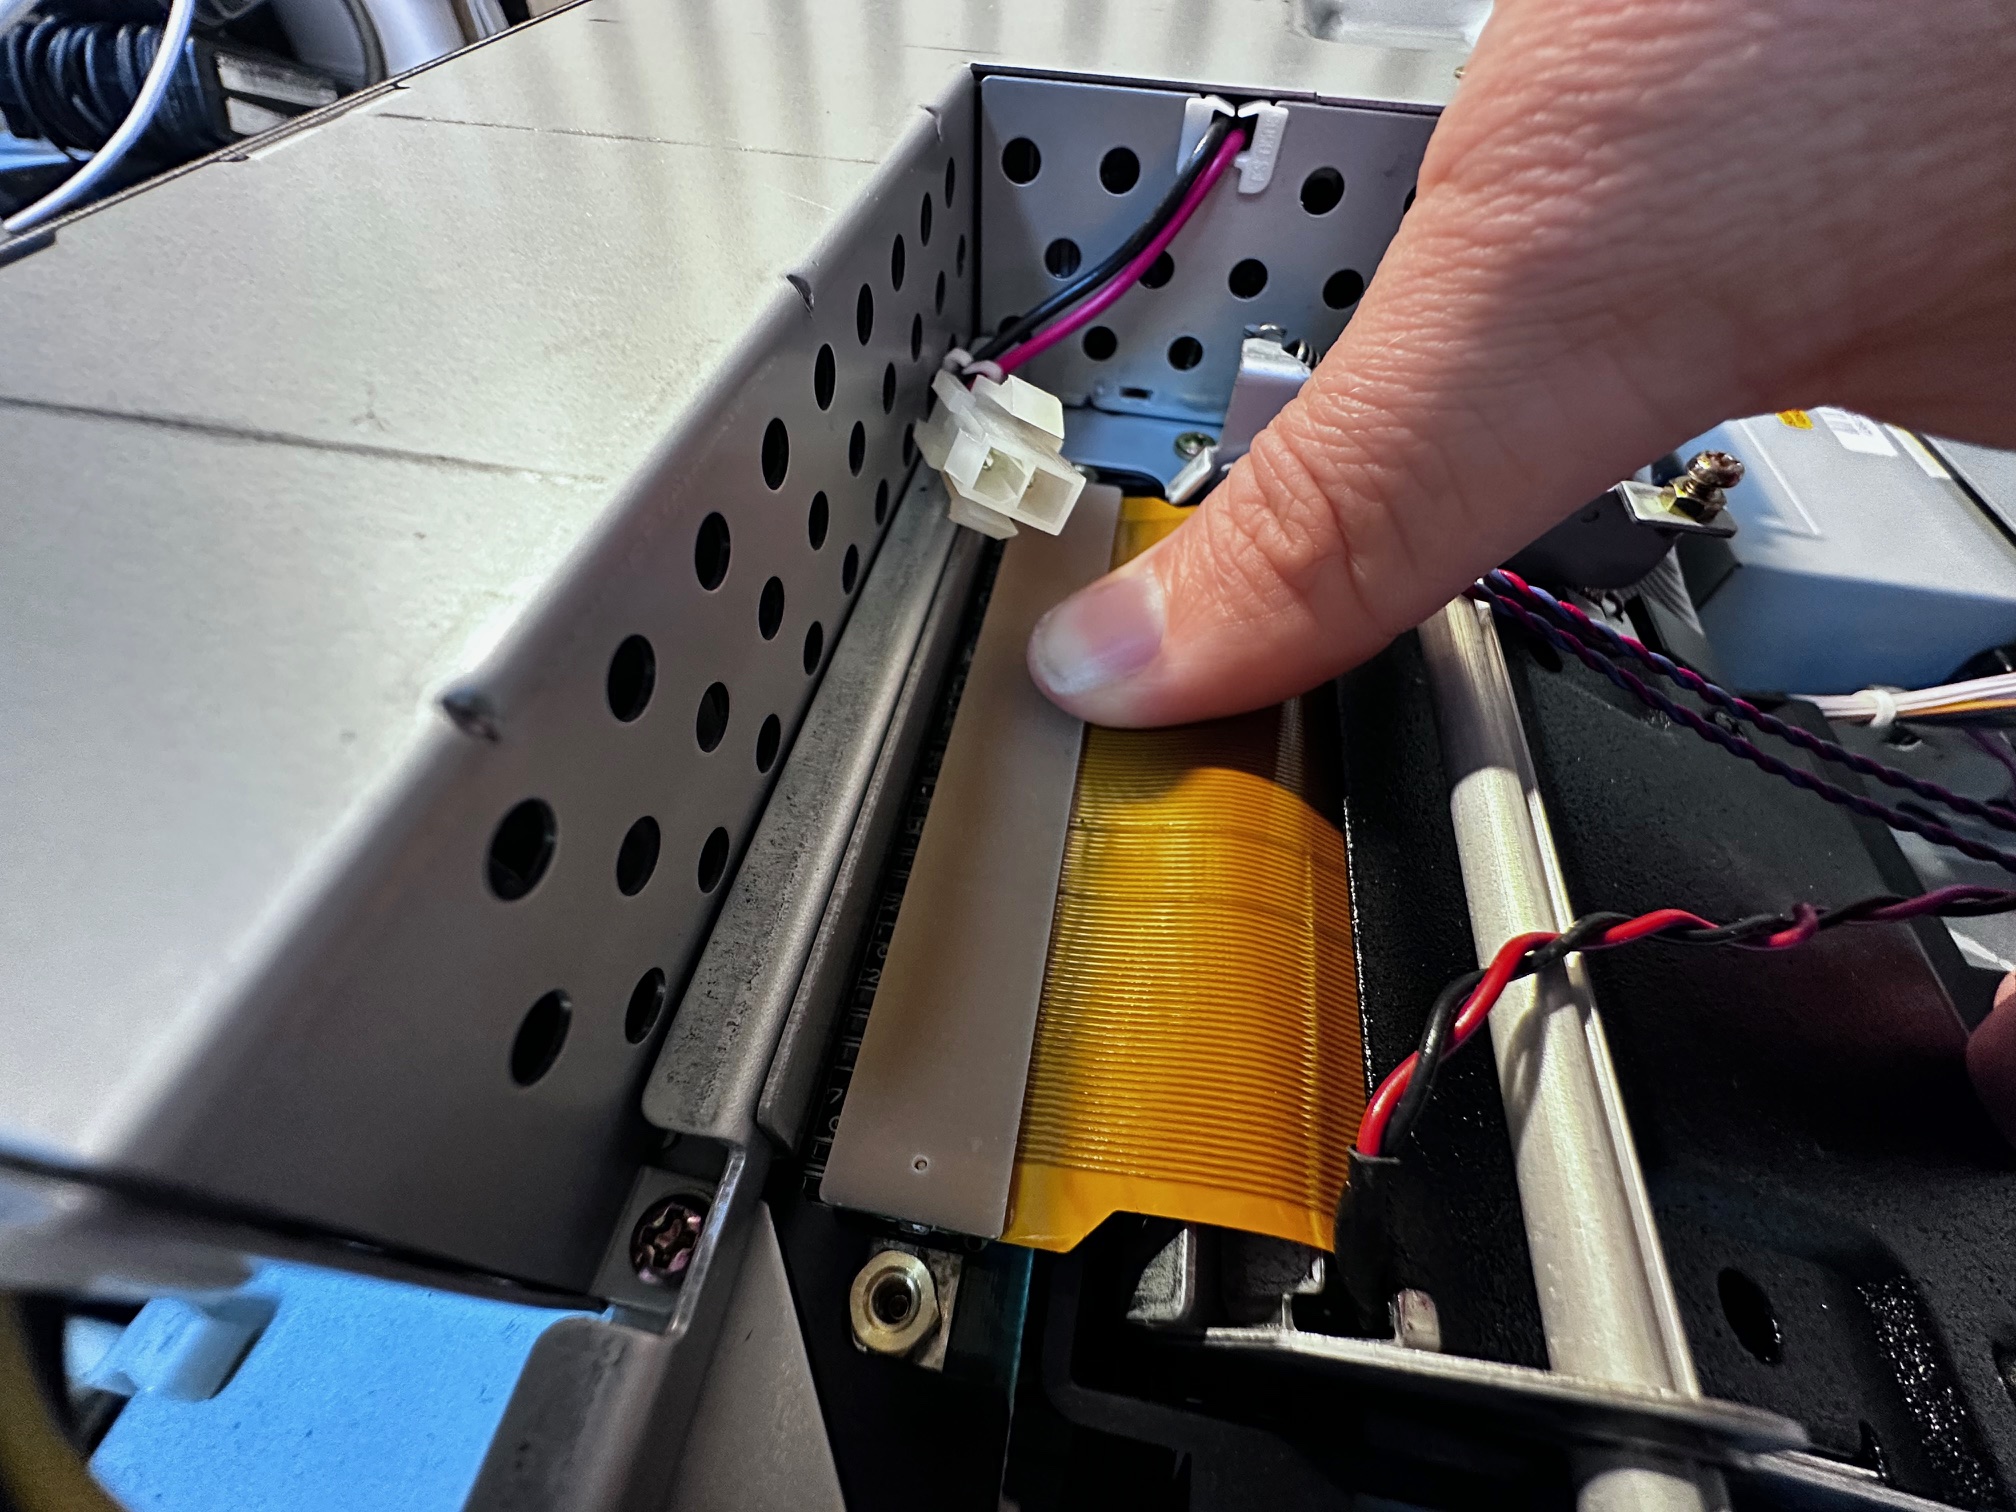
First then you have to slide in the connector under the metal bar and push down hard onto the long ribbon connector:
Next step is to connect up the thicker DC power connector:

And then finally the weird bit. The manual says to look for these 4 pairs of jumper pins and 'remove the jumper closest to the front of the dock'. As there is a pair of jumpers, I removed the front one and taped it to the inside of the dock:


Here is a close-up of the connector on the dock. I am assuming that fitting this connector to the missing jumper will allow you control an IDE master/slave setting from within the BIOS. It is all a bit janky as the connector has two blanked-off holes which overhang the front of the connector. Feels a bit of an afterthought to be honest...


I realised later that you must feed this Master/Slave Jumper attachment through some of the existing cables to stop it being wedged, ripped off or damaged when closing the lid of the Dock II. Here is how I fed mine:

Then you thumb-screw in these two screws to hold the dock connector in place:

And step back and take a look around at this contraption you have assembled:


You then push the dock connector back down into it's lowered connector (as the front tabs sit in front of the top plastic cover) and slide the top back into place, screwing back in the two rear thumb-screws:


To allow the top tray to hold the 701c, you have to flip-up this tiny black plastic tab:


And here is the Dock II with it's expansion connector fitted:

And sitting a 701c on the dock and sliding it back:


Here is a picture of the System Update diskette which comes with the expansion unit:


And finally, the floppy disk passthrough cable is supposed to allow your 701c to use the floppy diskette drive on the dock. Here is a picture of that strange cable, which connects to a FDD connector on the rear of the dock and then you can connect your 701c floppy drive to the cable:


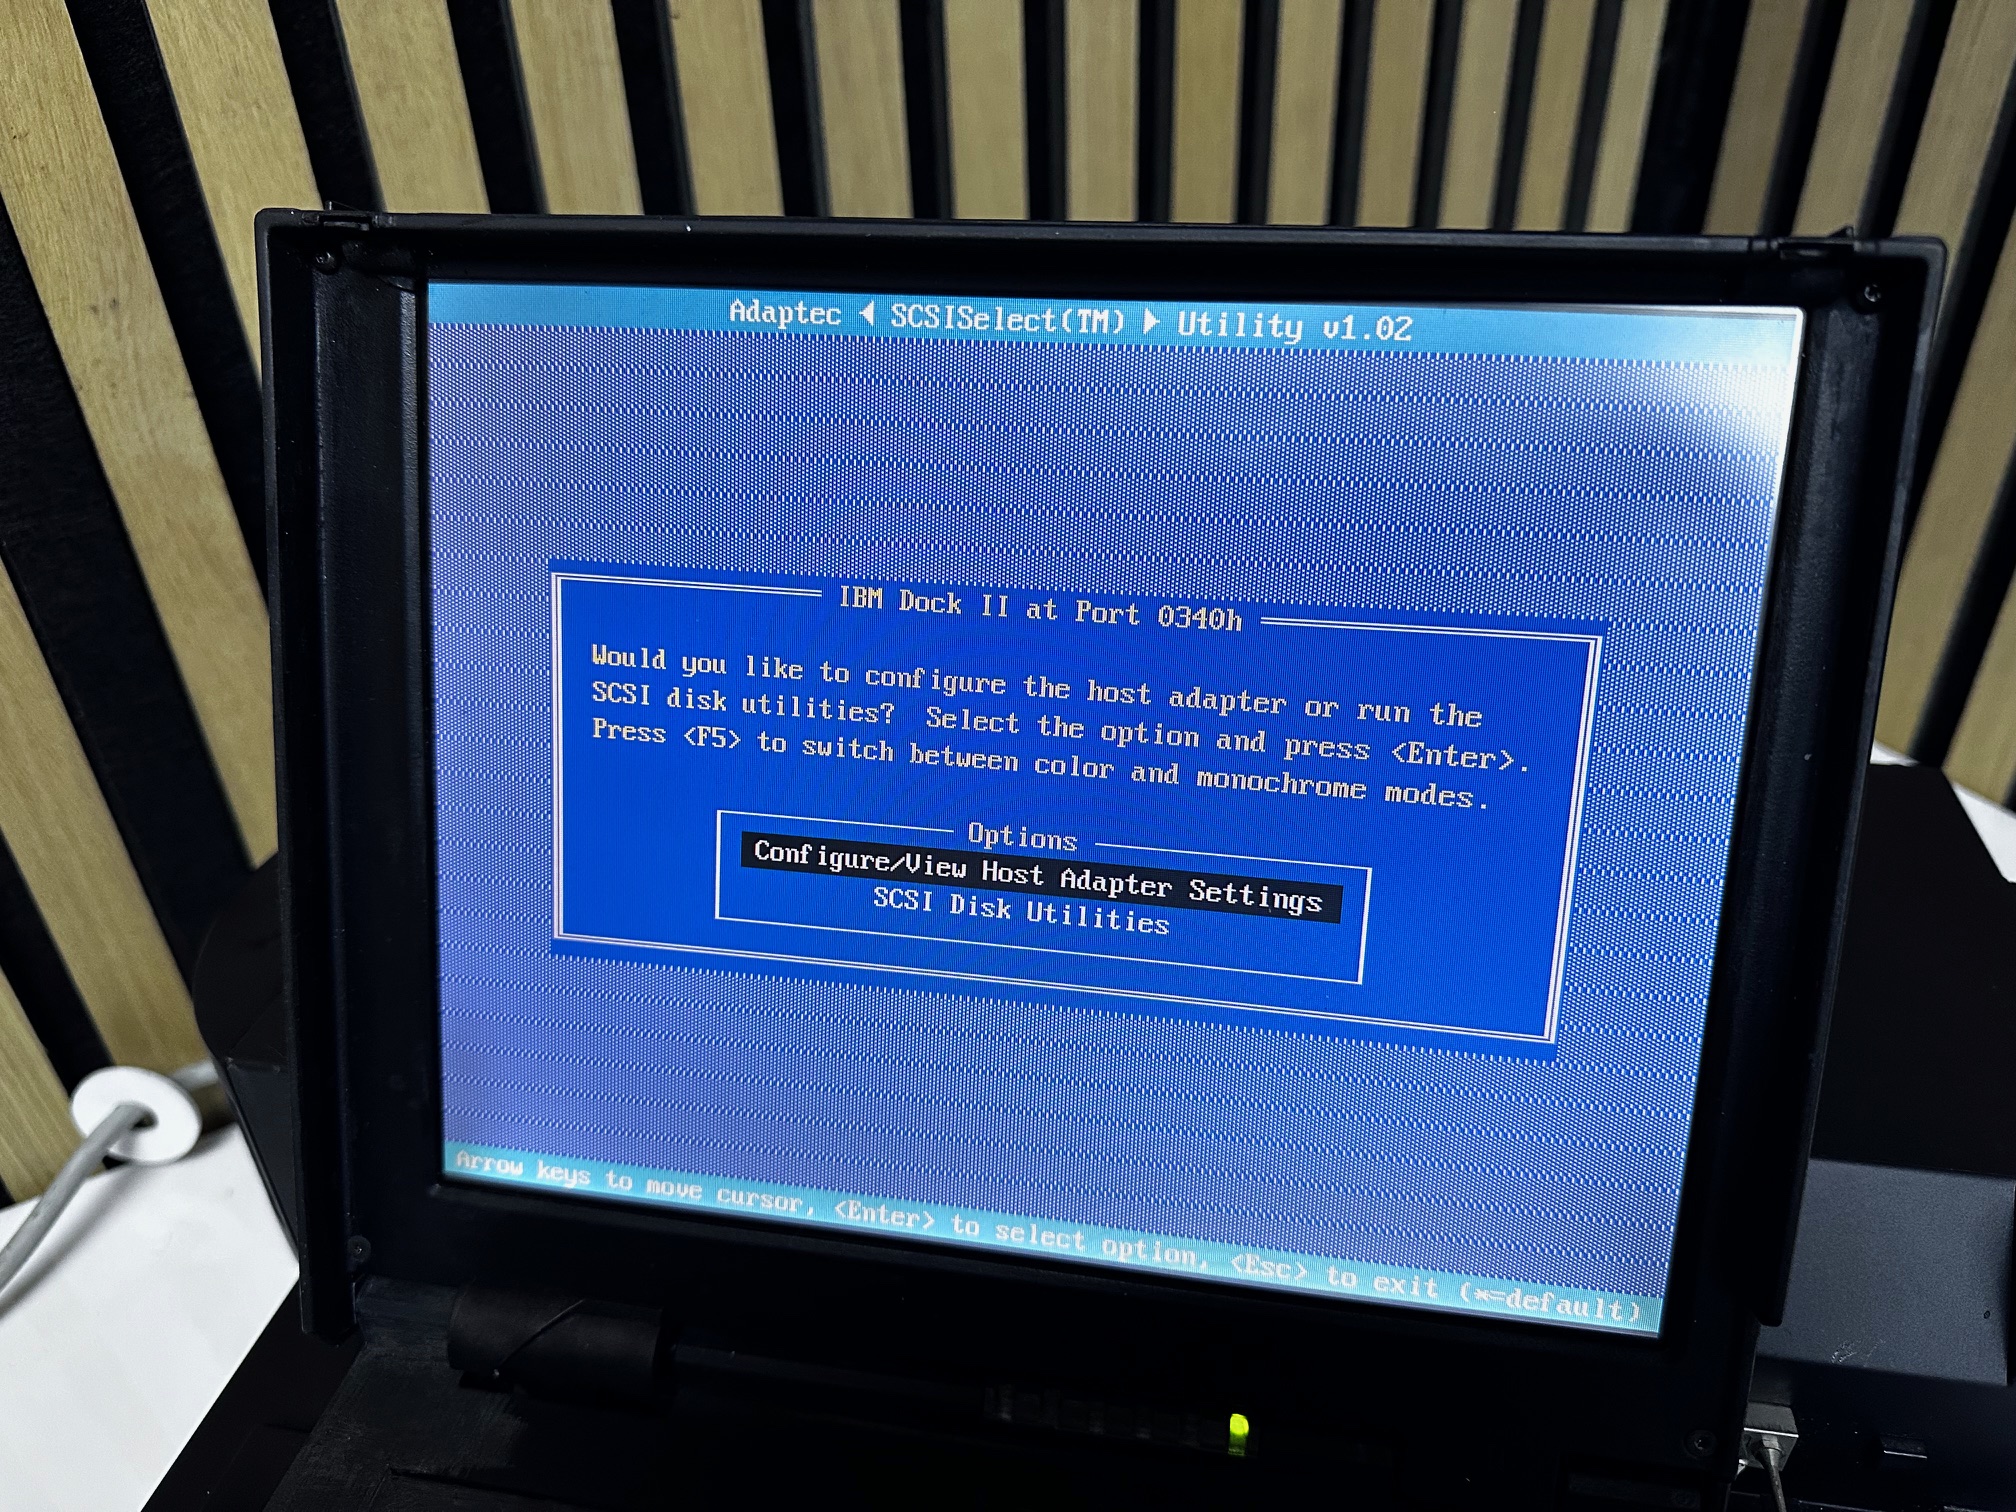
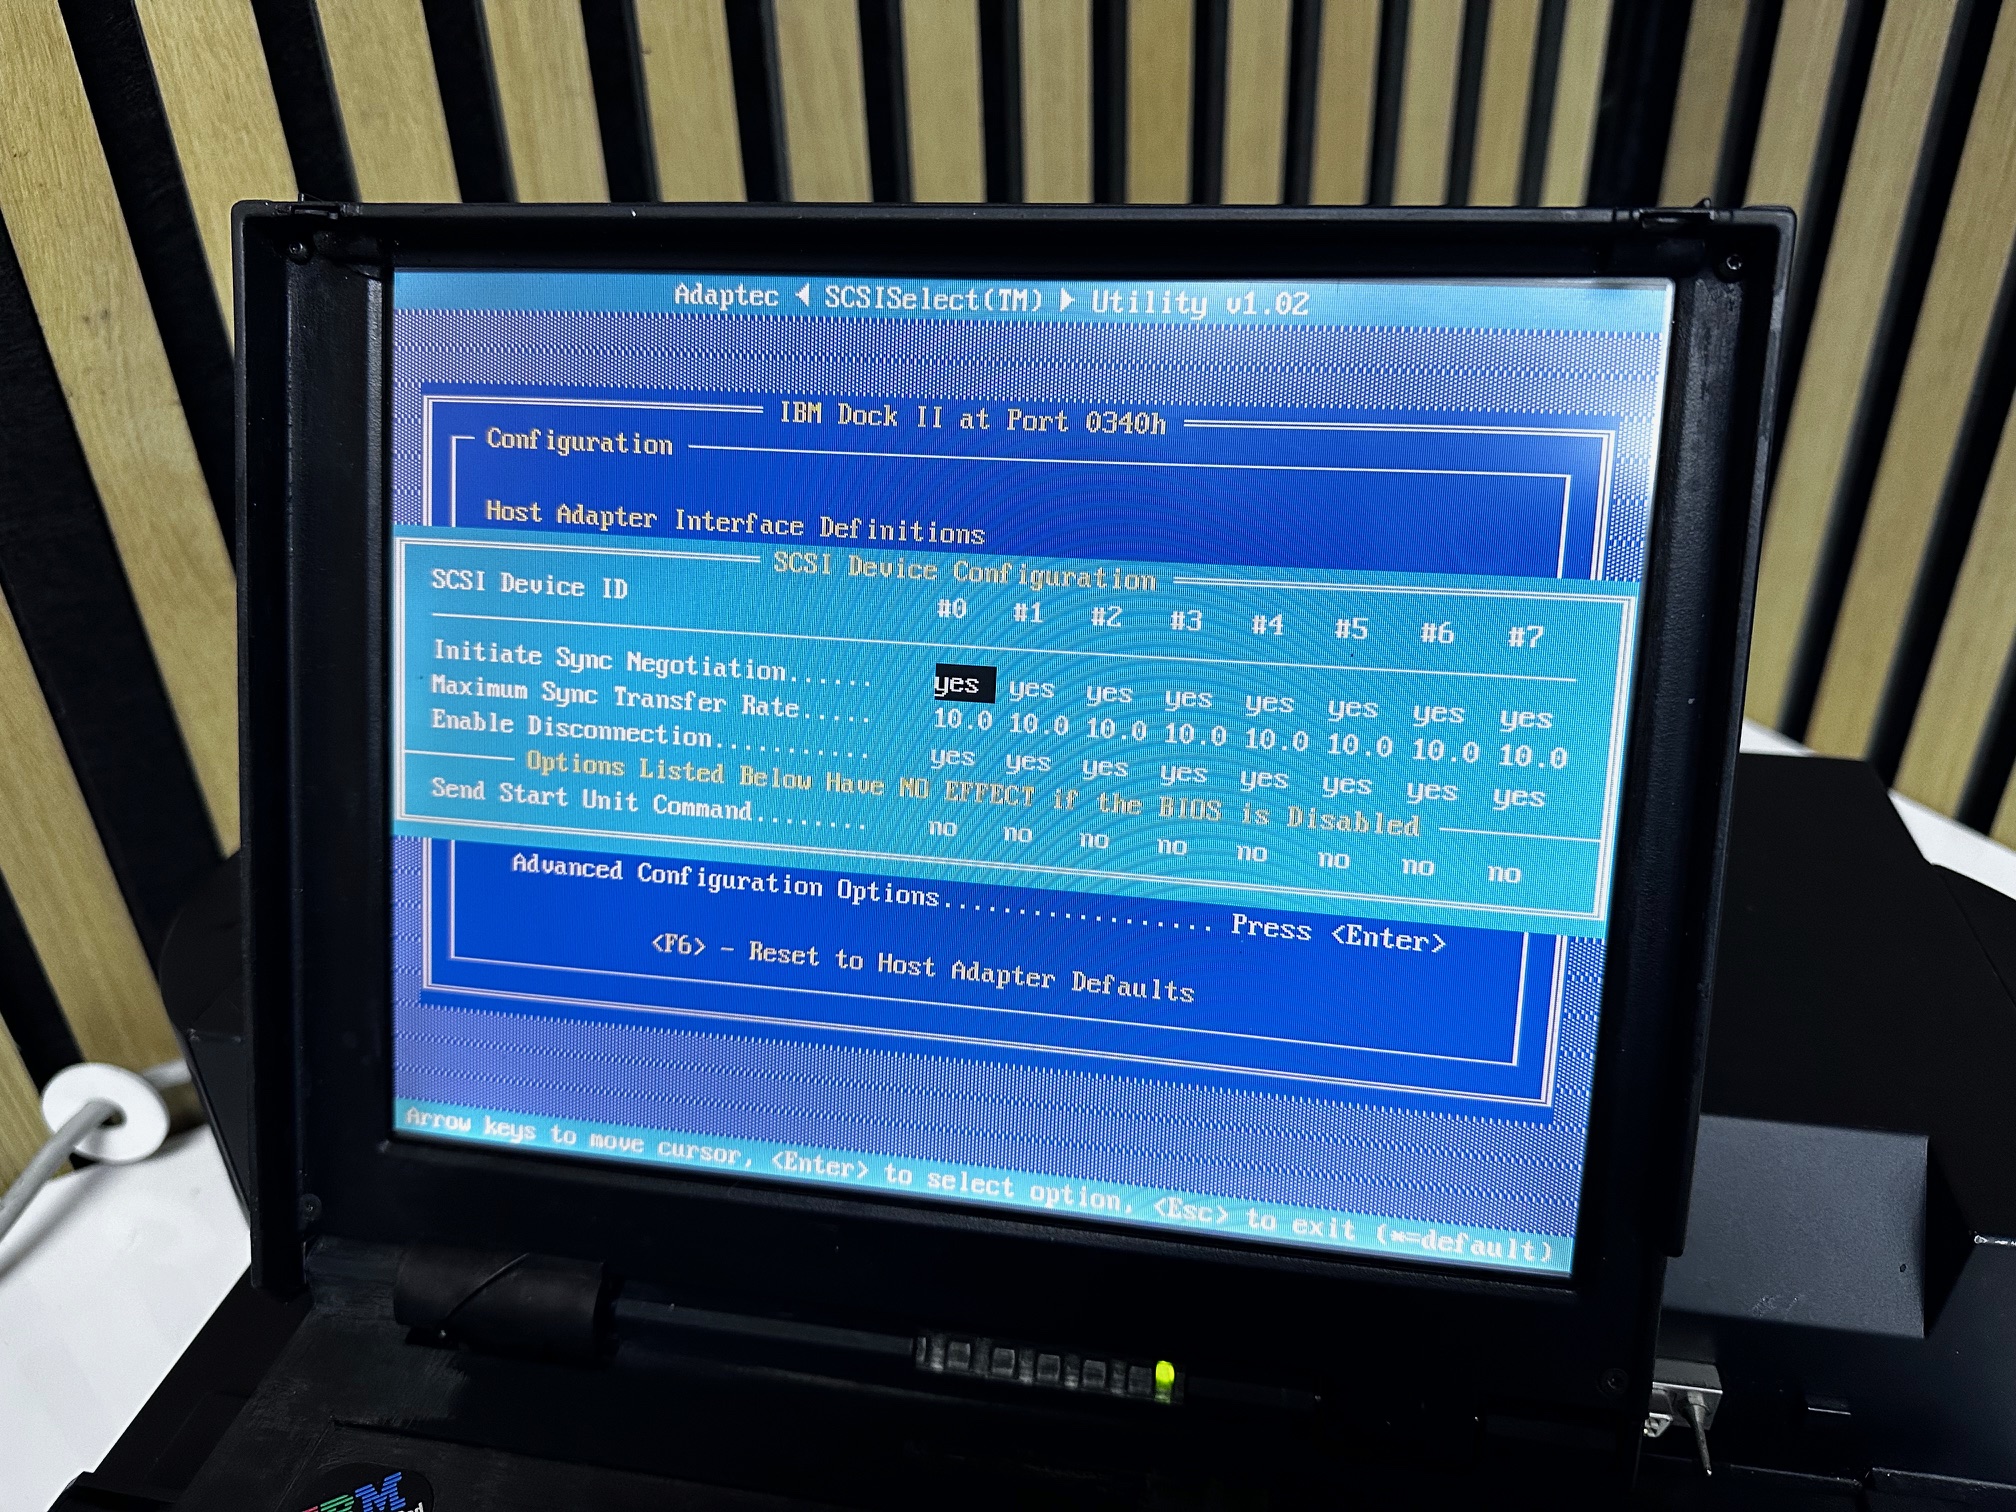
Here are some pictures of the additional POST configuration utility windows you get for specific configuration of the Dock II's SCSI and ports:


I didn't remember/realise this until I started to try and boot my 701c that my Dock II has a IDE CD-ROM drive, not a SCSI one and this seemed to create some problems booting to my 701c's internal hard drive.
A first I noted that when docked the HDD was spinning up as it should but when I got to the fairly usual 701c error message about the Hard Disk and it's ability to Hibernate, clicking ESC/OK would power down the HDD.
So I went back into the POST config utility and disabled hibernation whilst docked from page 3 as follows:

This meant my 701c would boot whilst docked. I'm still on the road to troubleshooting the CD-ROM drive, but I'm also about to replace it with the 4x CD-ROM Adaptor for Dock II - which is a bit of a mystery in itself as it appears to take the optical drive from a later 755 or 760 and adapt it to IDE inside the dock. So I think I'll park that for now.
Here are some pictures I took of the dock working. I hope to add to these soon with some pictures of the dock being fully used (it was refusing to boot from the 701c internal hard drive at the time).


I also added a rare CD-ROM adaptor to the half-height 5.25" drive bay:


And here is that dock with the 701c fitted and working and reading CD-ROMs:


I needed to use this Chips and Technology driver set for it to detect the video drivers:
Here are some additional pictures of the PS/2 CL57, 700C and 701c next to one another:


