Restoration #2
It's the 15th Feburary 2026 and I've decided to document another rebuild, this time which will involve strengthening the rear and it's hinges.
My focus of this work is to solve the issue whereby the hinges and the plastic they're bolted to in the base of the machine fail. The hinges become increasingly stiff over time and need to be loosened up. The plastic which the hinges are bolted to, inside the base of the 700C fails by cracking and breaking.
I now need to dismantle the machine in order to get to the base bezel to inspect, measure, and rebuild.
I strongly recommend the 700C disassembly guide on ifixit.
I managed to acquire a busted up 700C, which back had already cracked apart on the right side, where the hinges had got so stiff, it broke the plastic.
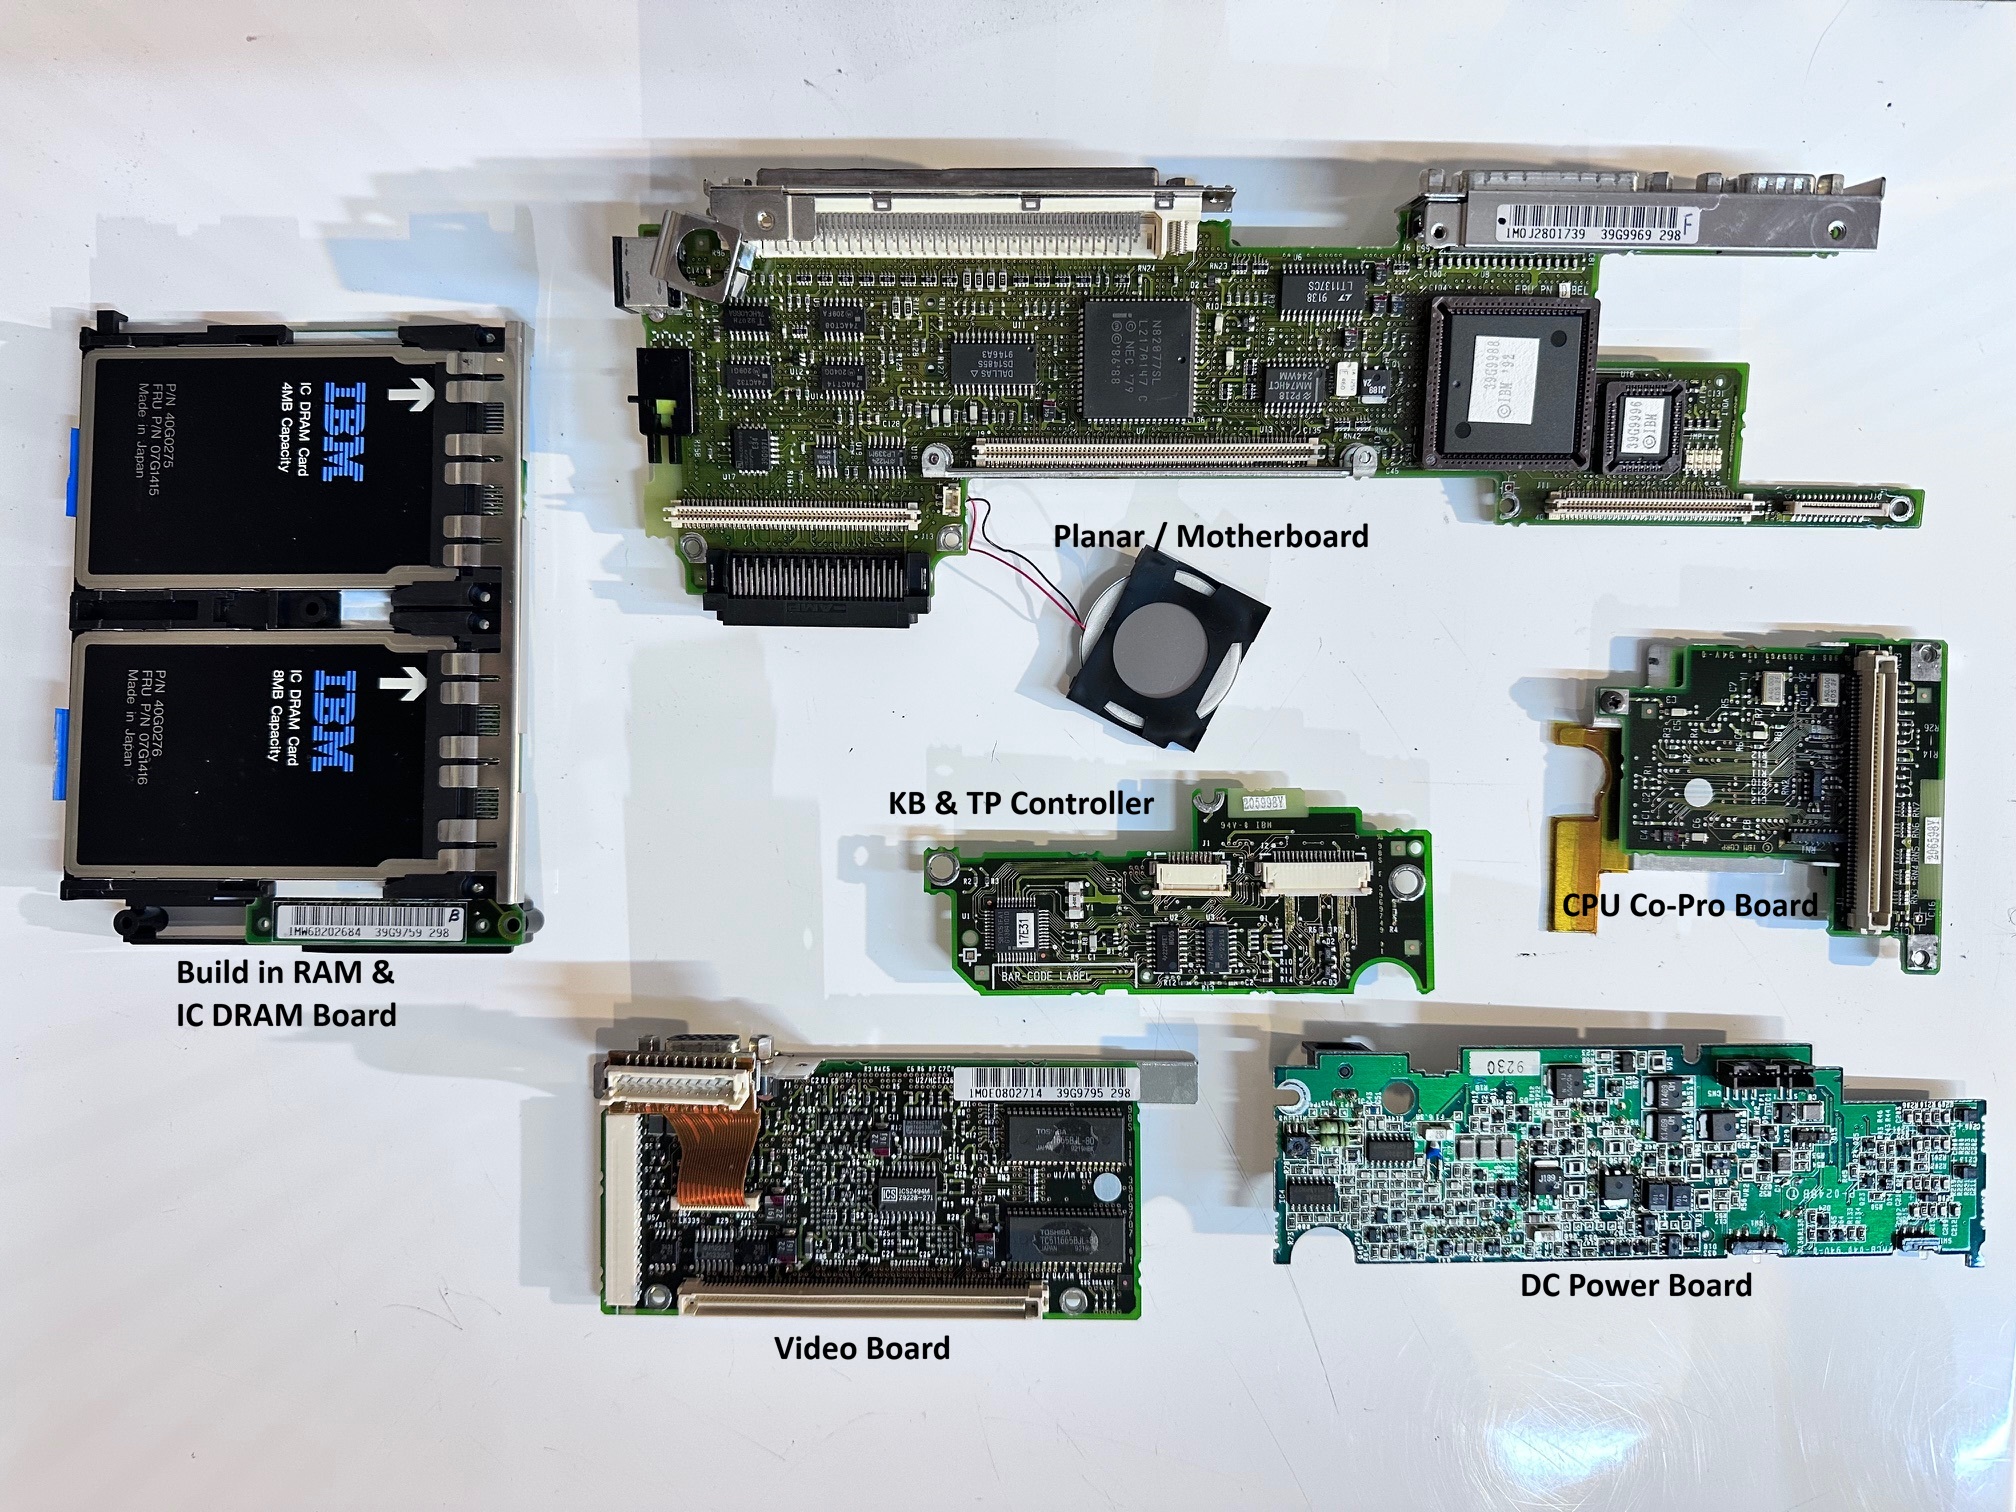
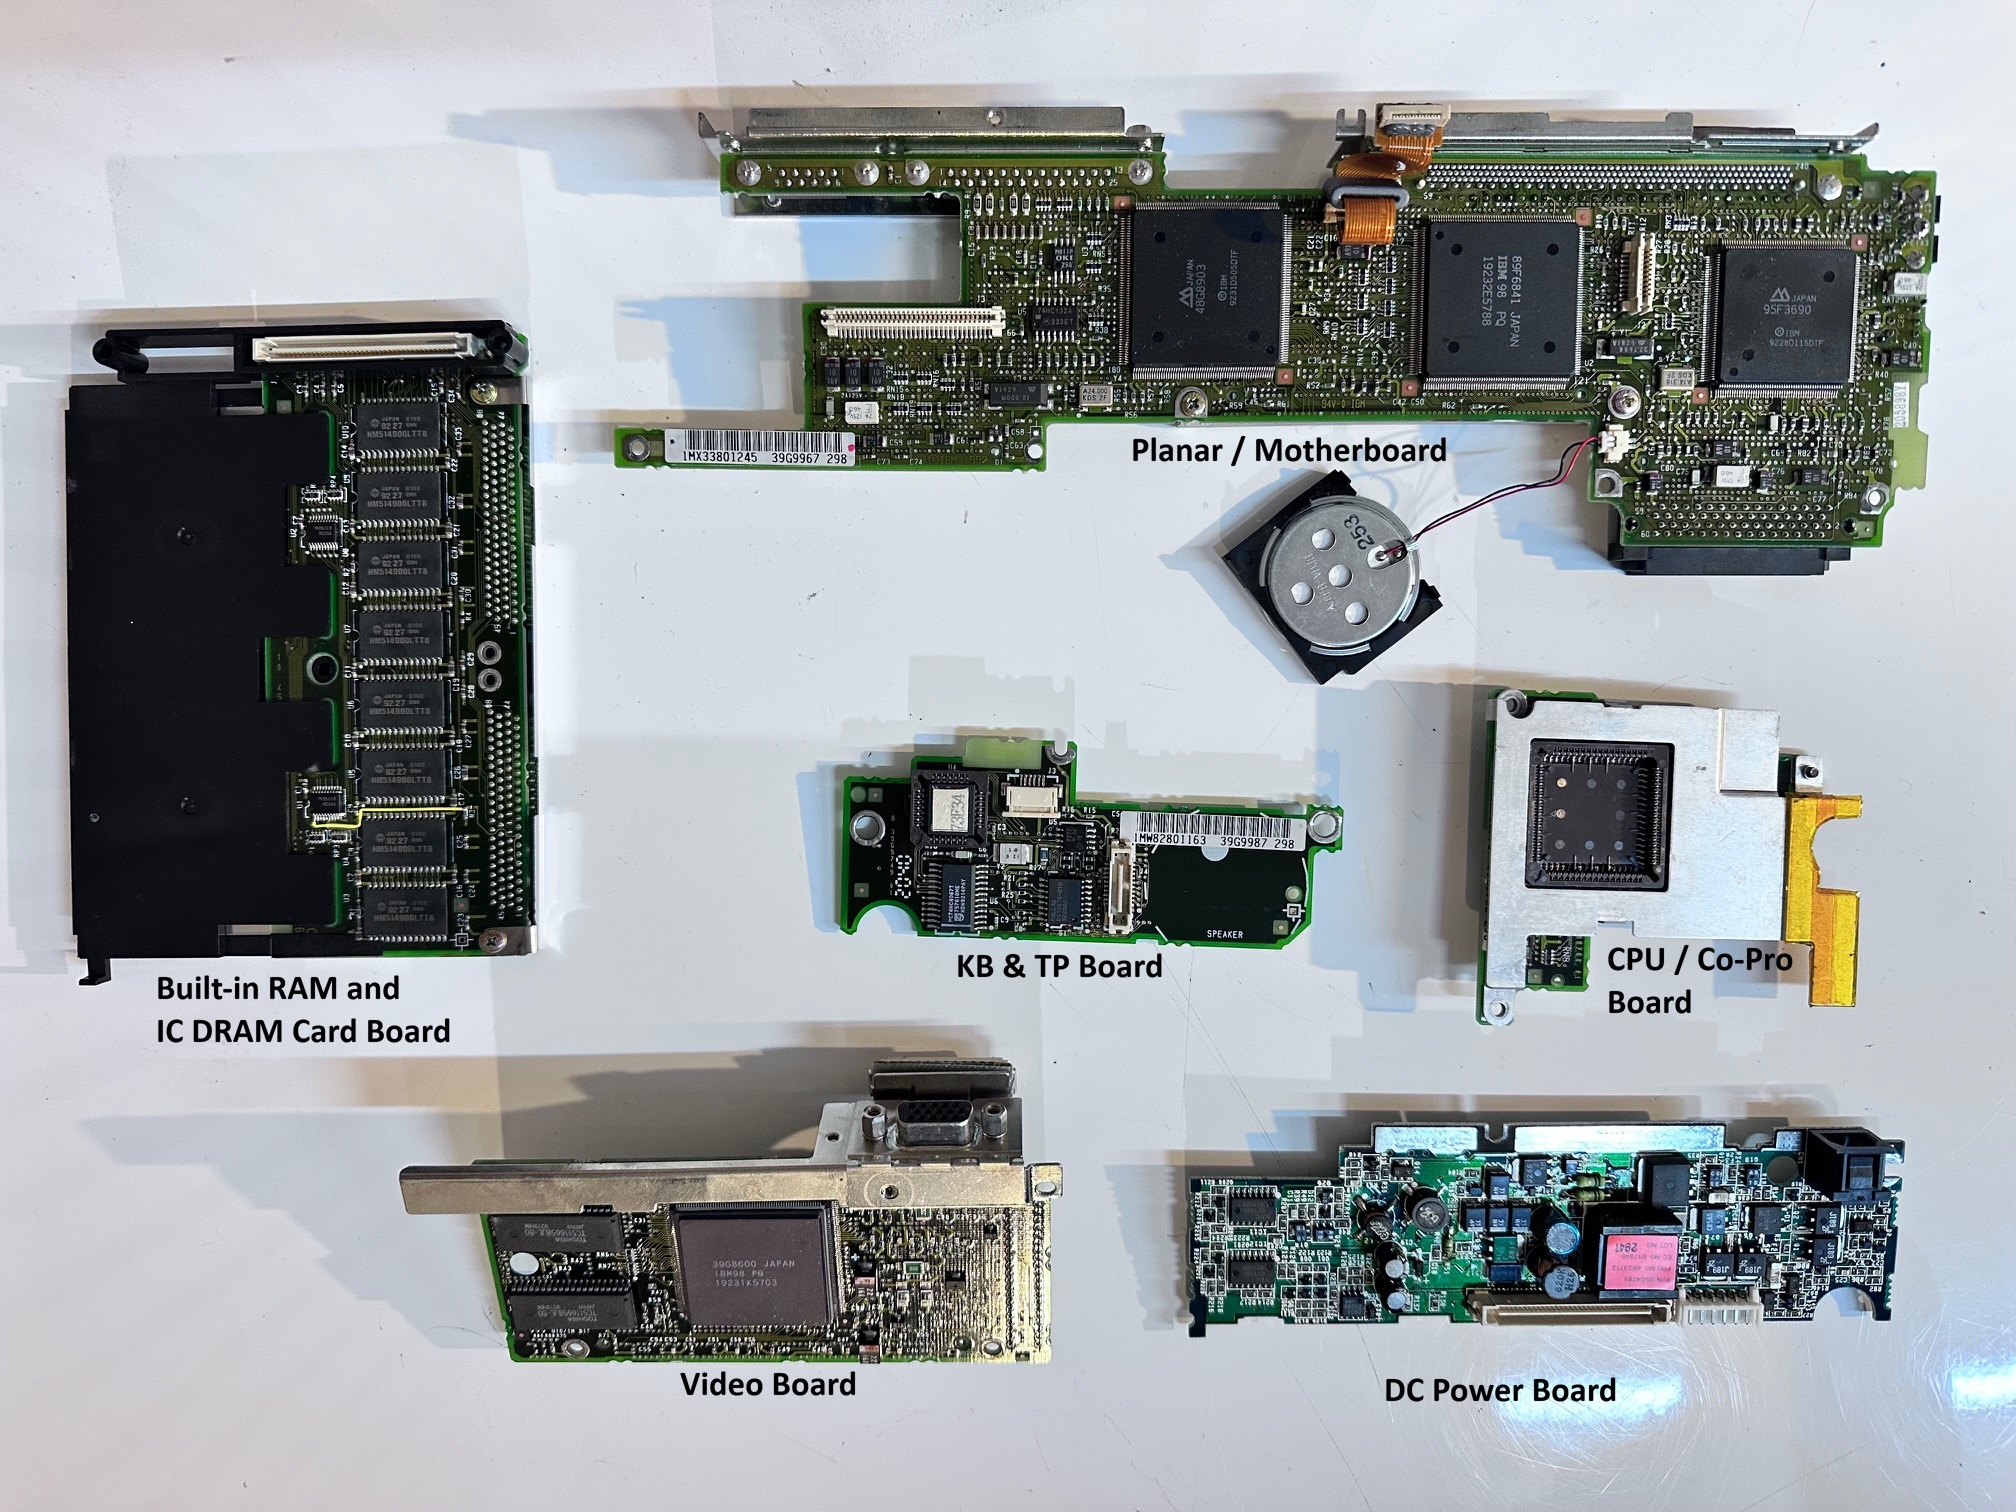
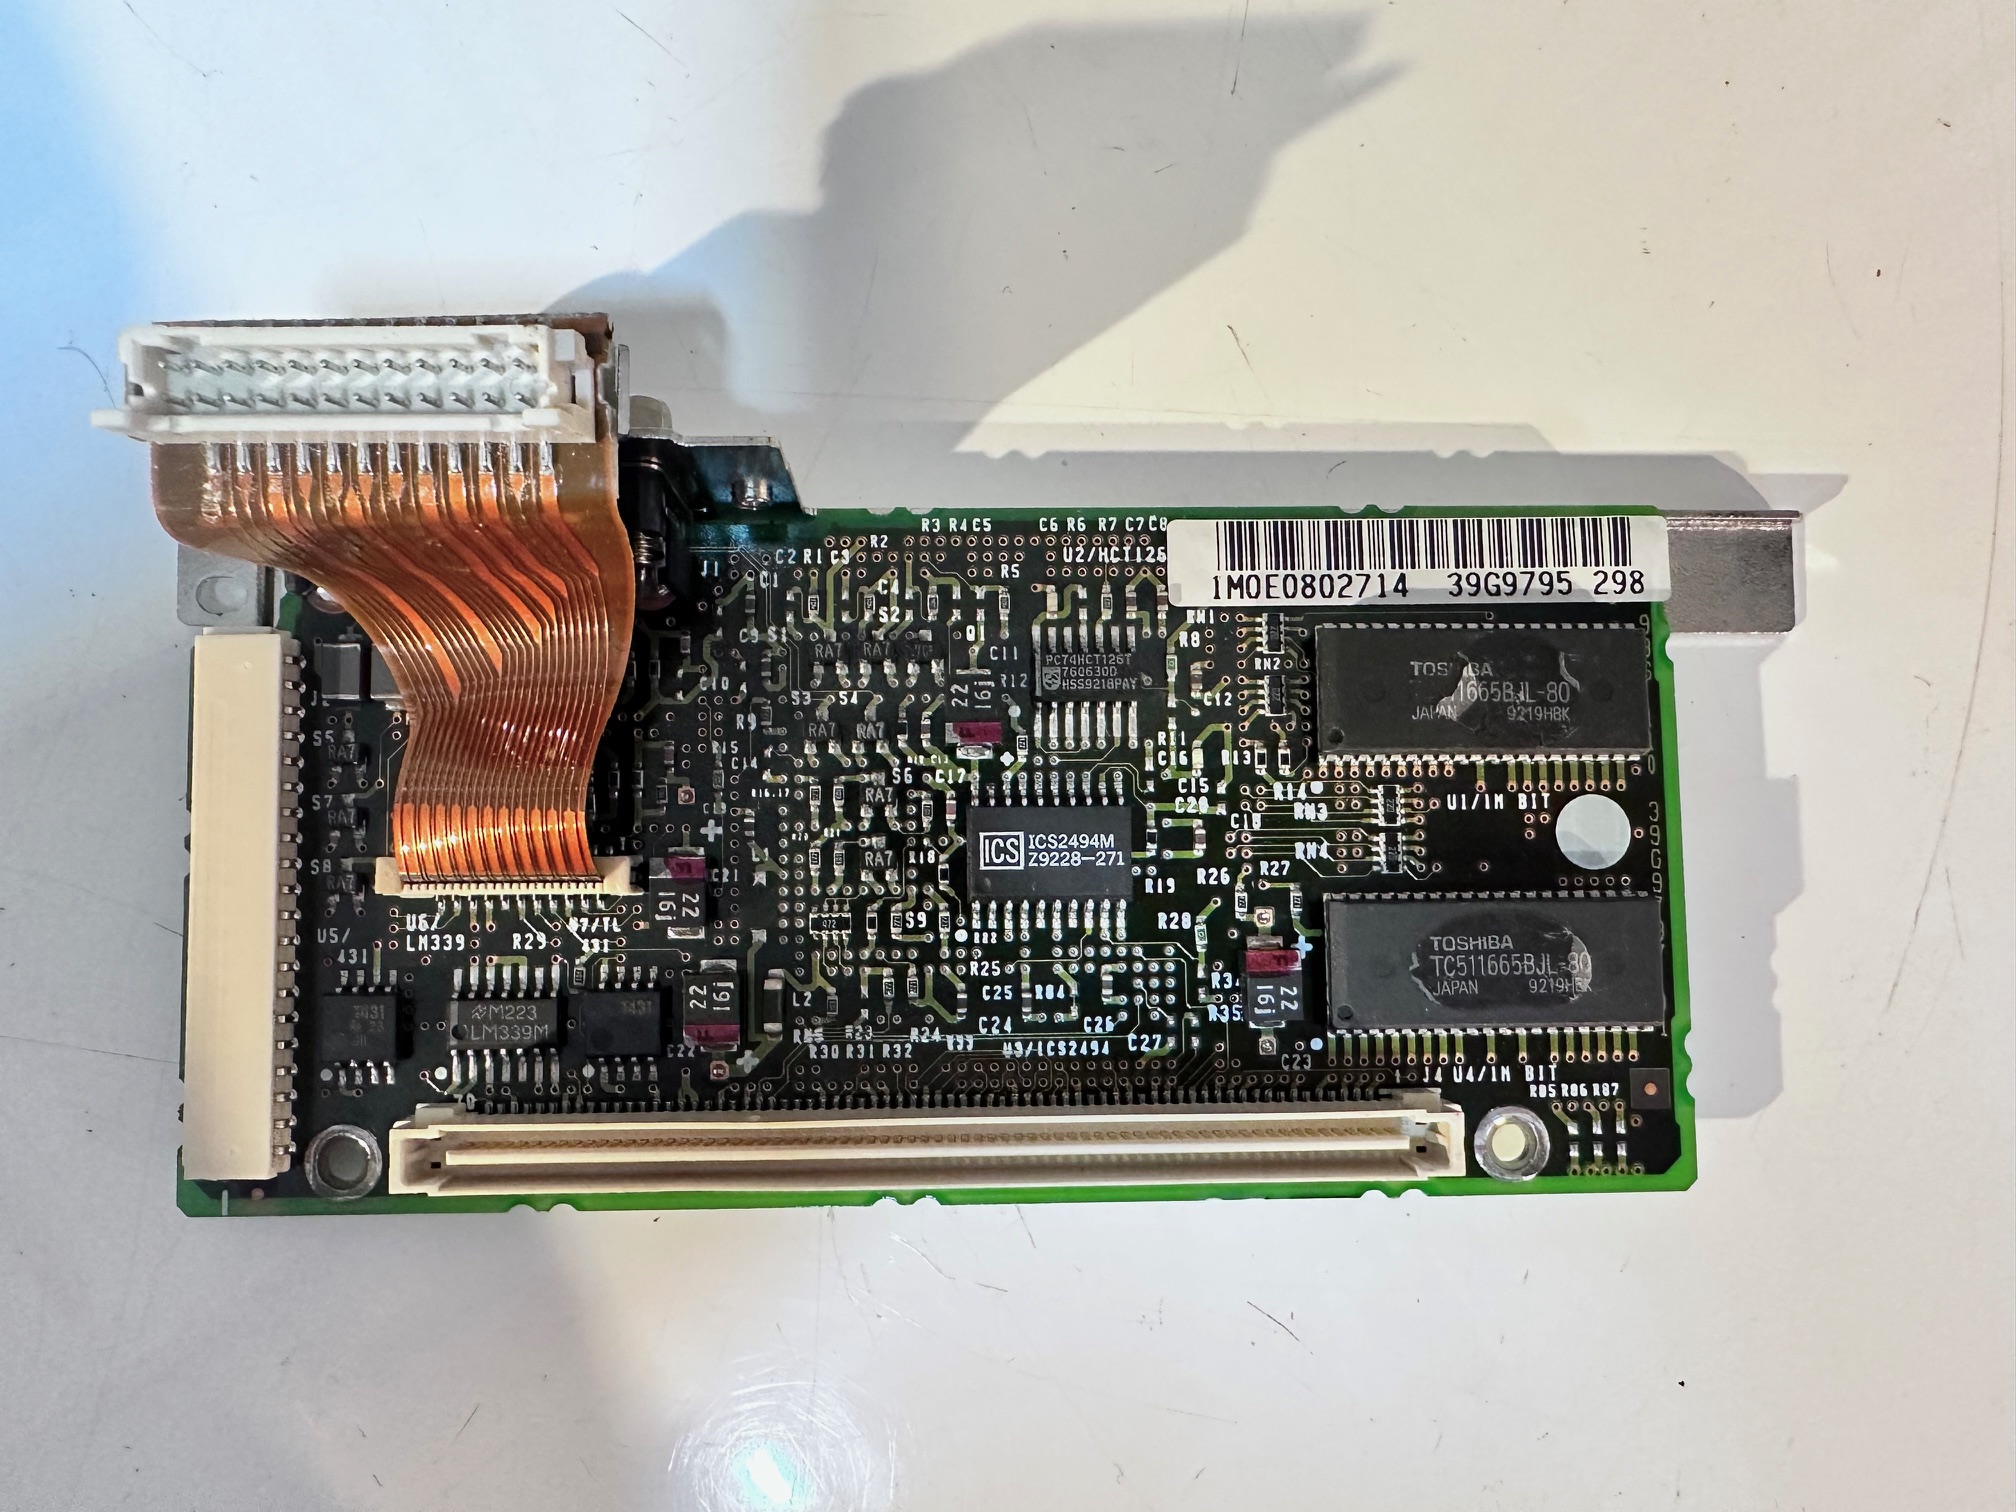
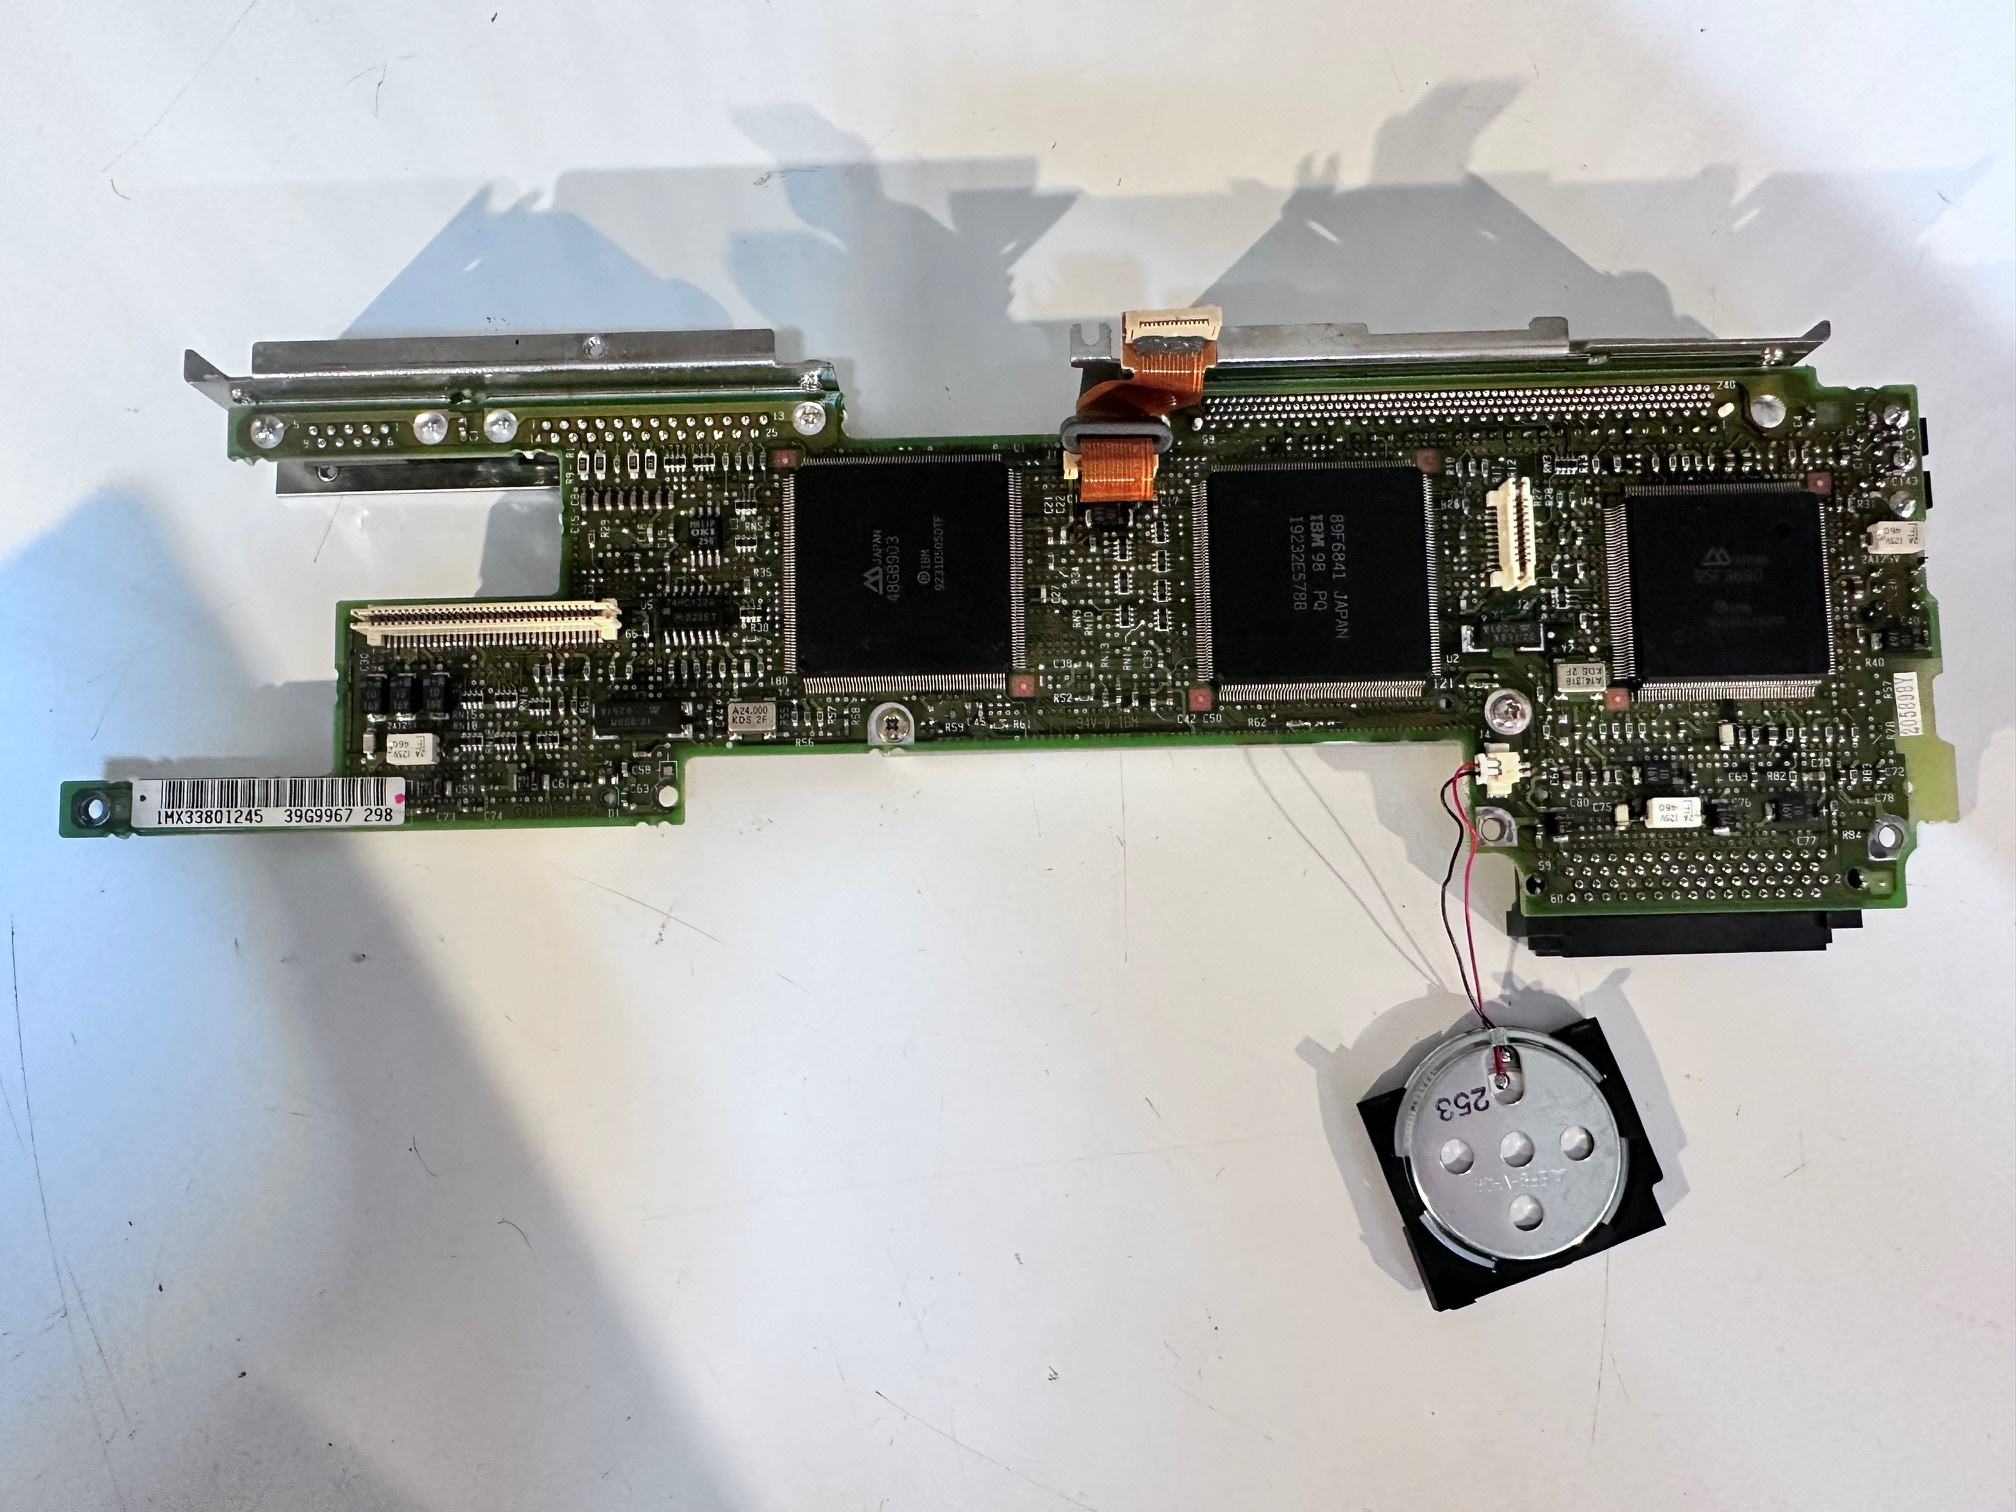
Internal PCBs:
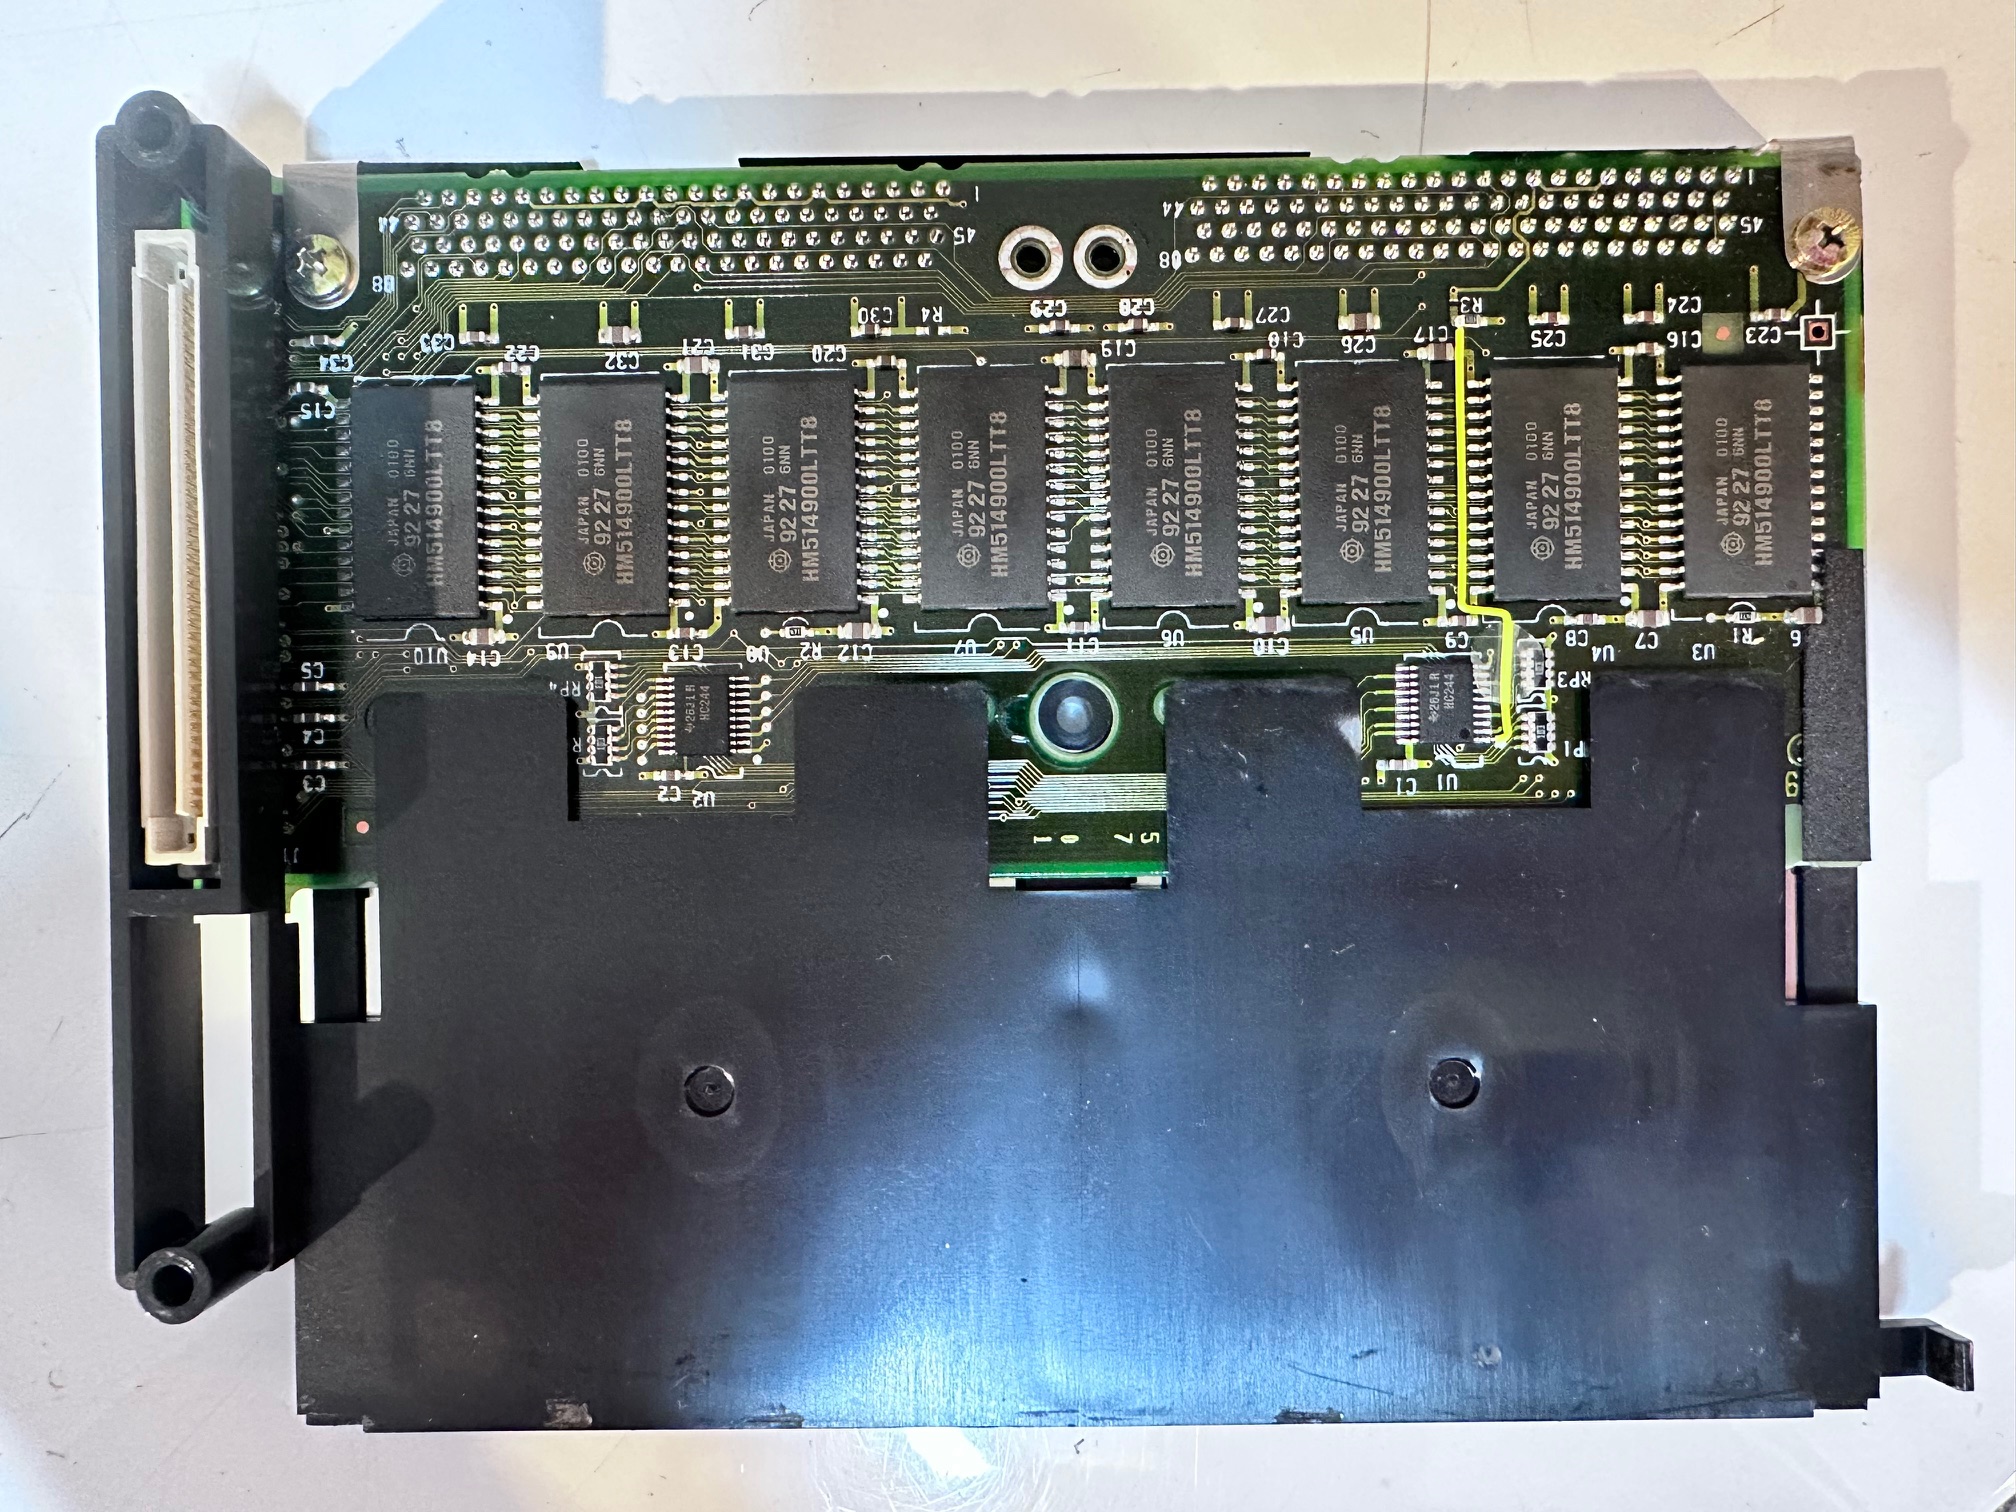
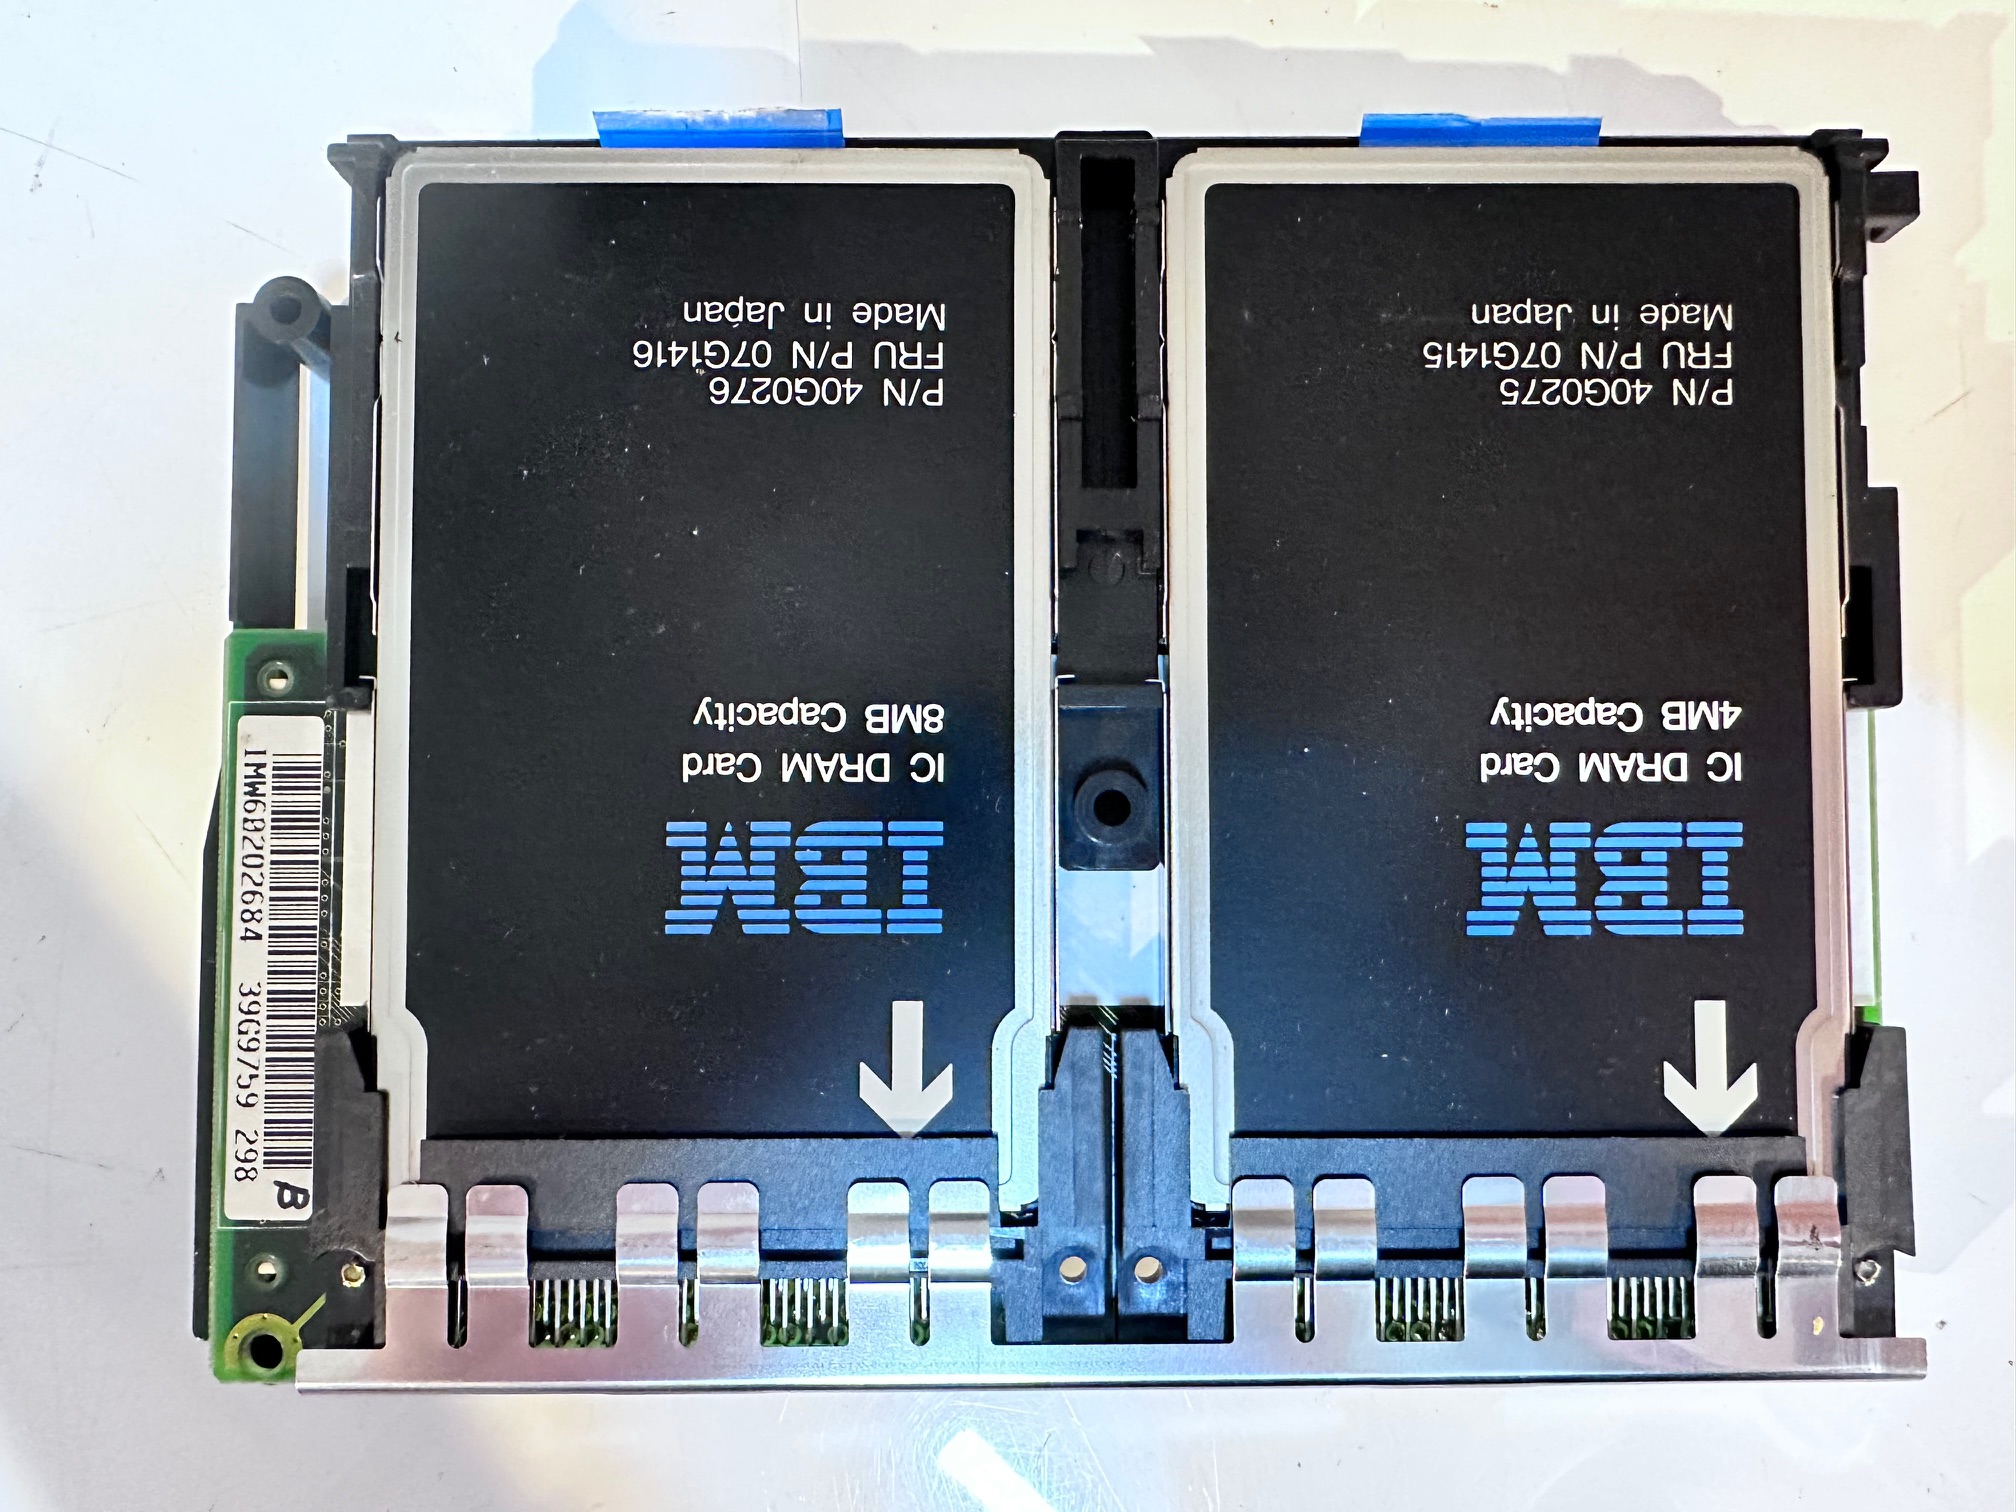
Memory Board Close-Up:
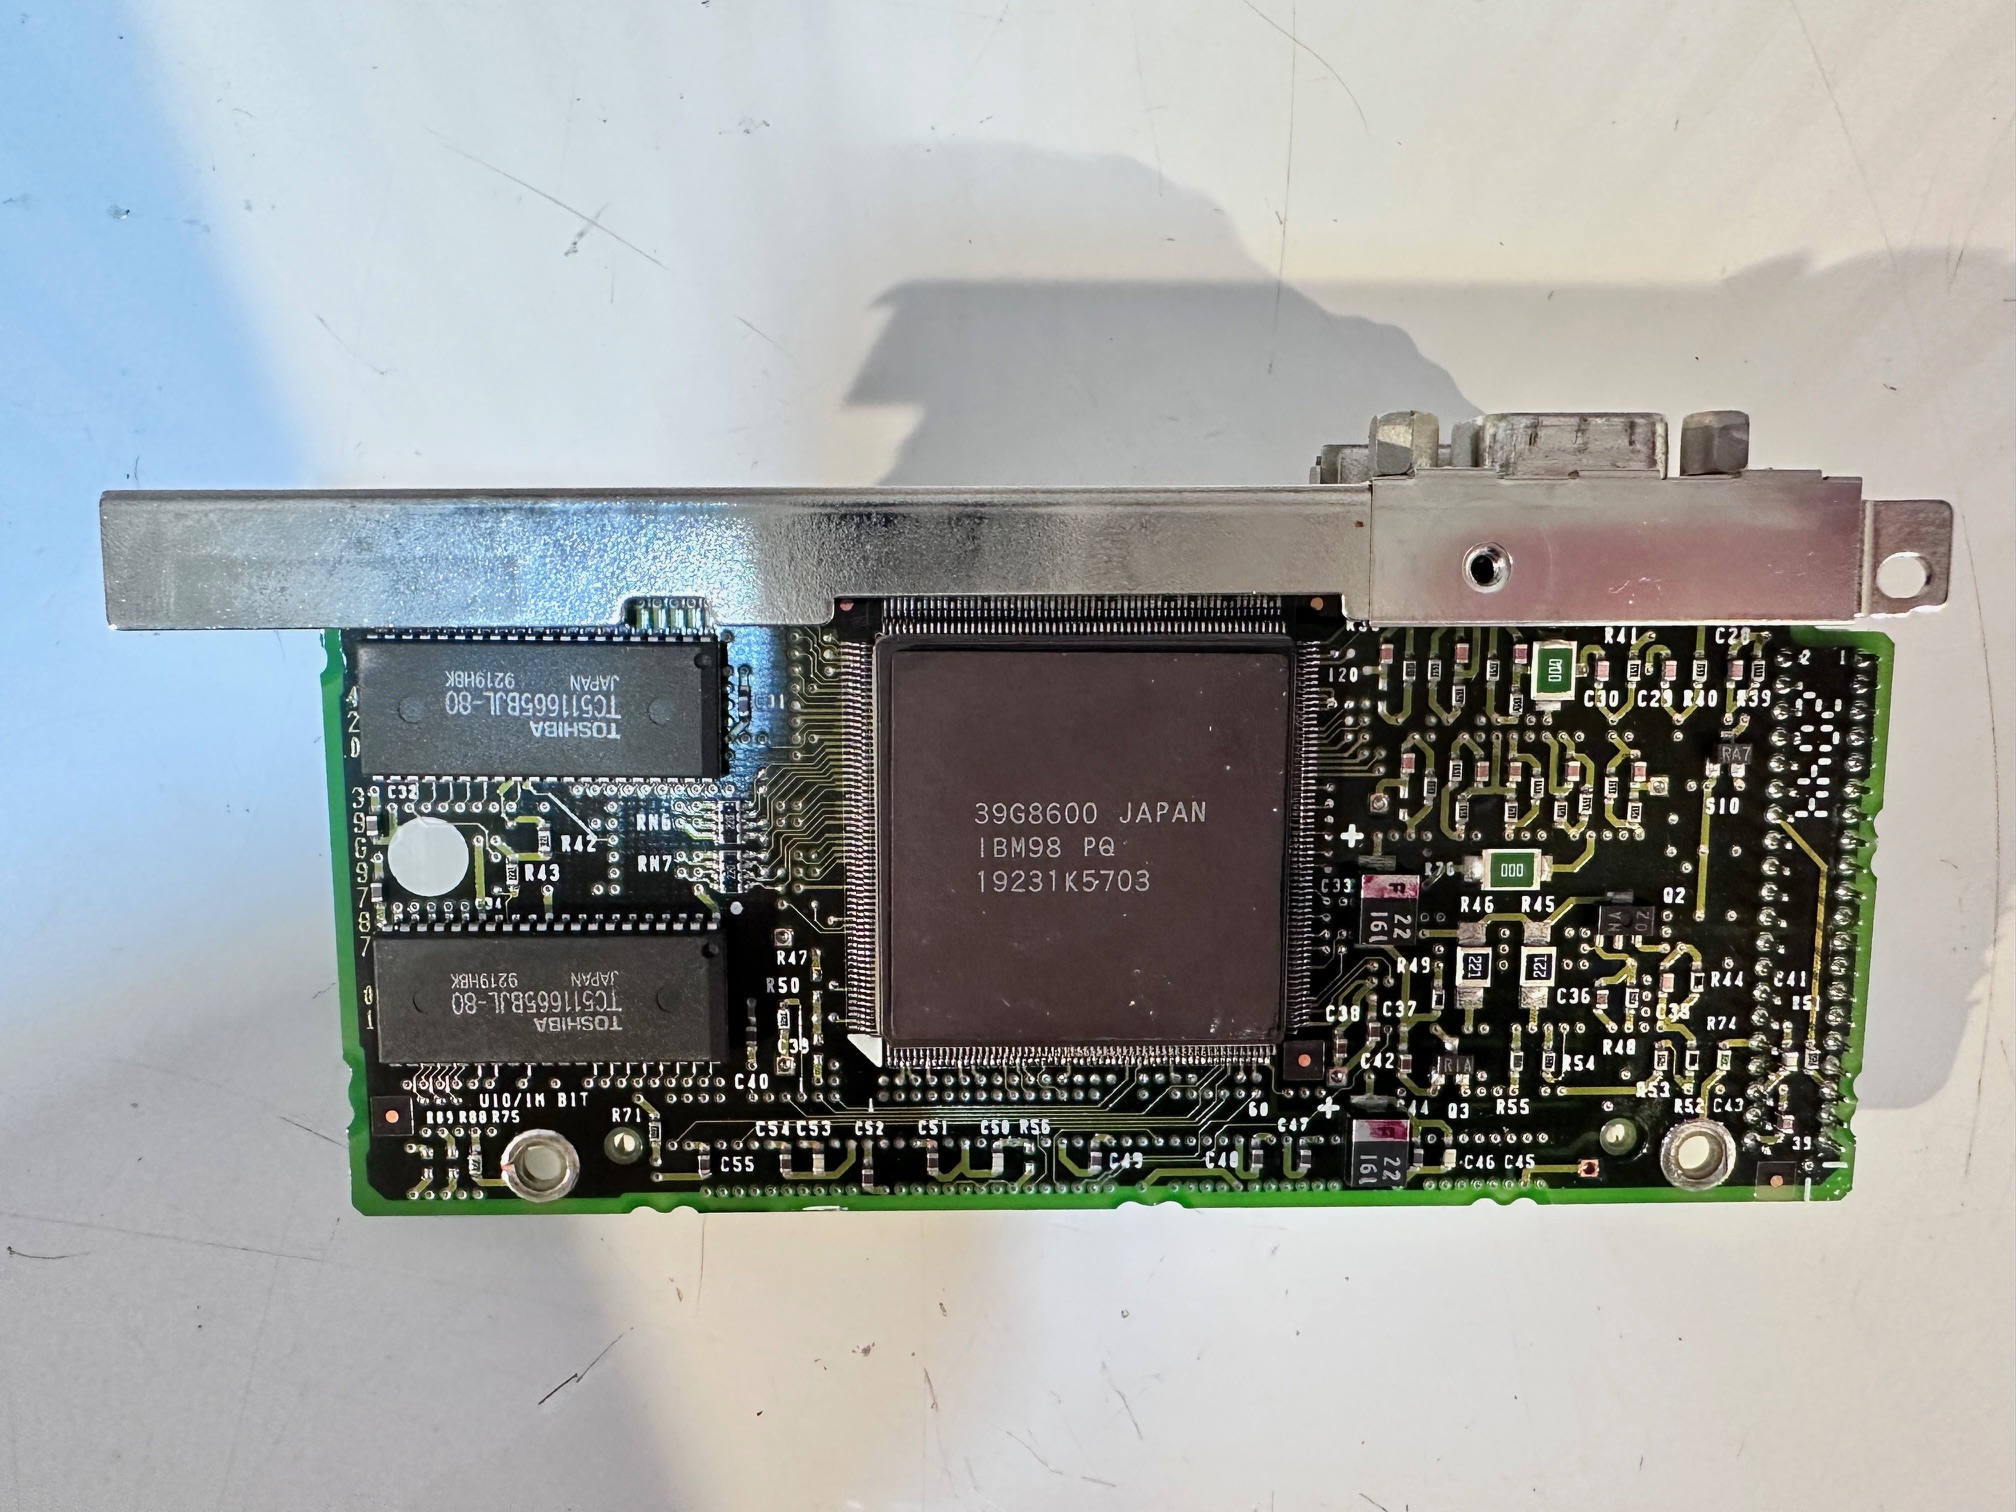
Video Board Close-up:
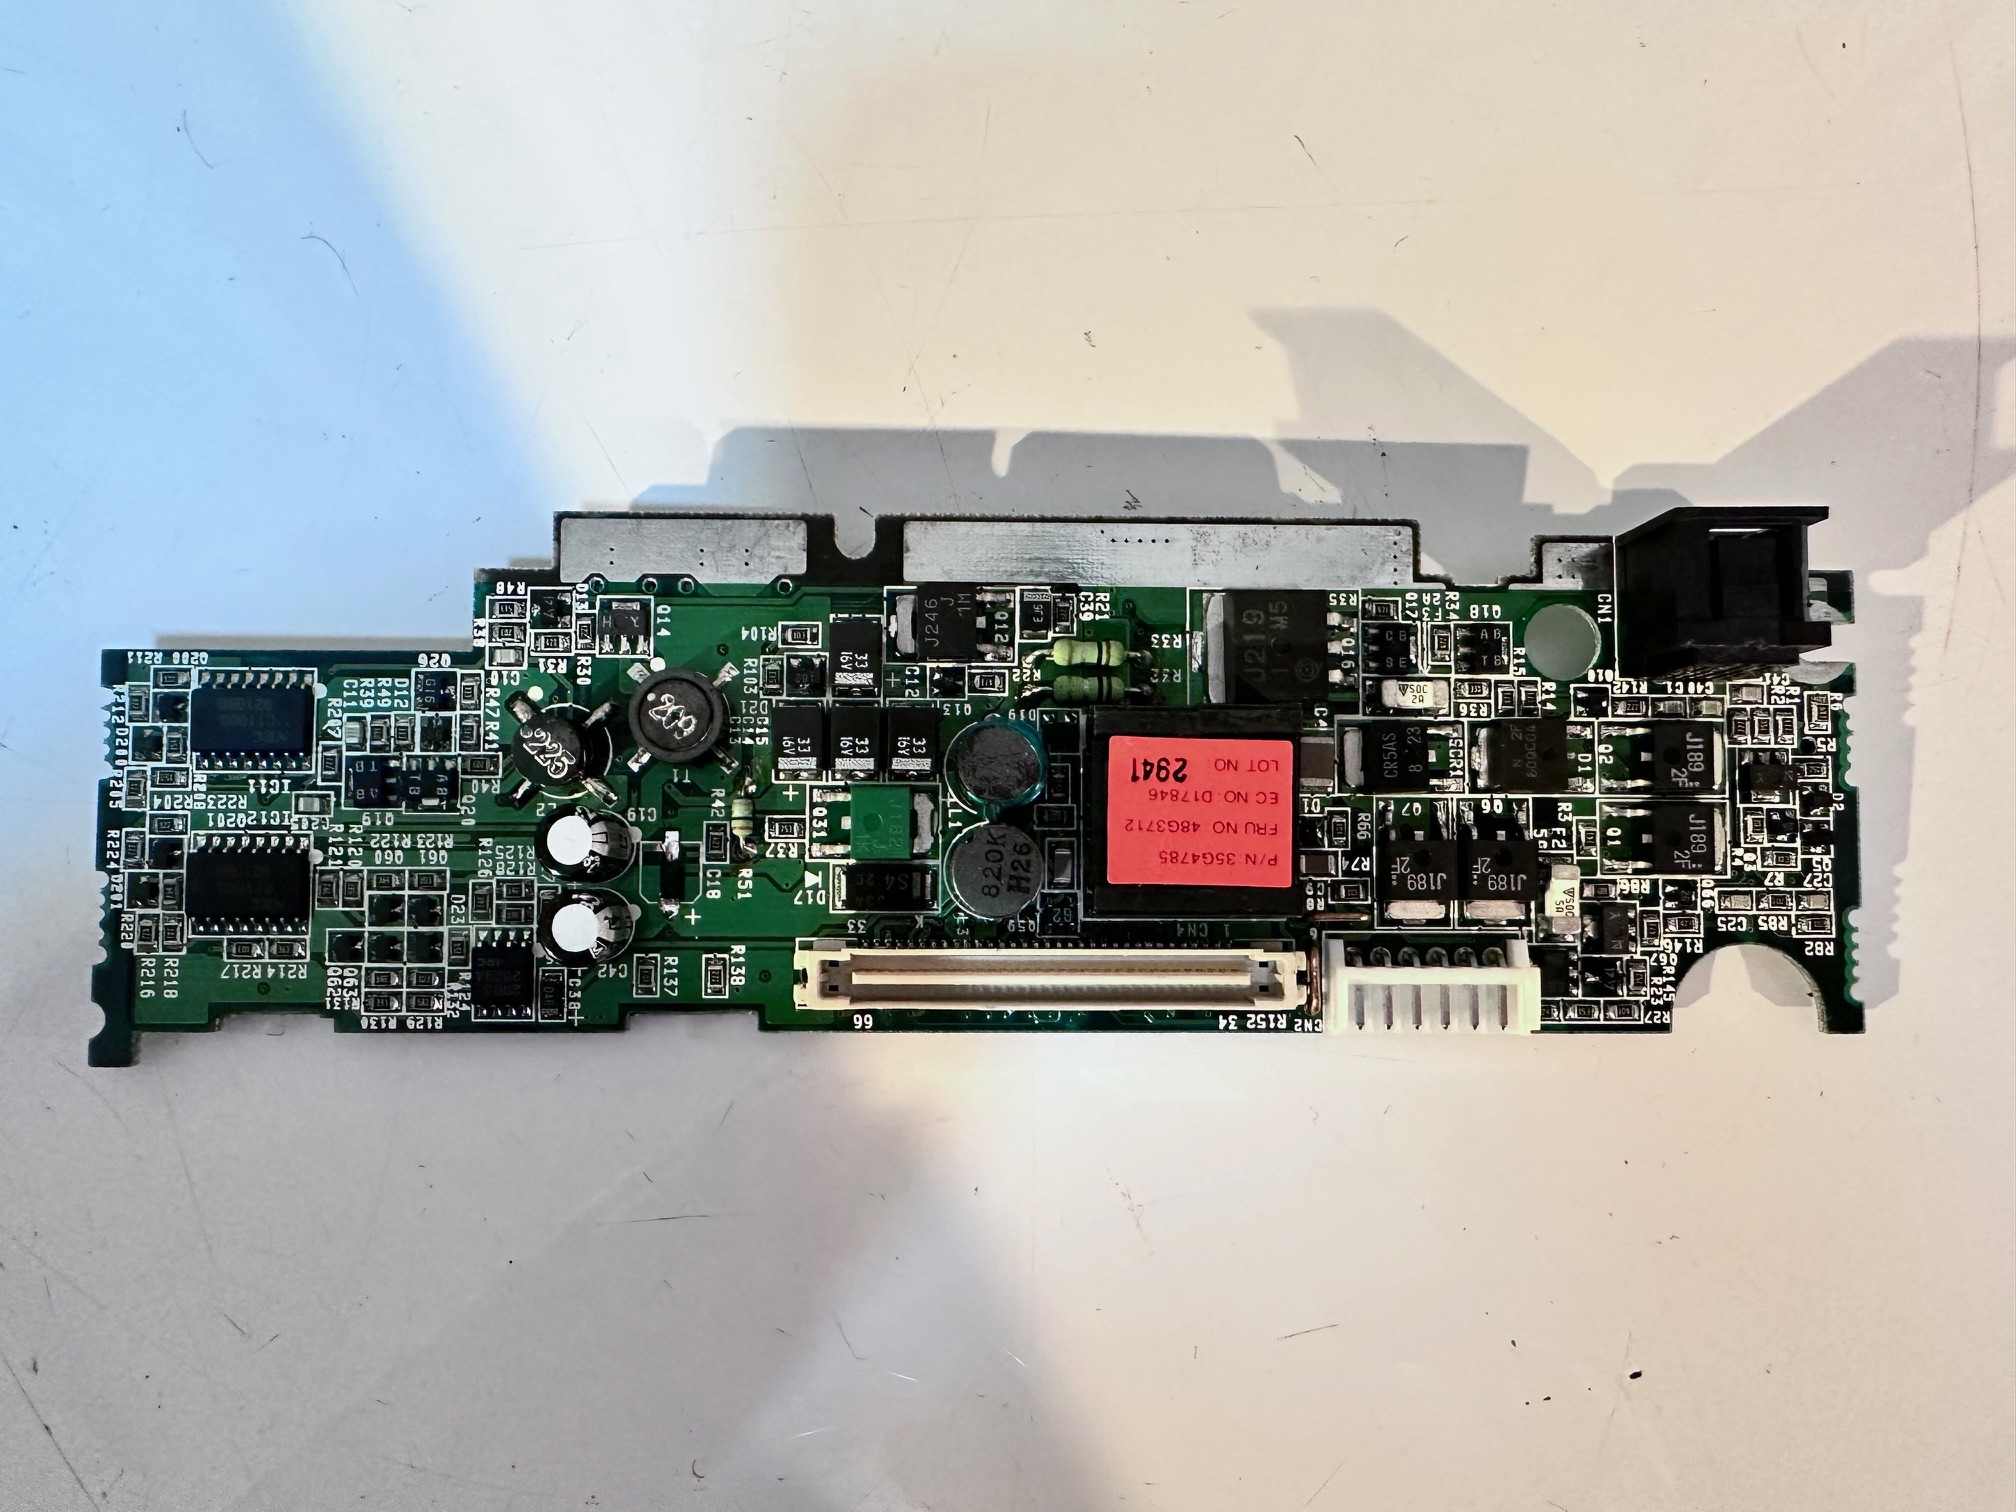
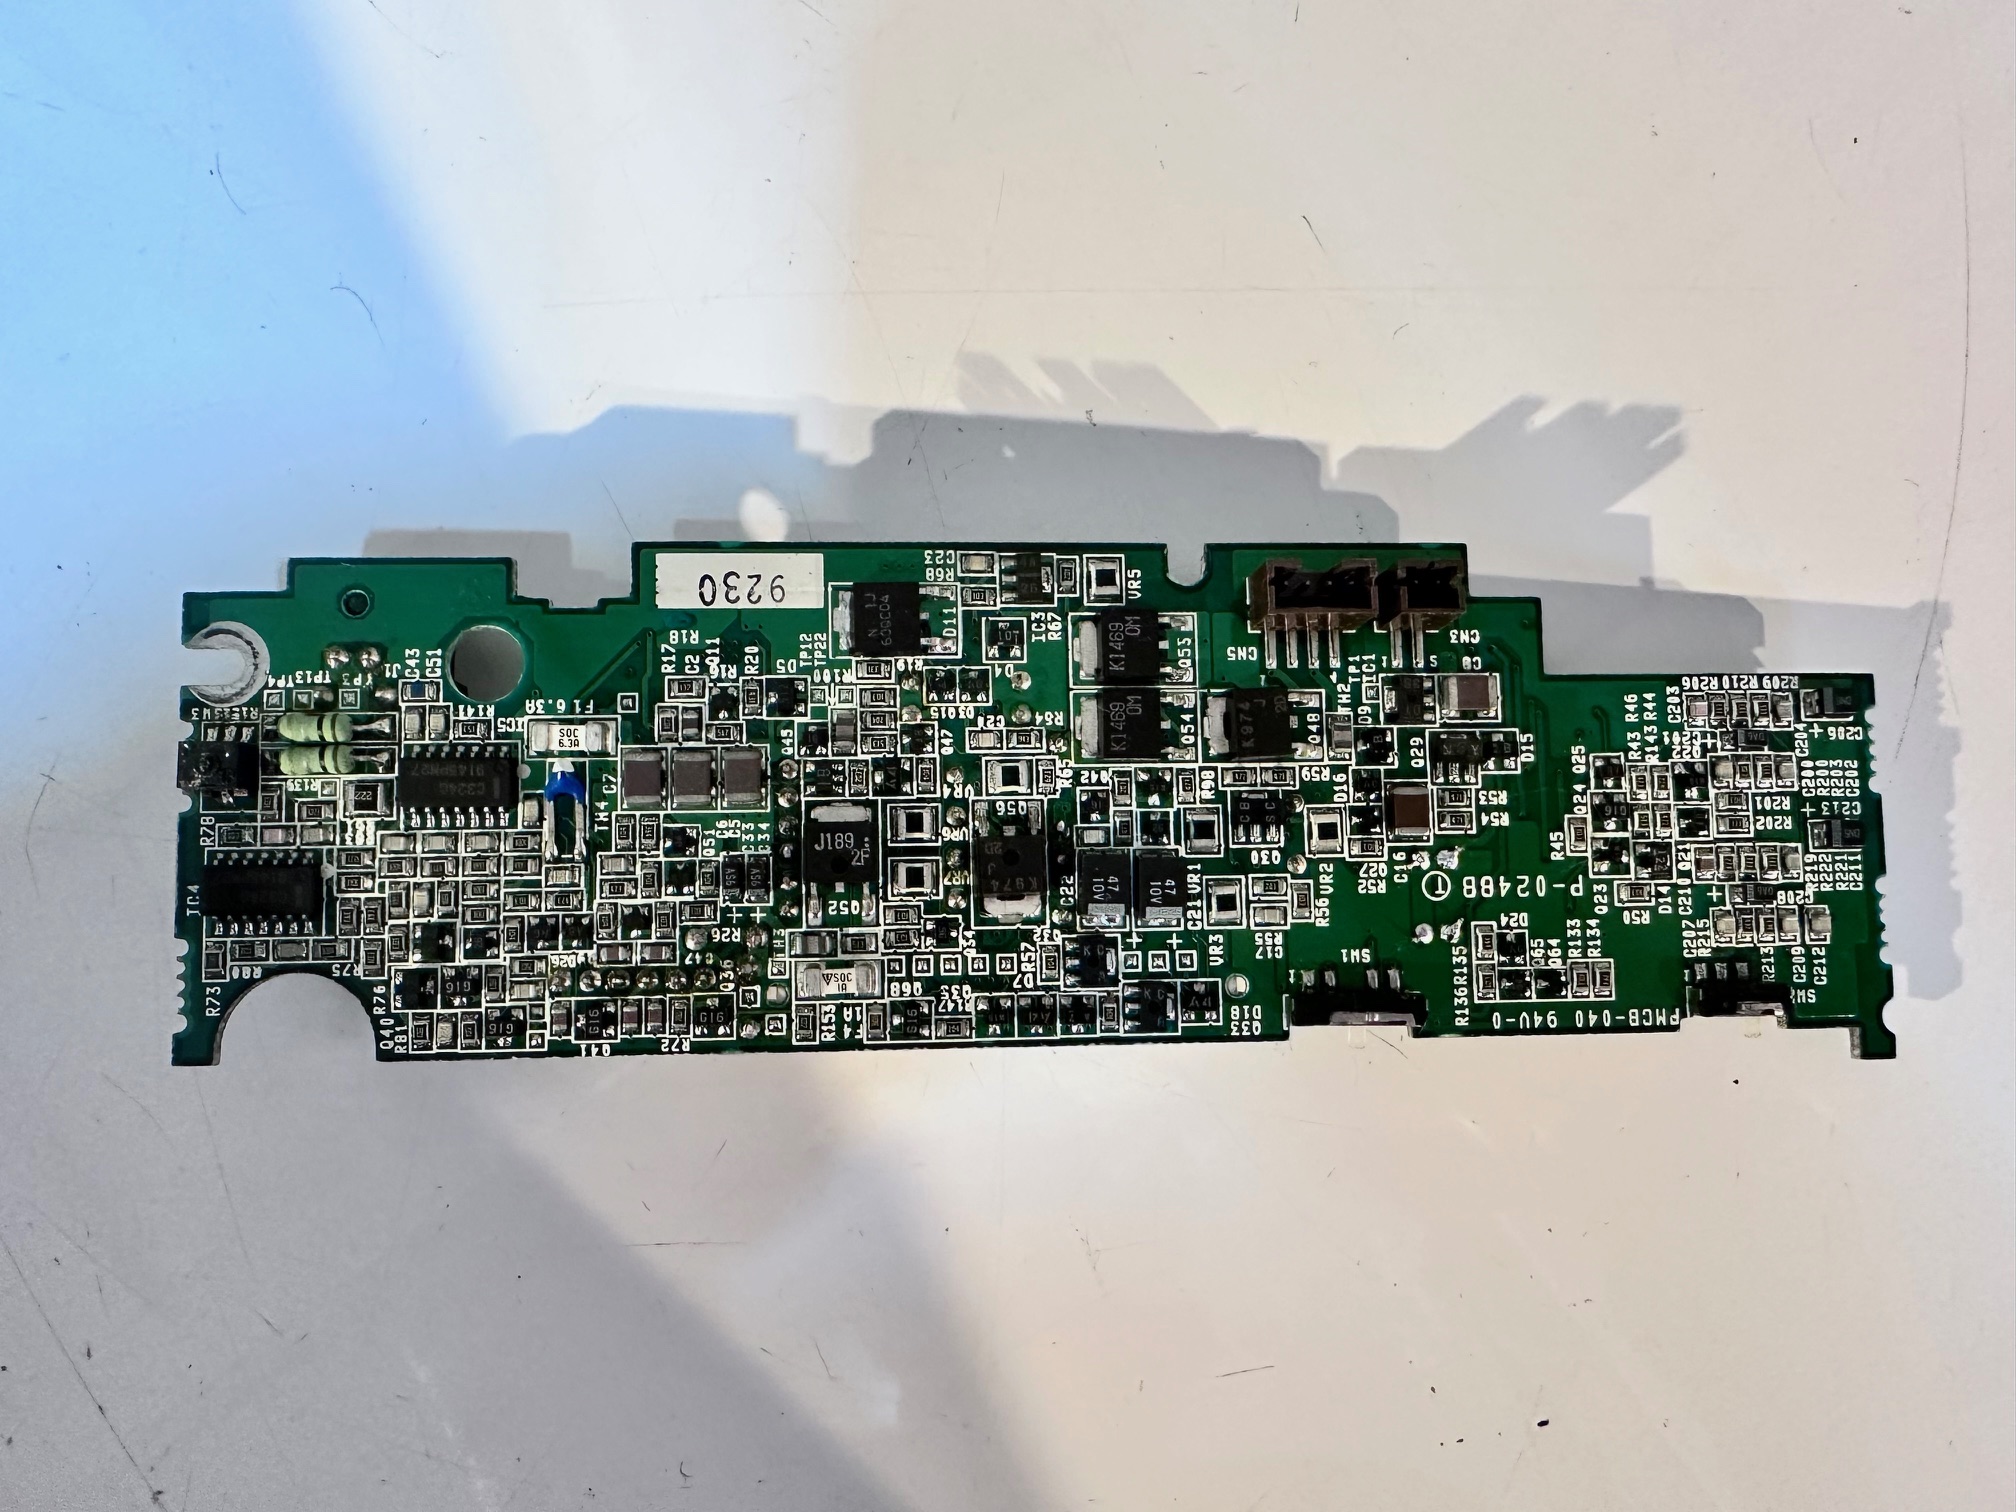
DC Board Closeup (Recapped):
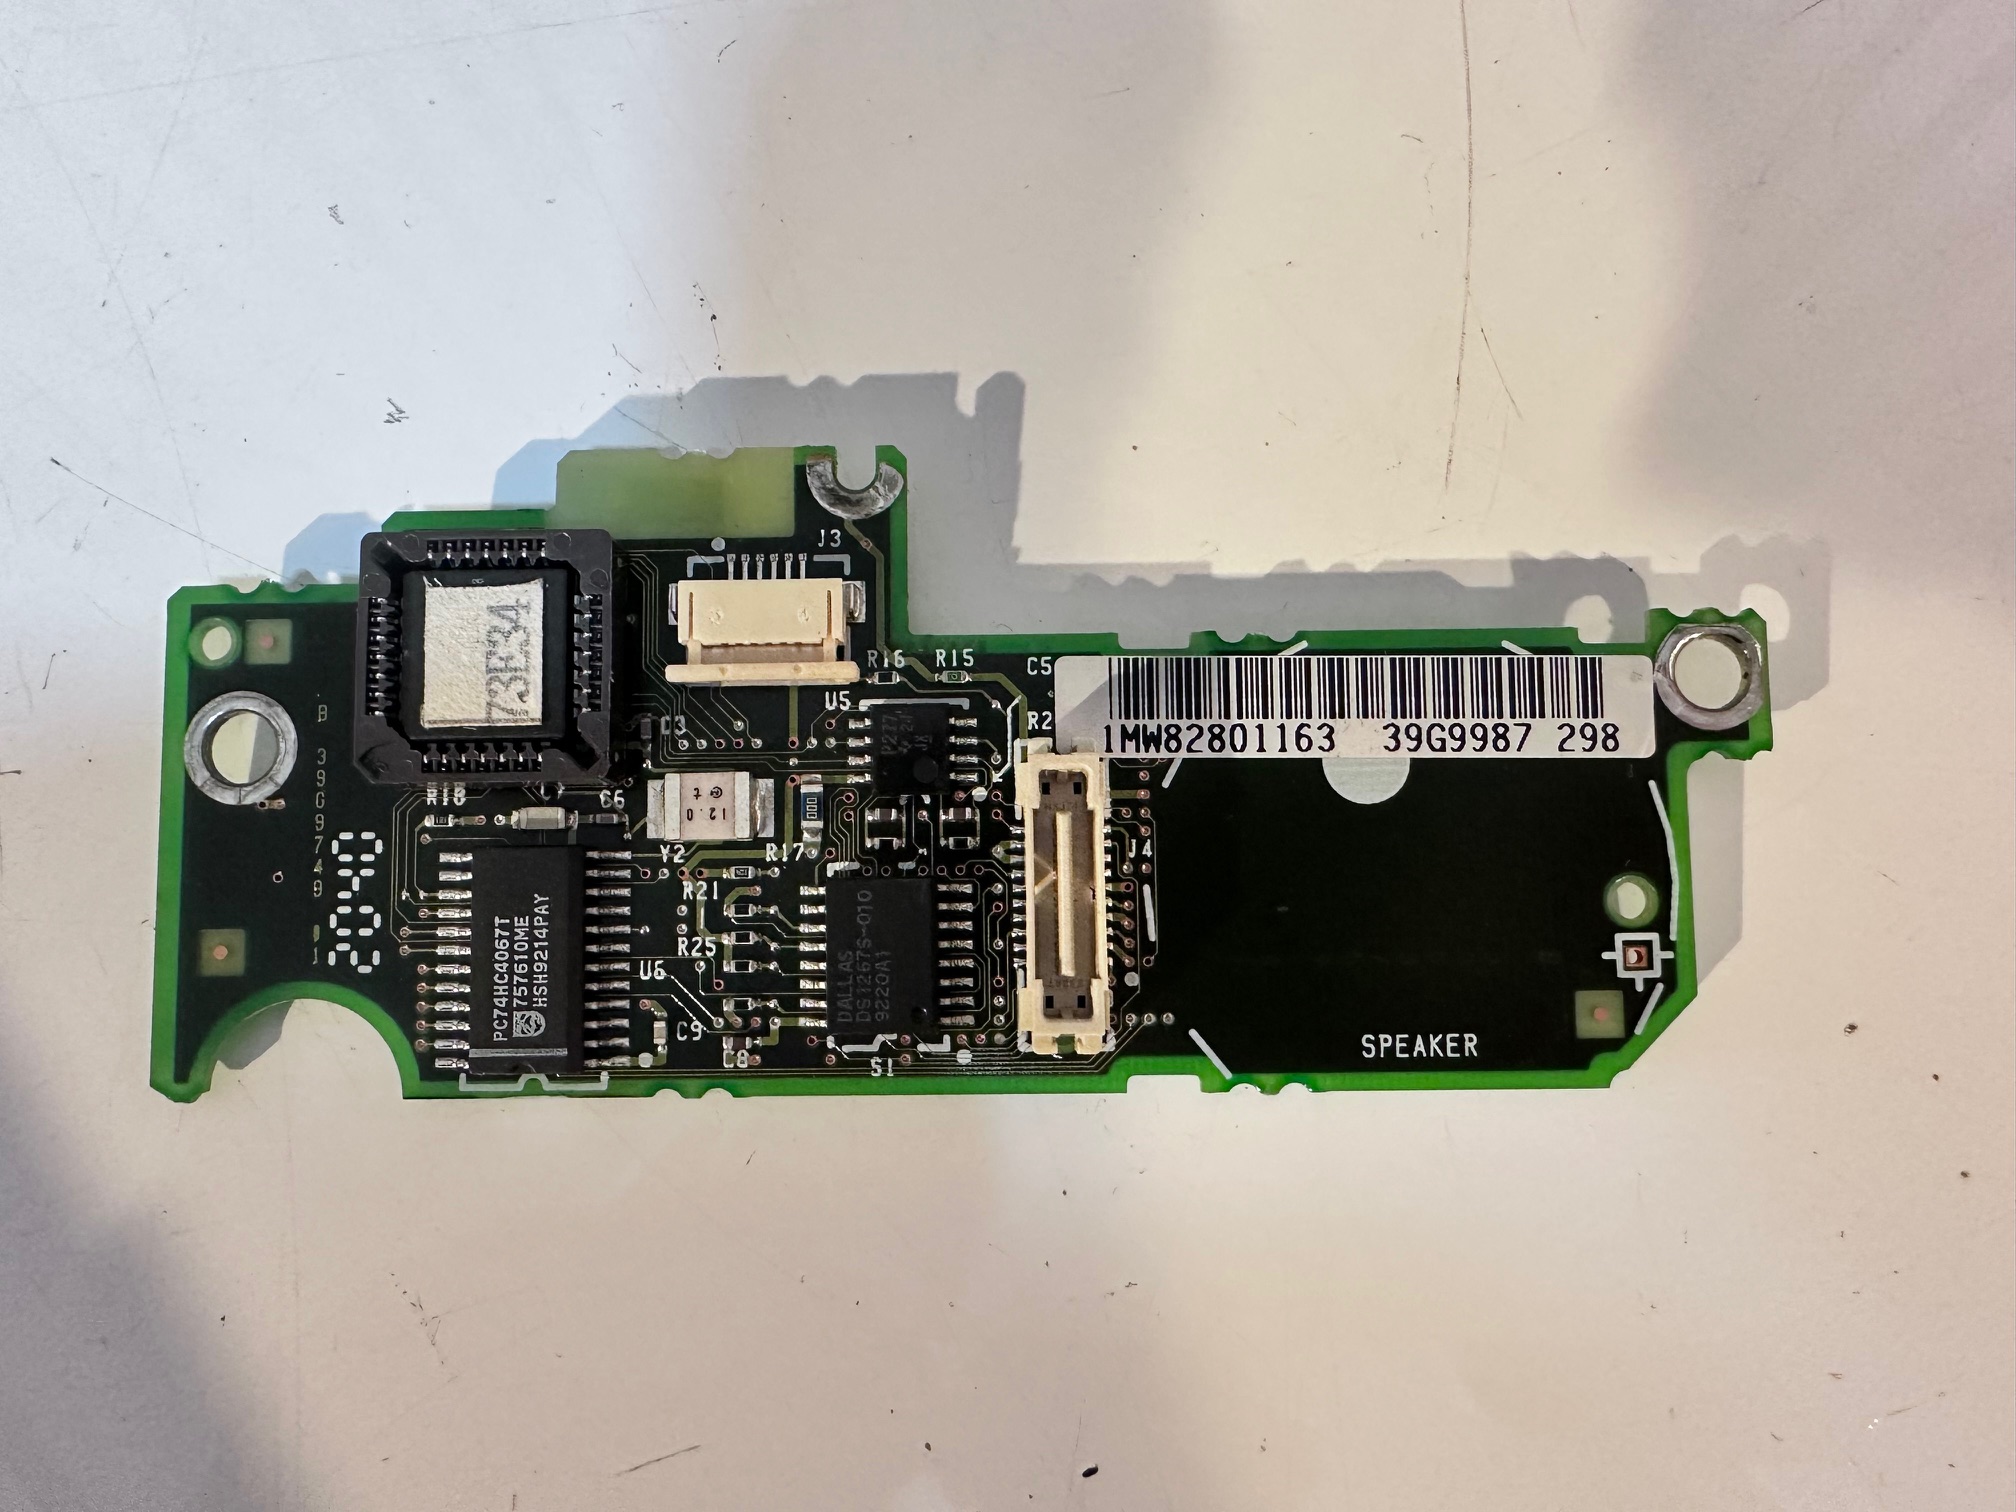
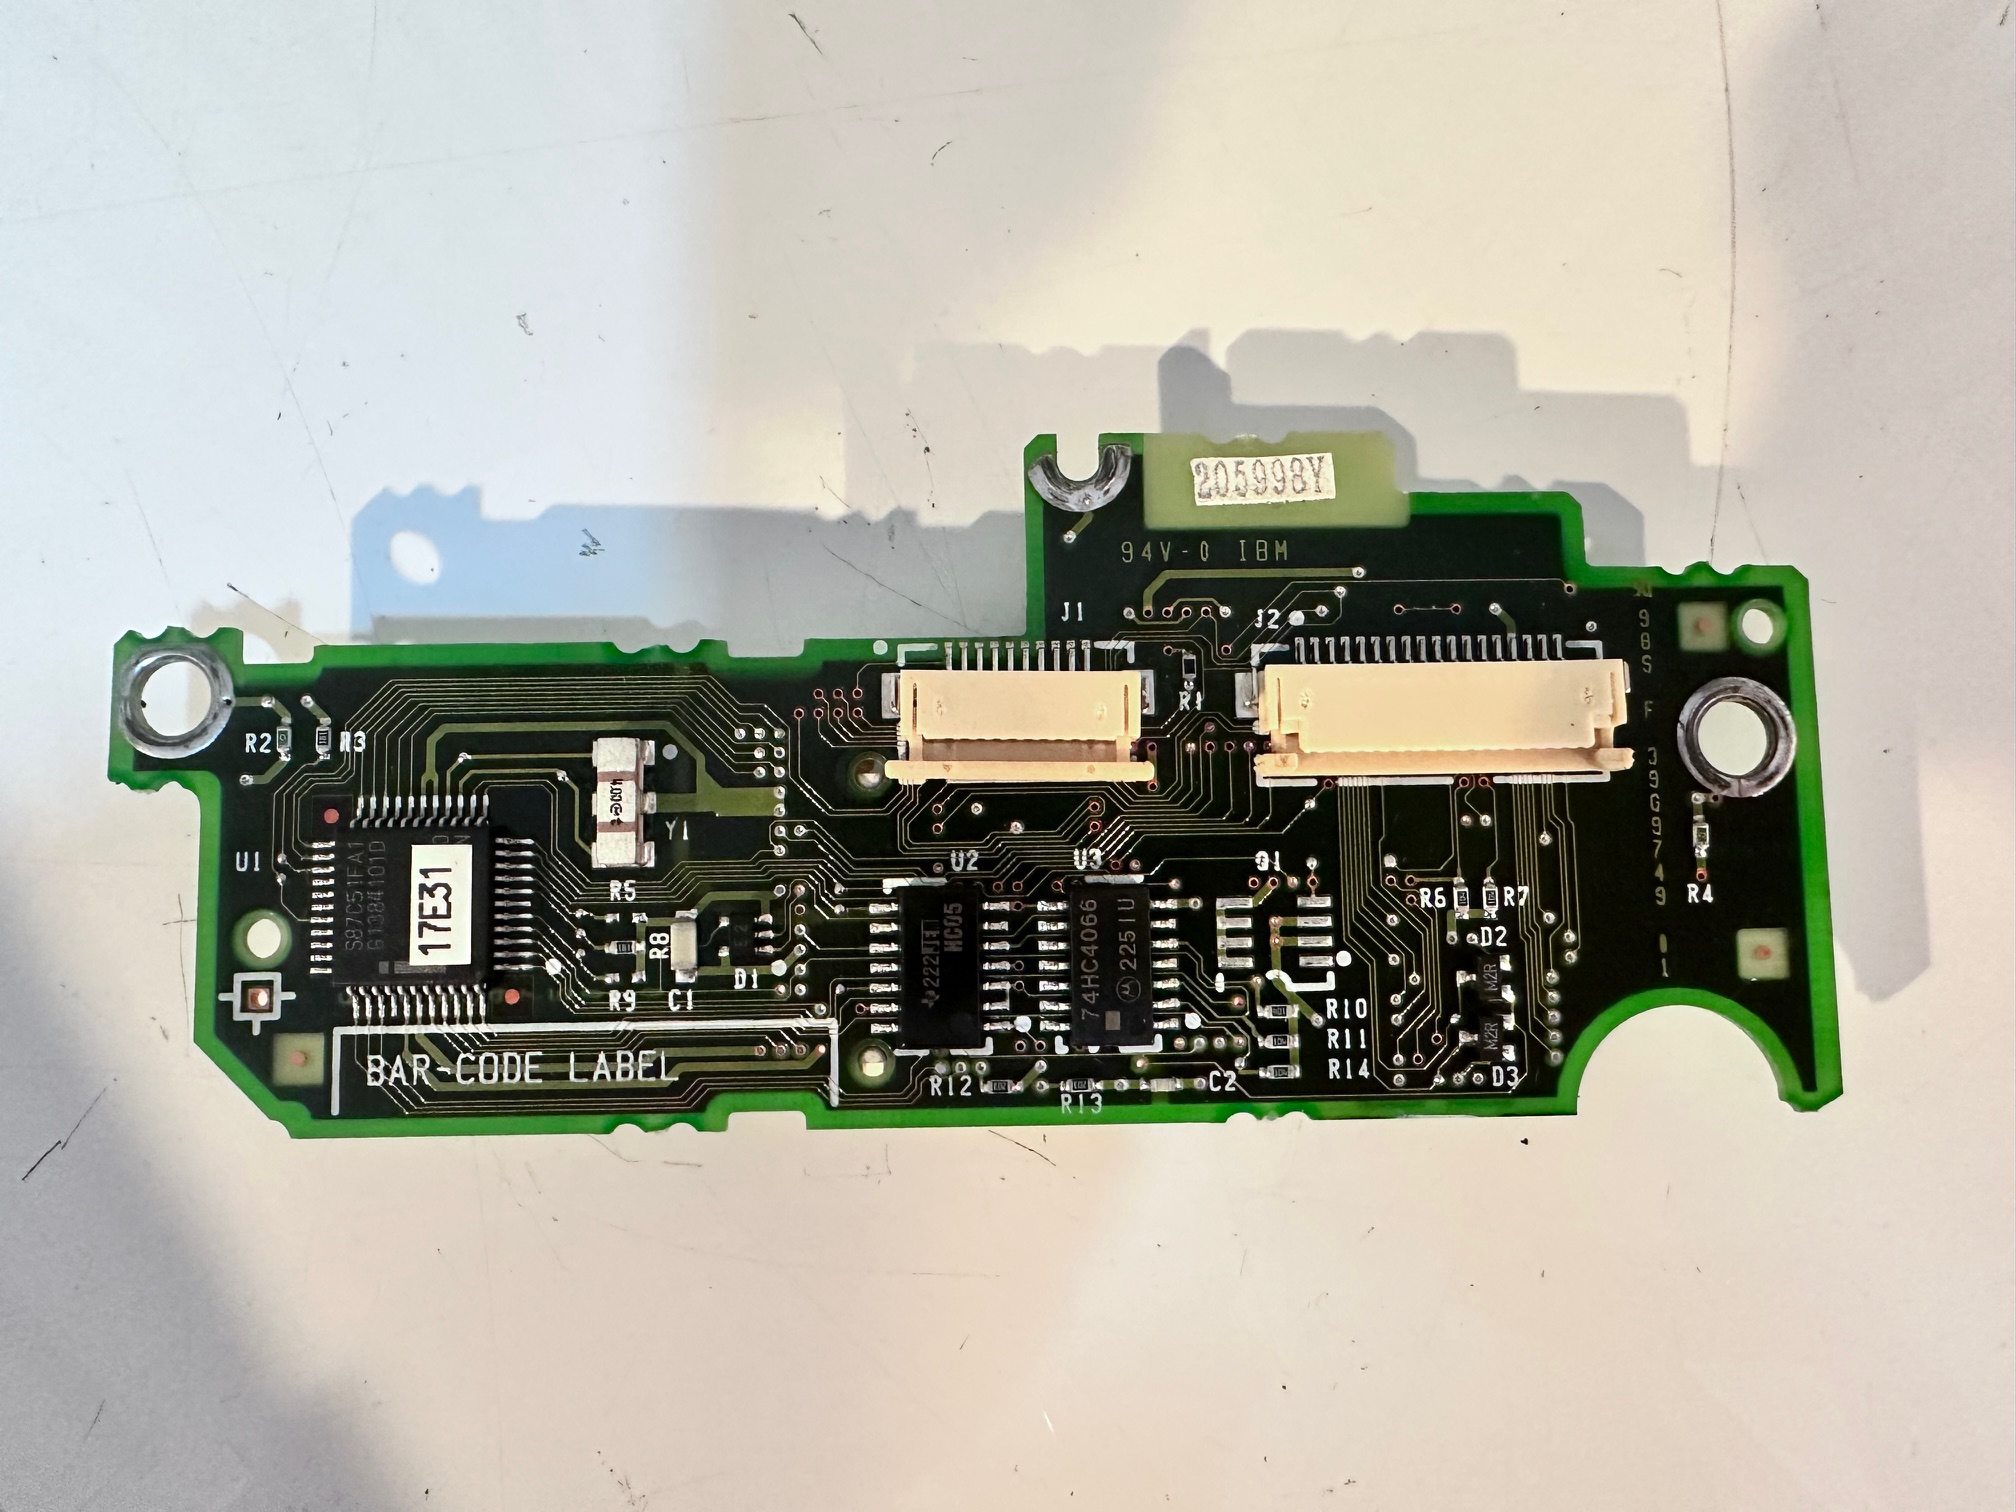
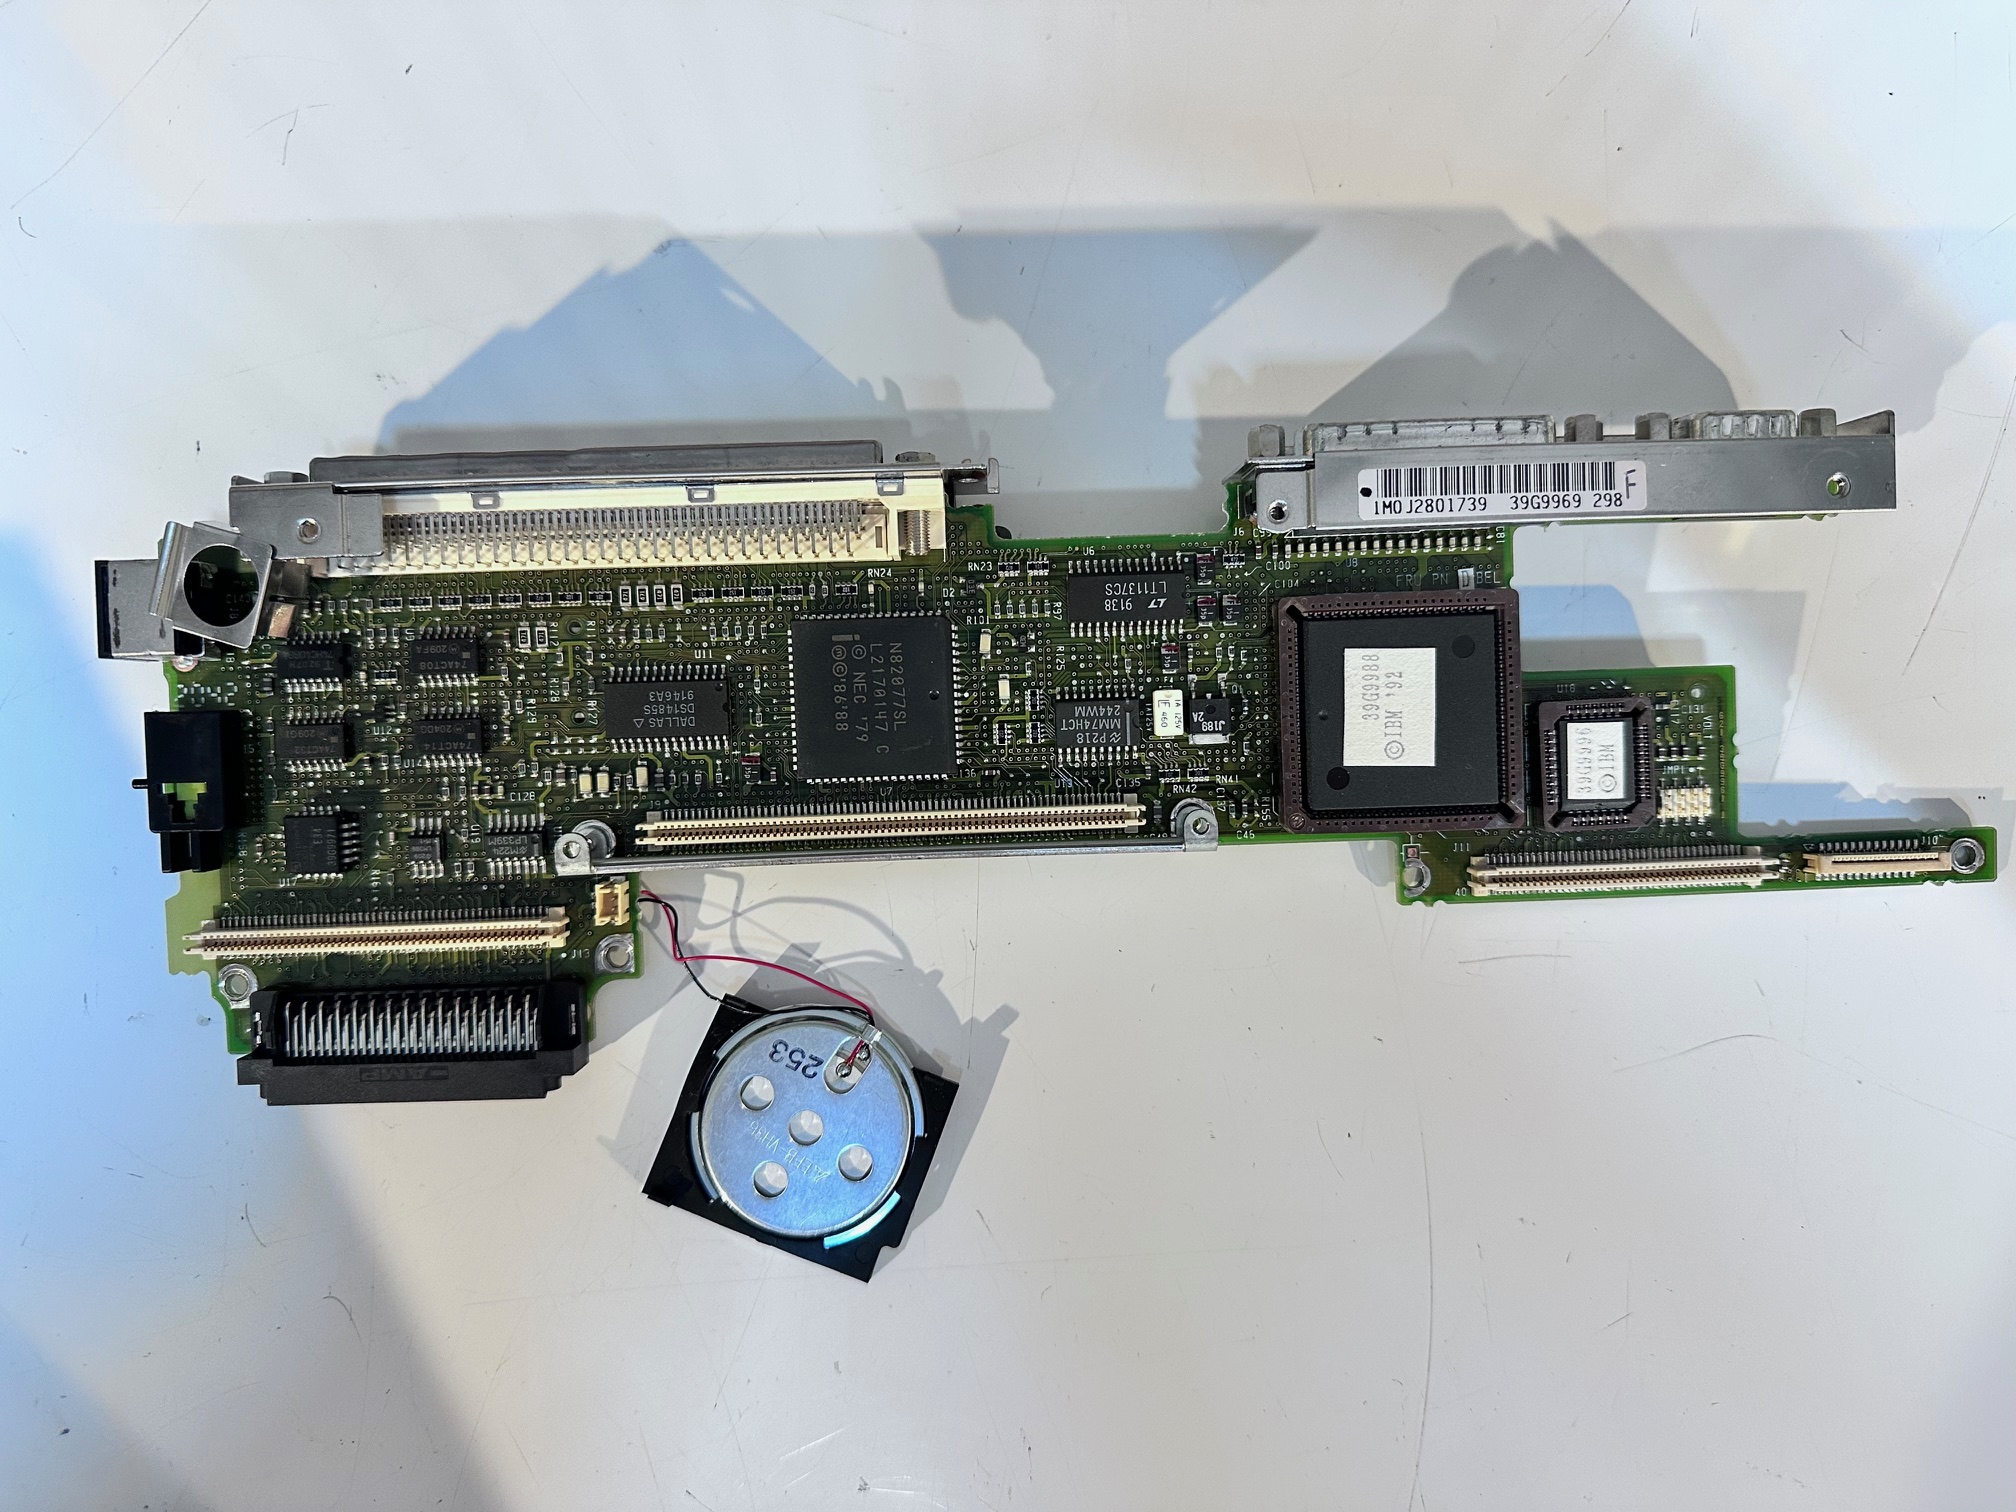
Trackpoint and Keyboard Board:
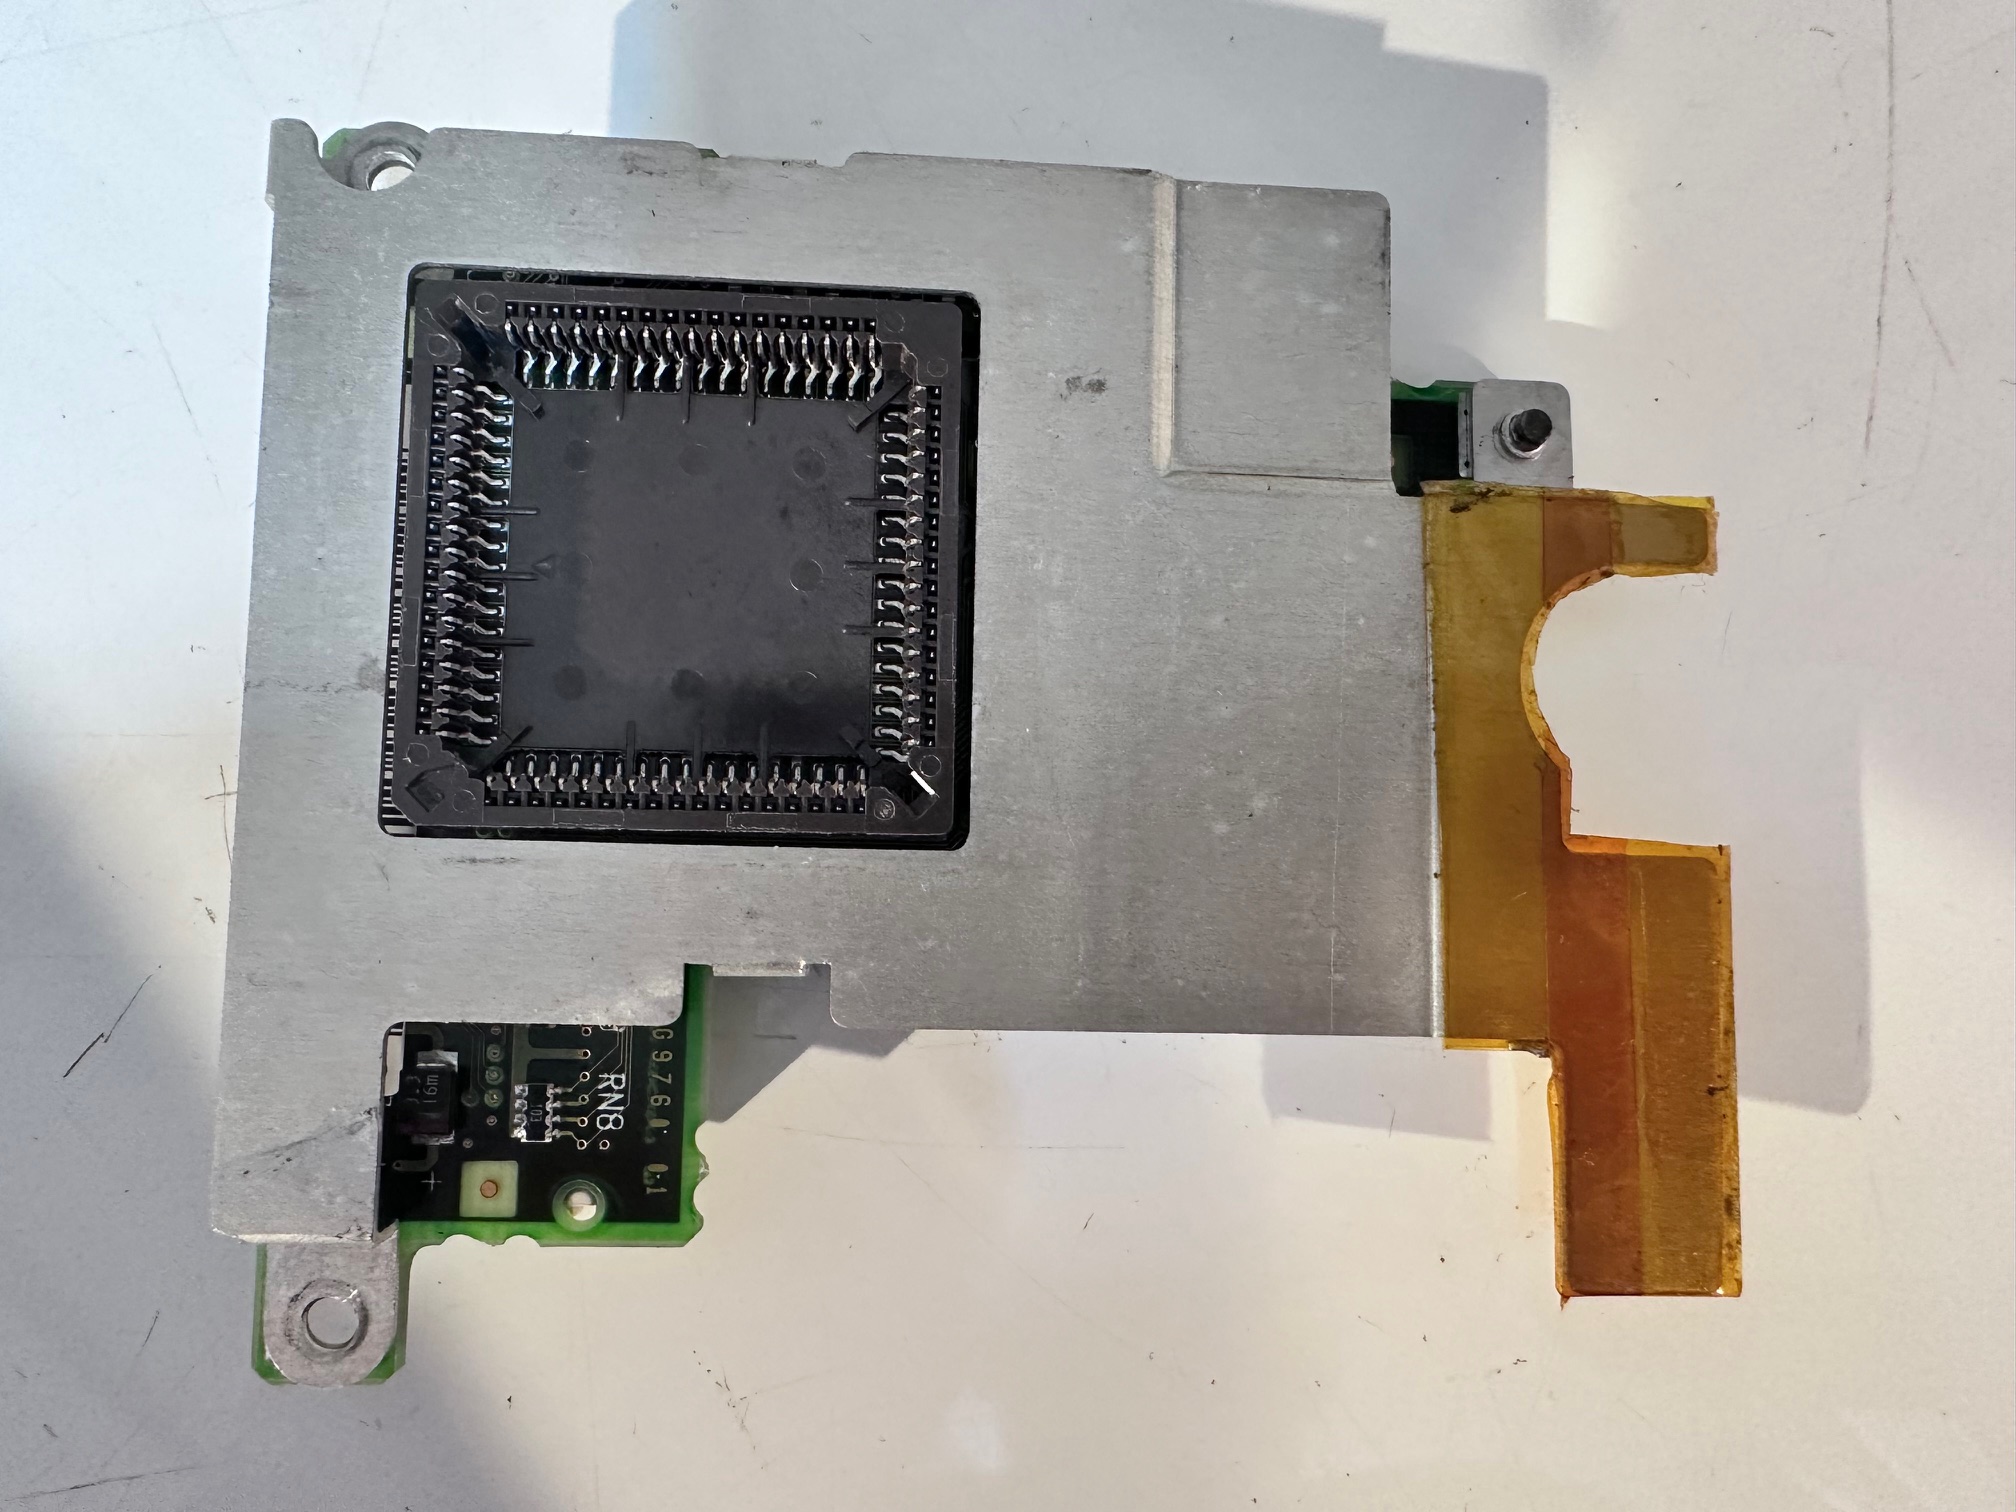
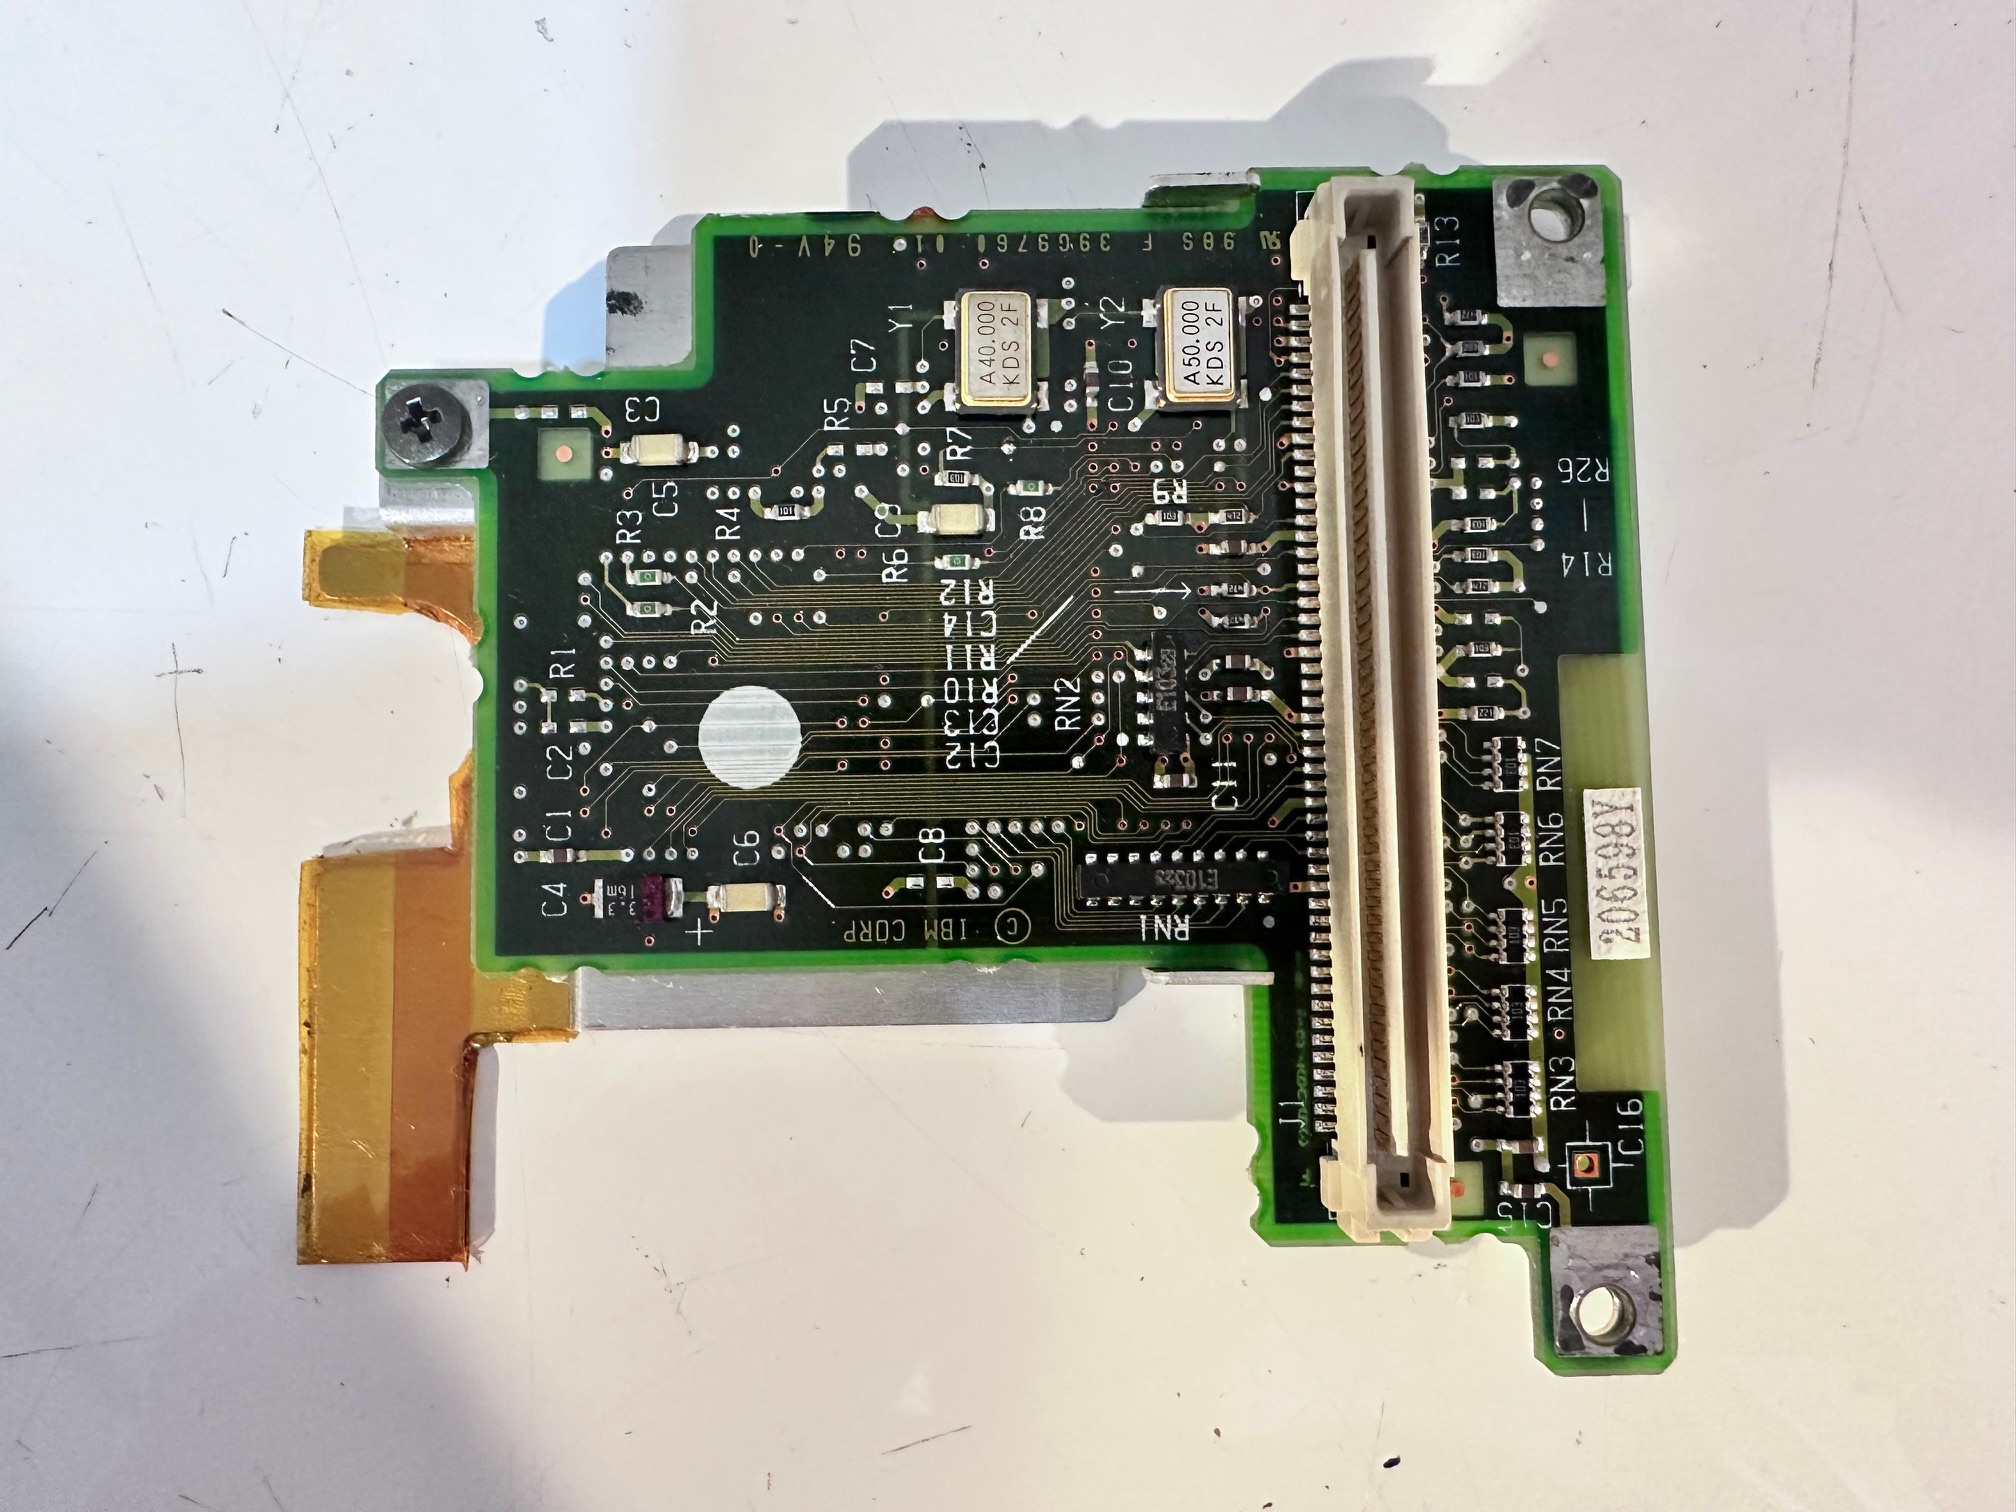
Processor Daughterboard:
Mainboard / Planar:
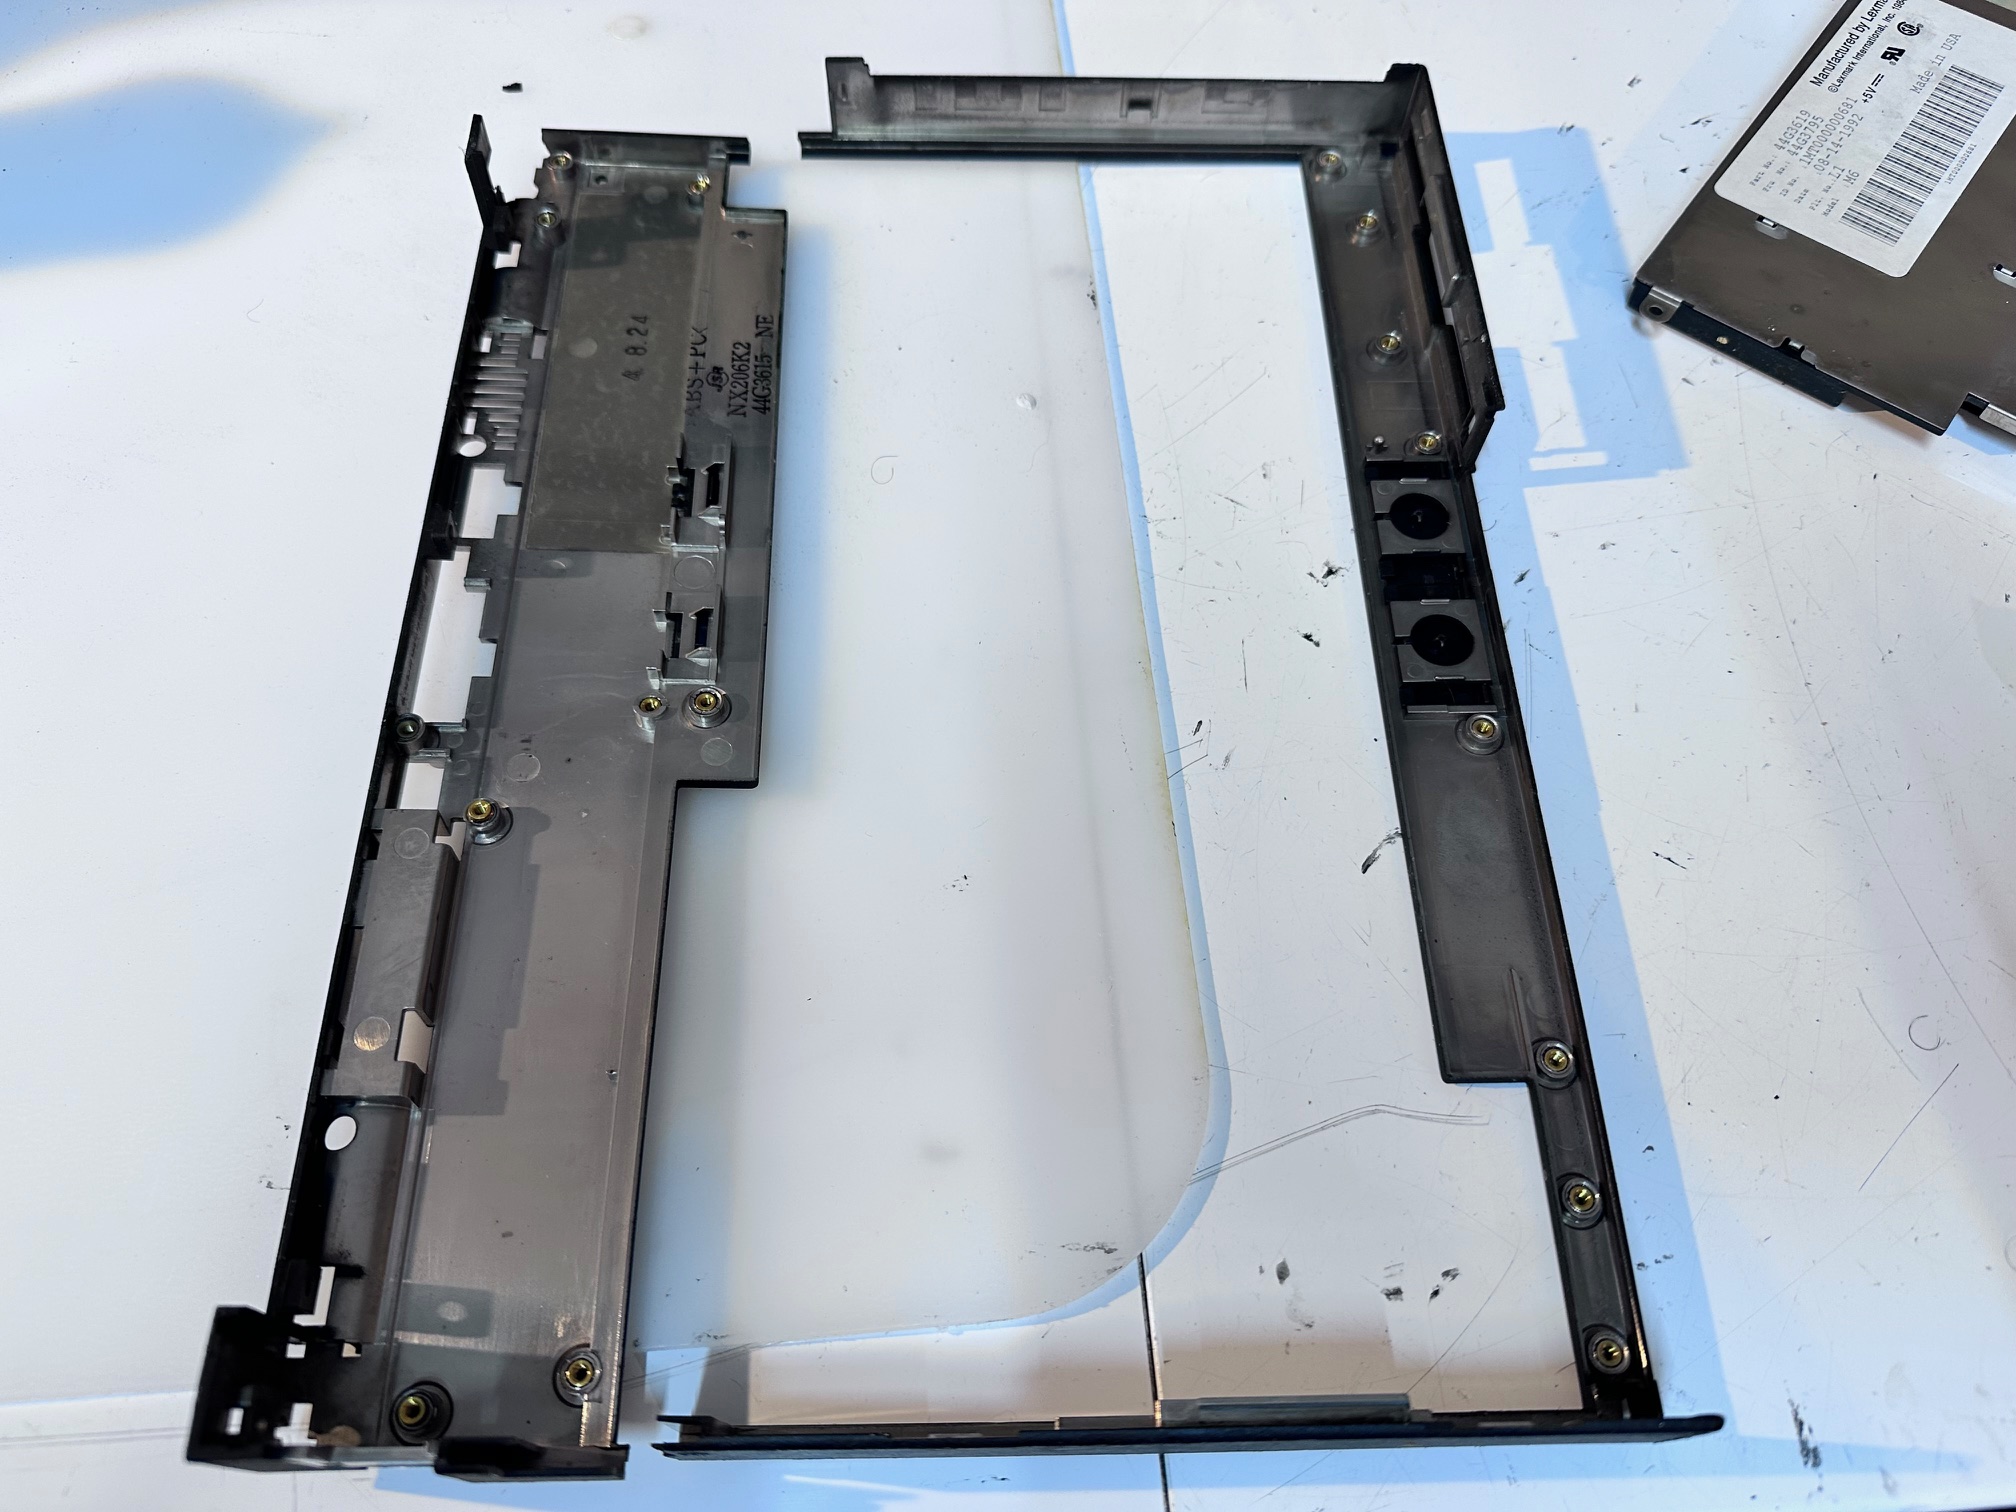
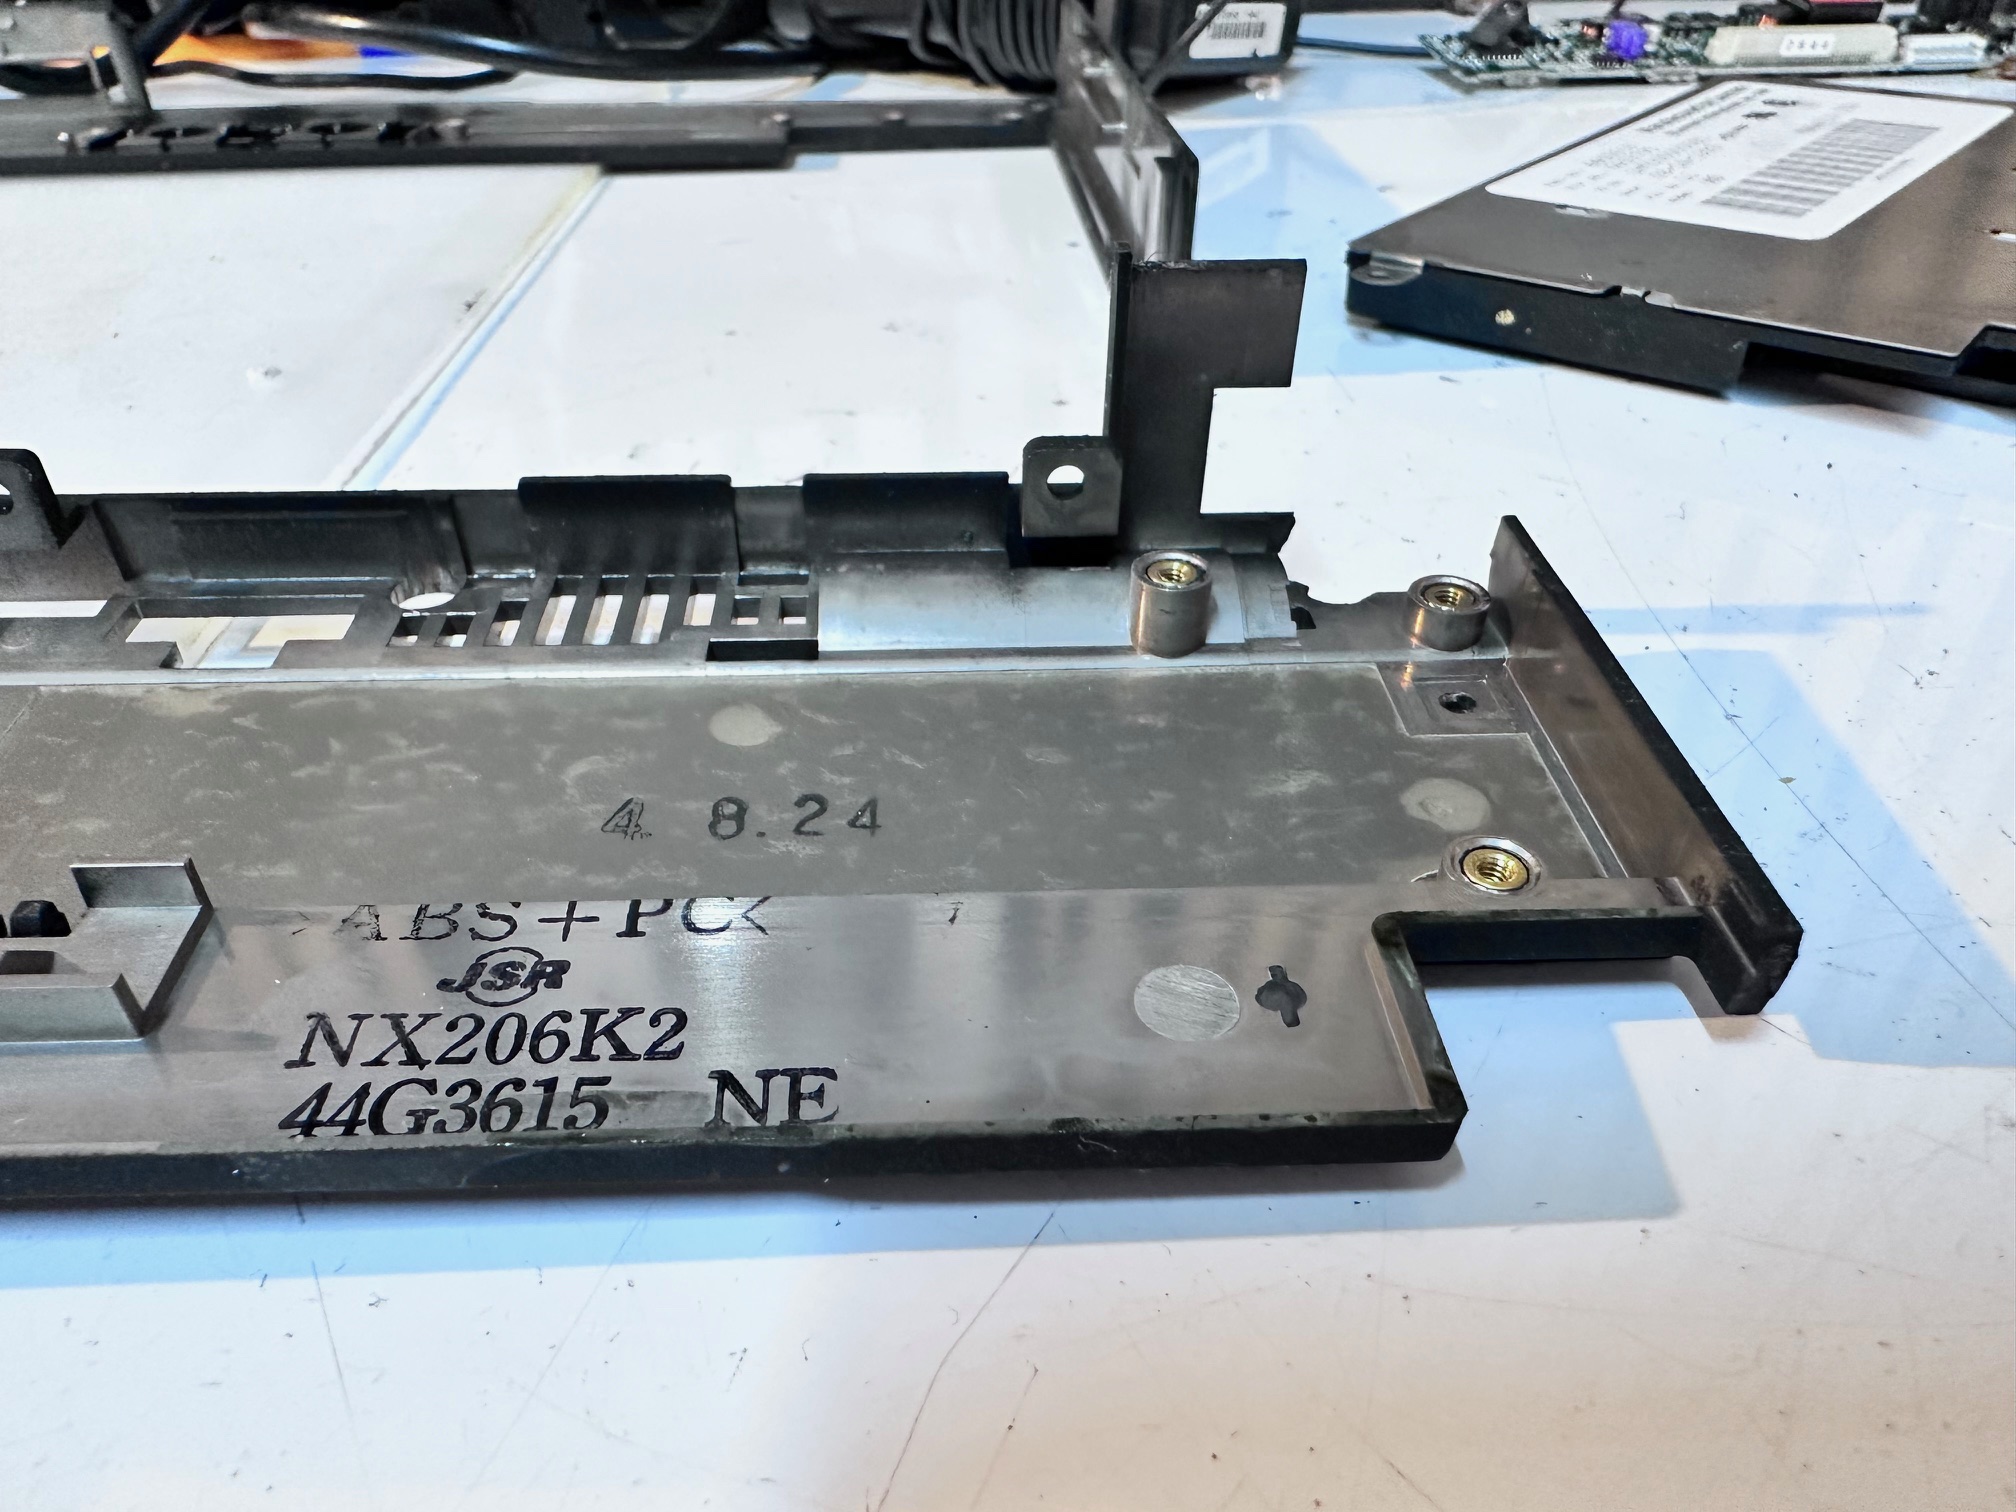
Keyboard Bezel and Base for Hinges:
This is the base (mine is snapped in half) which is a first impression of what we're dealing with:
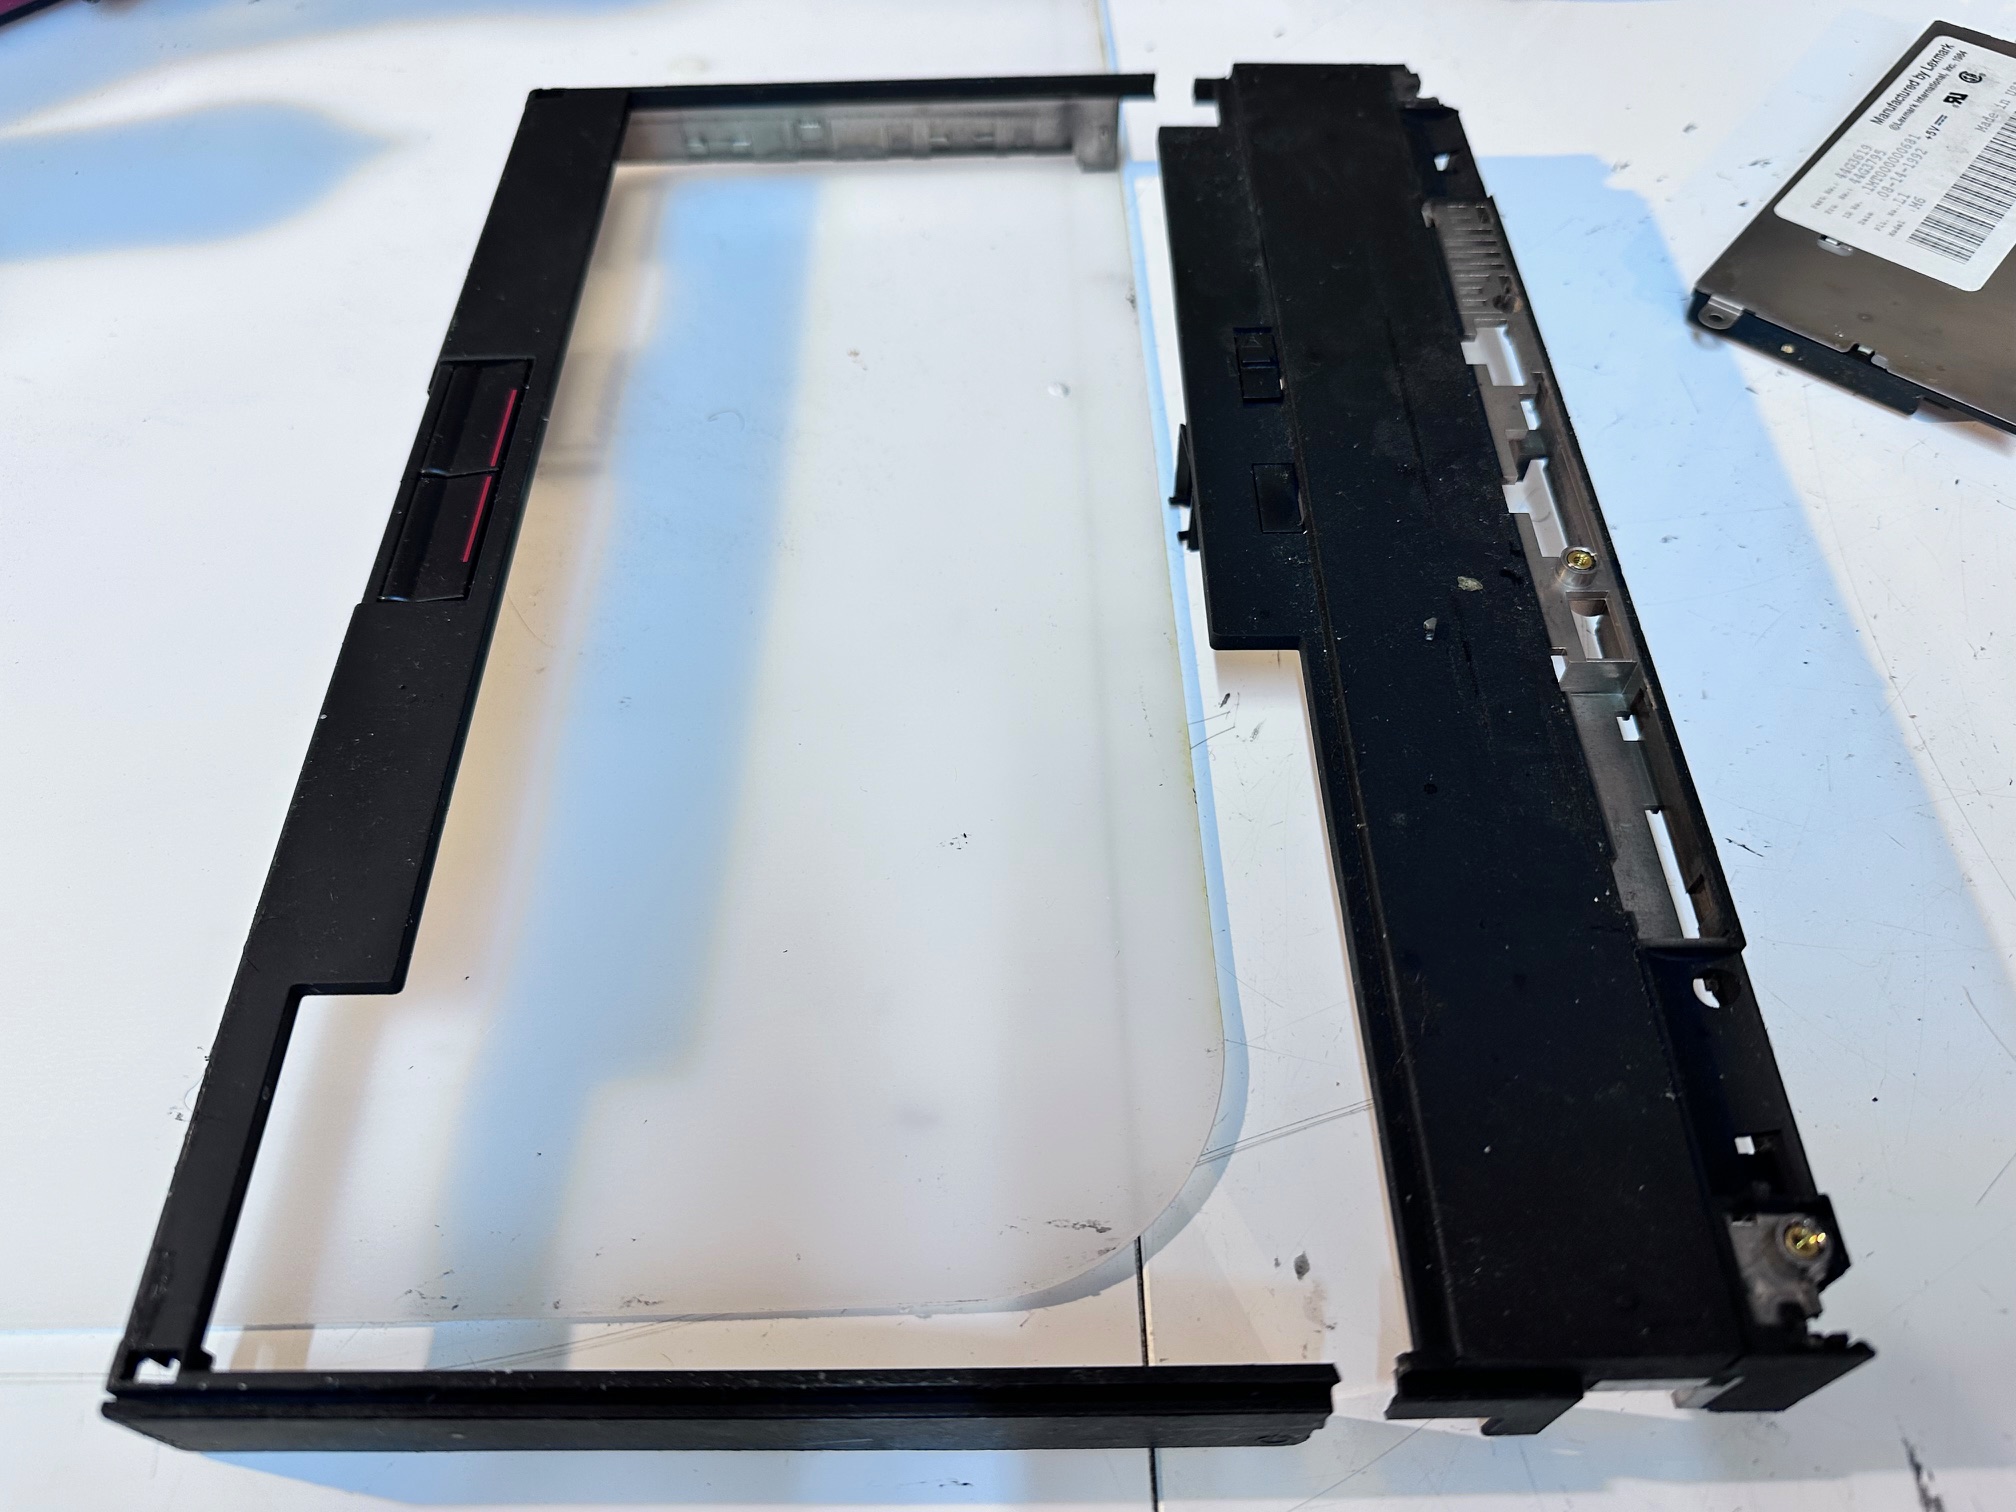
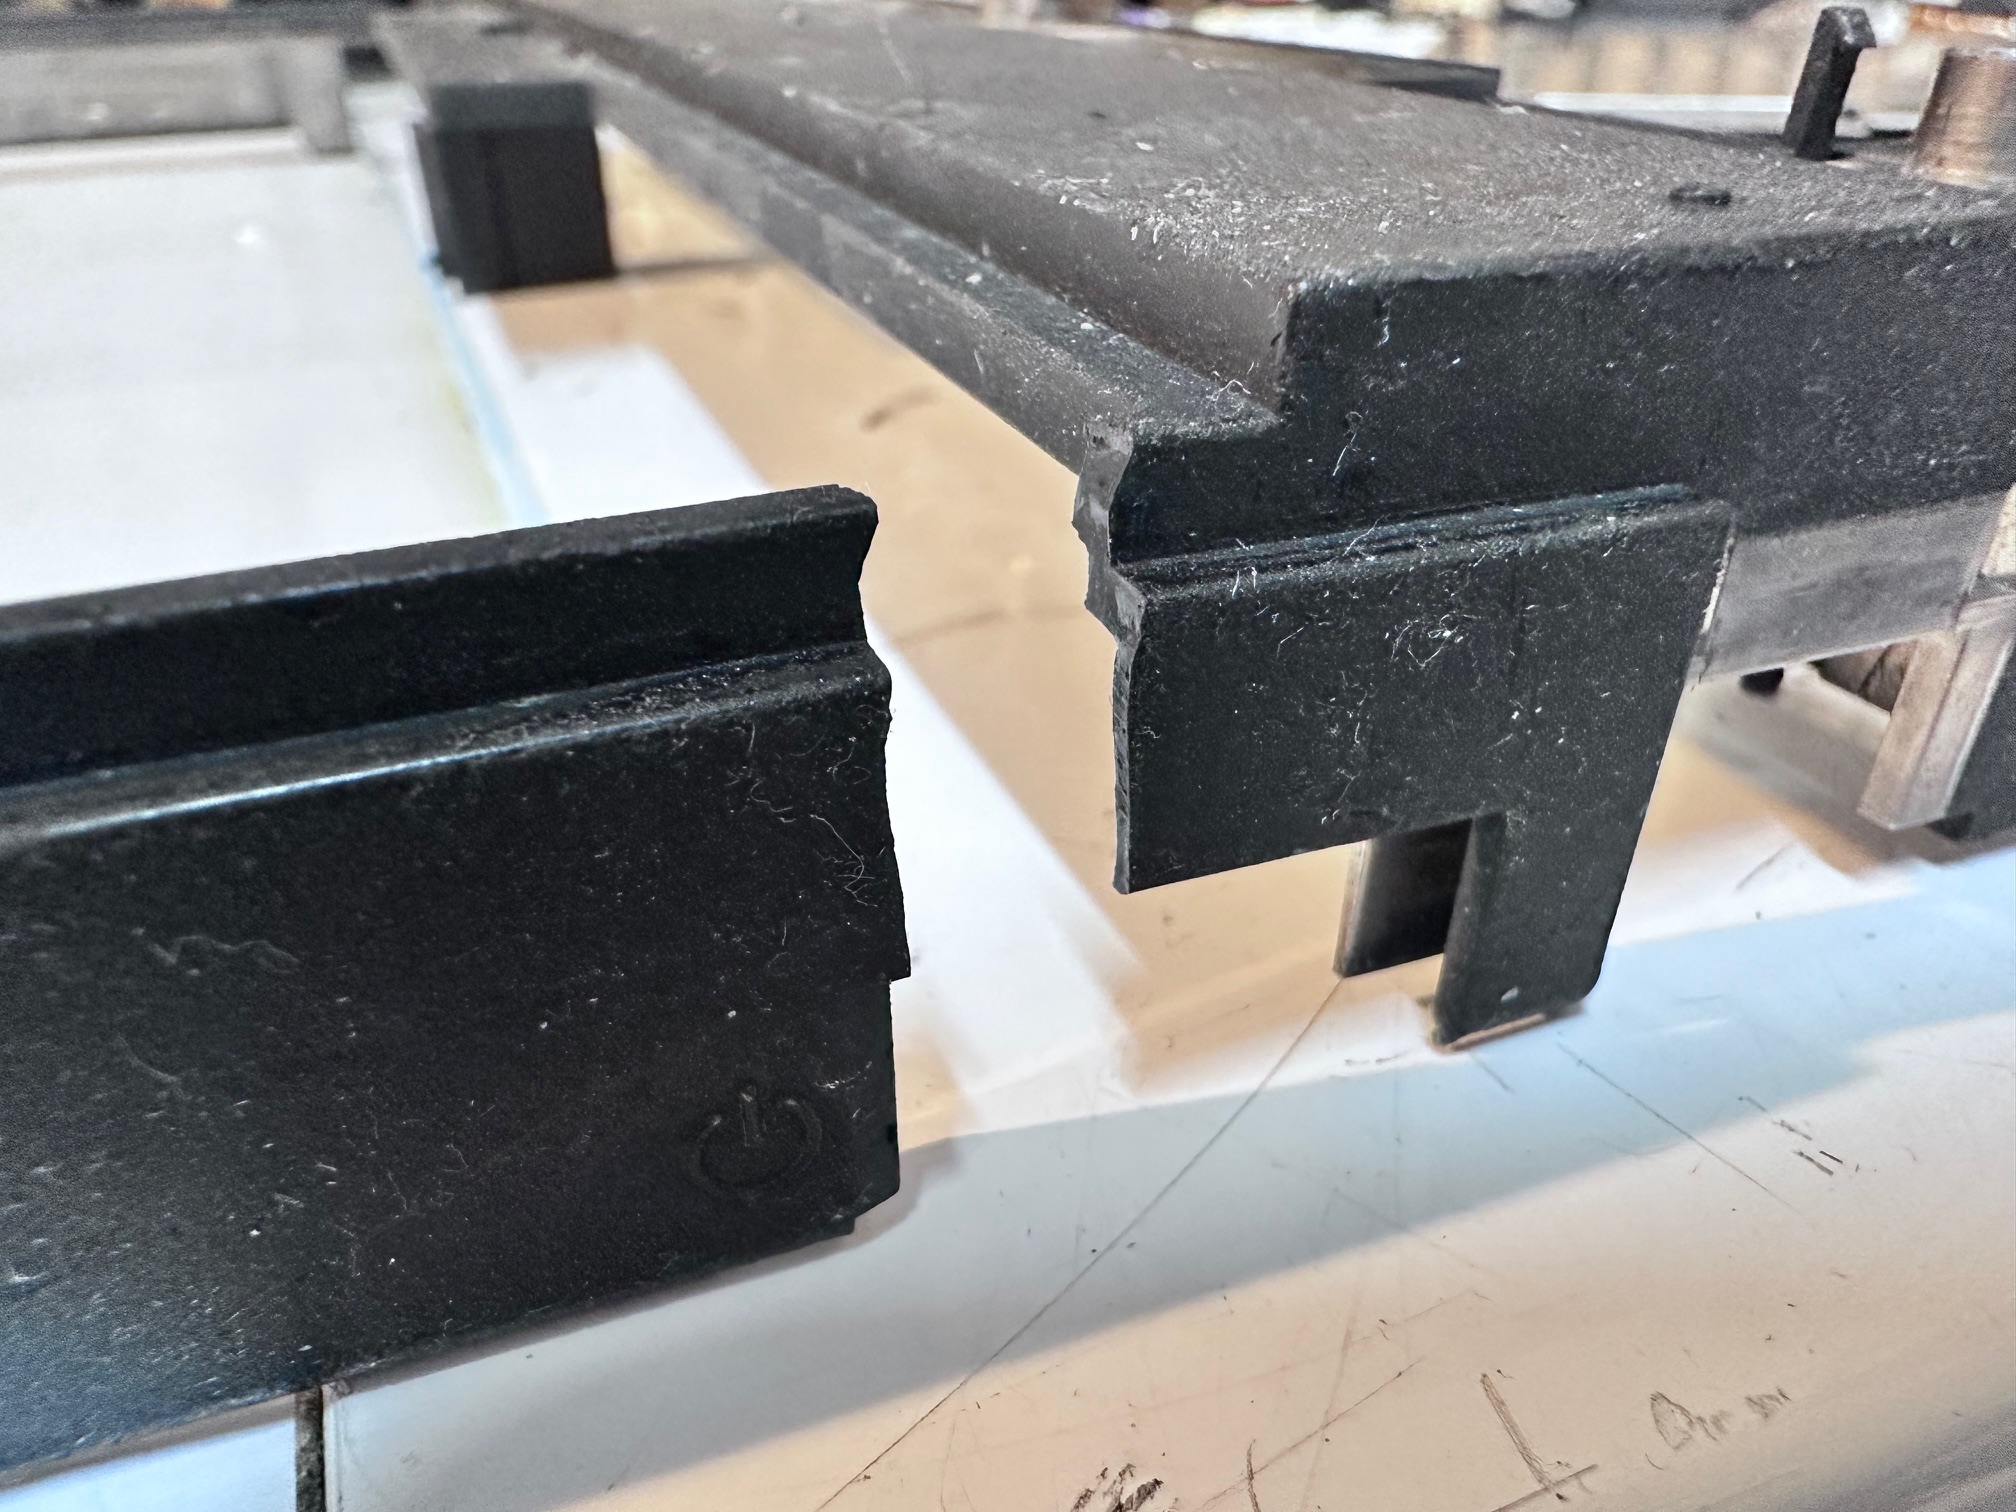
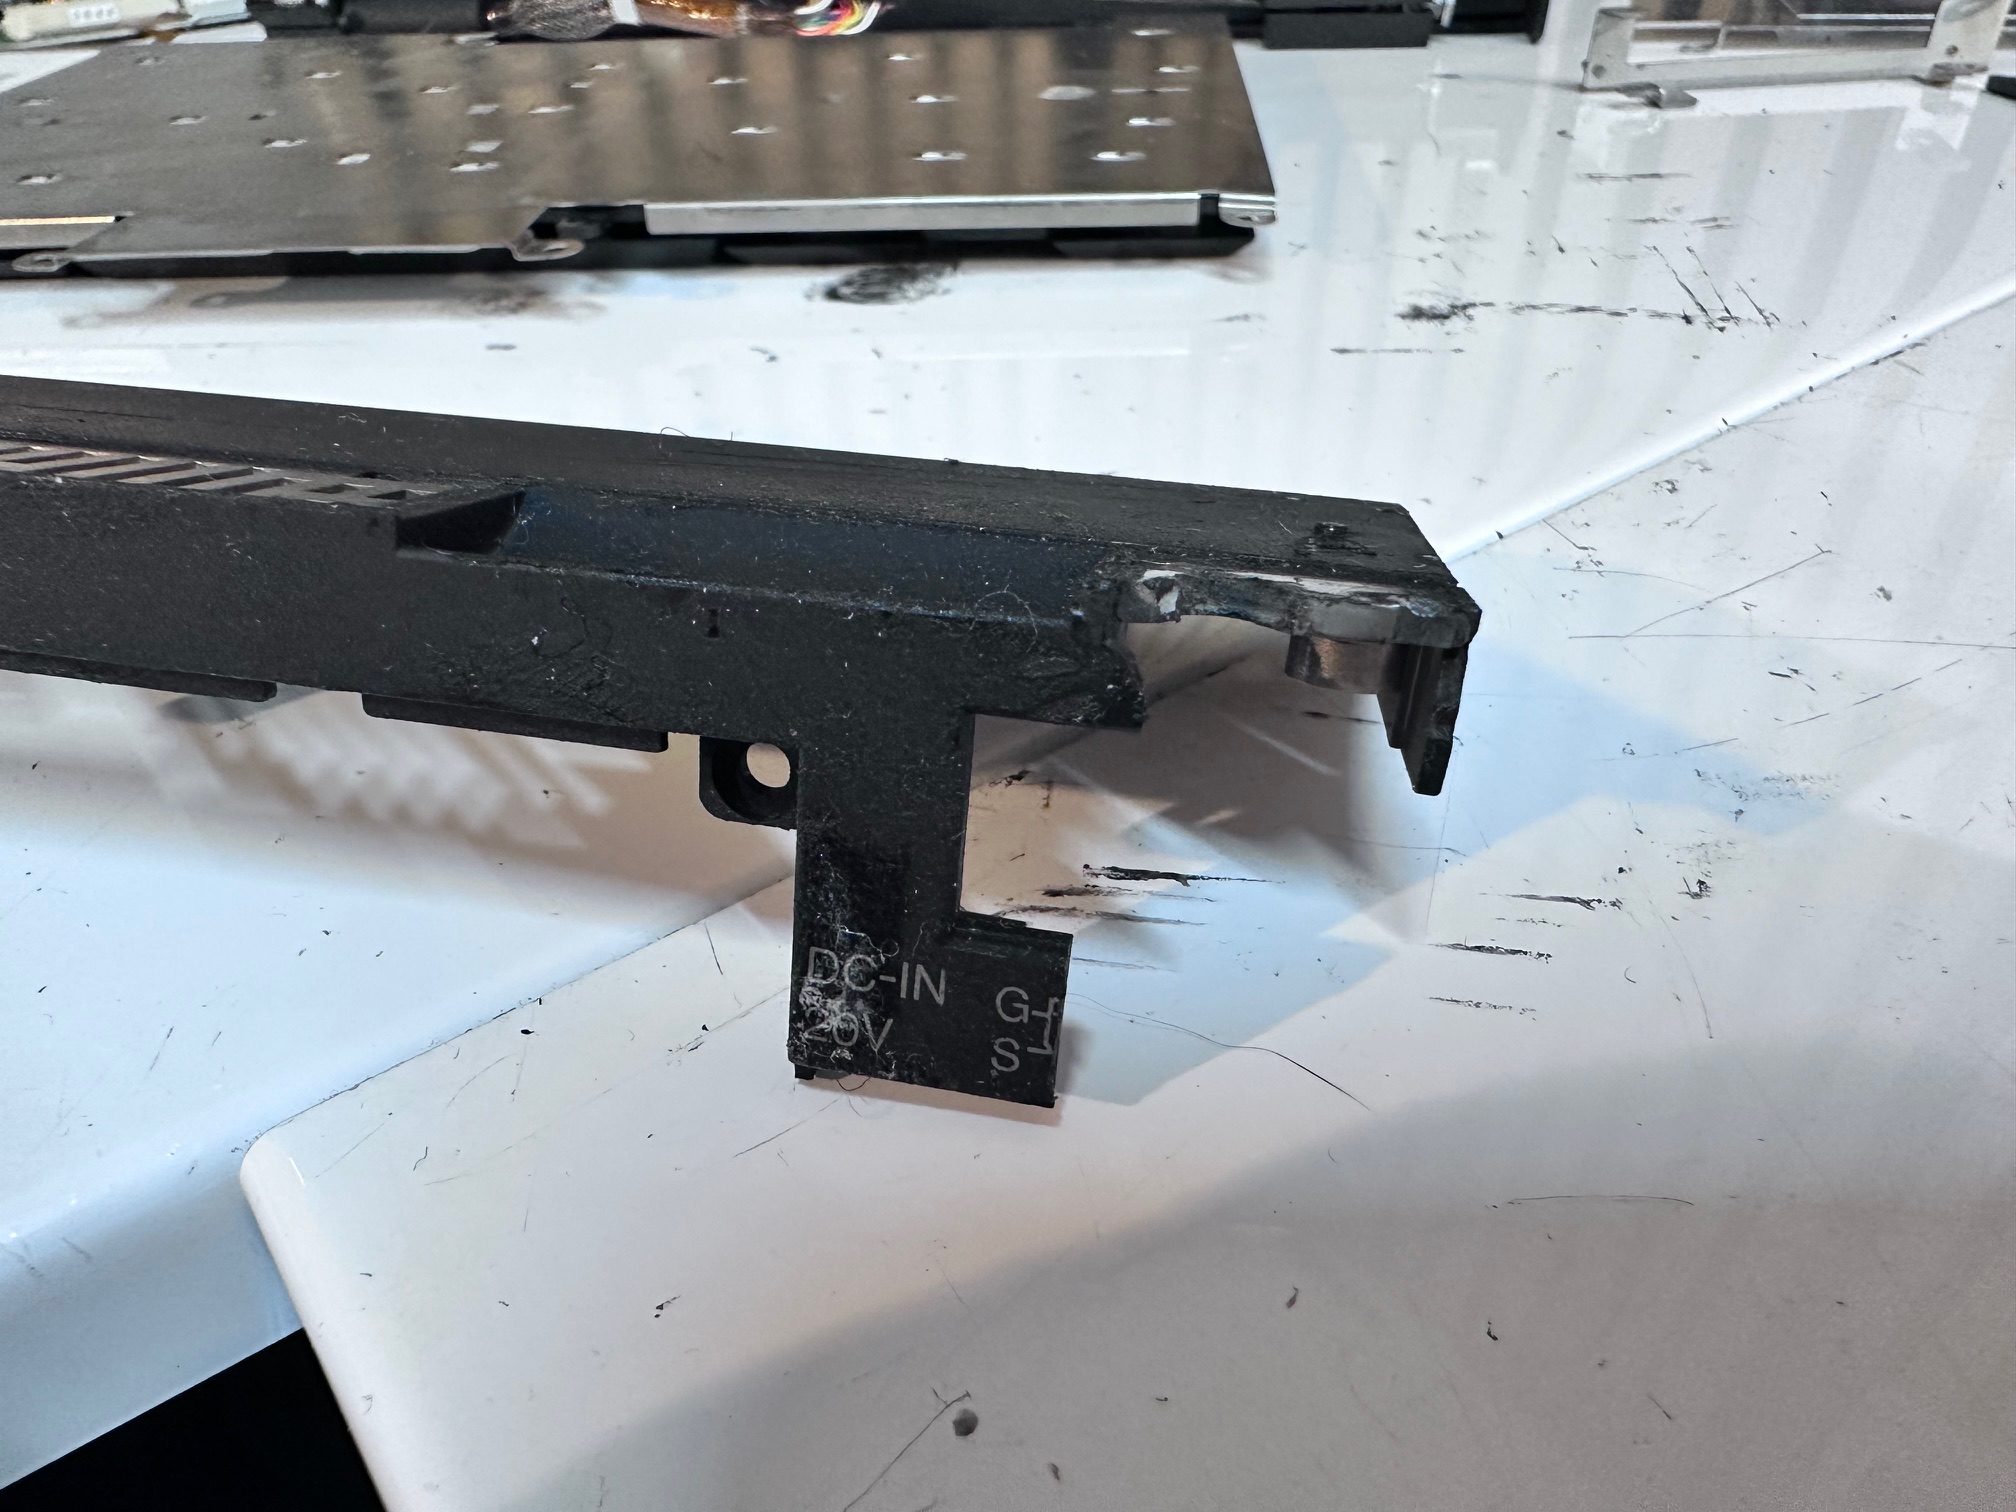
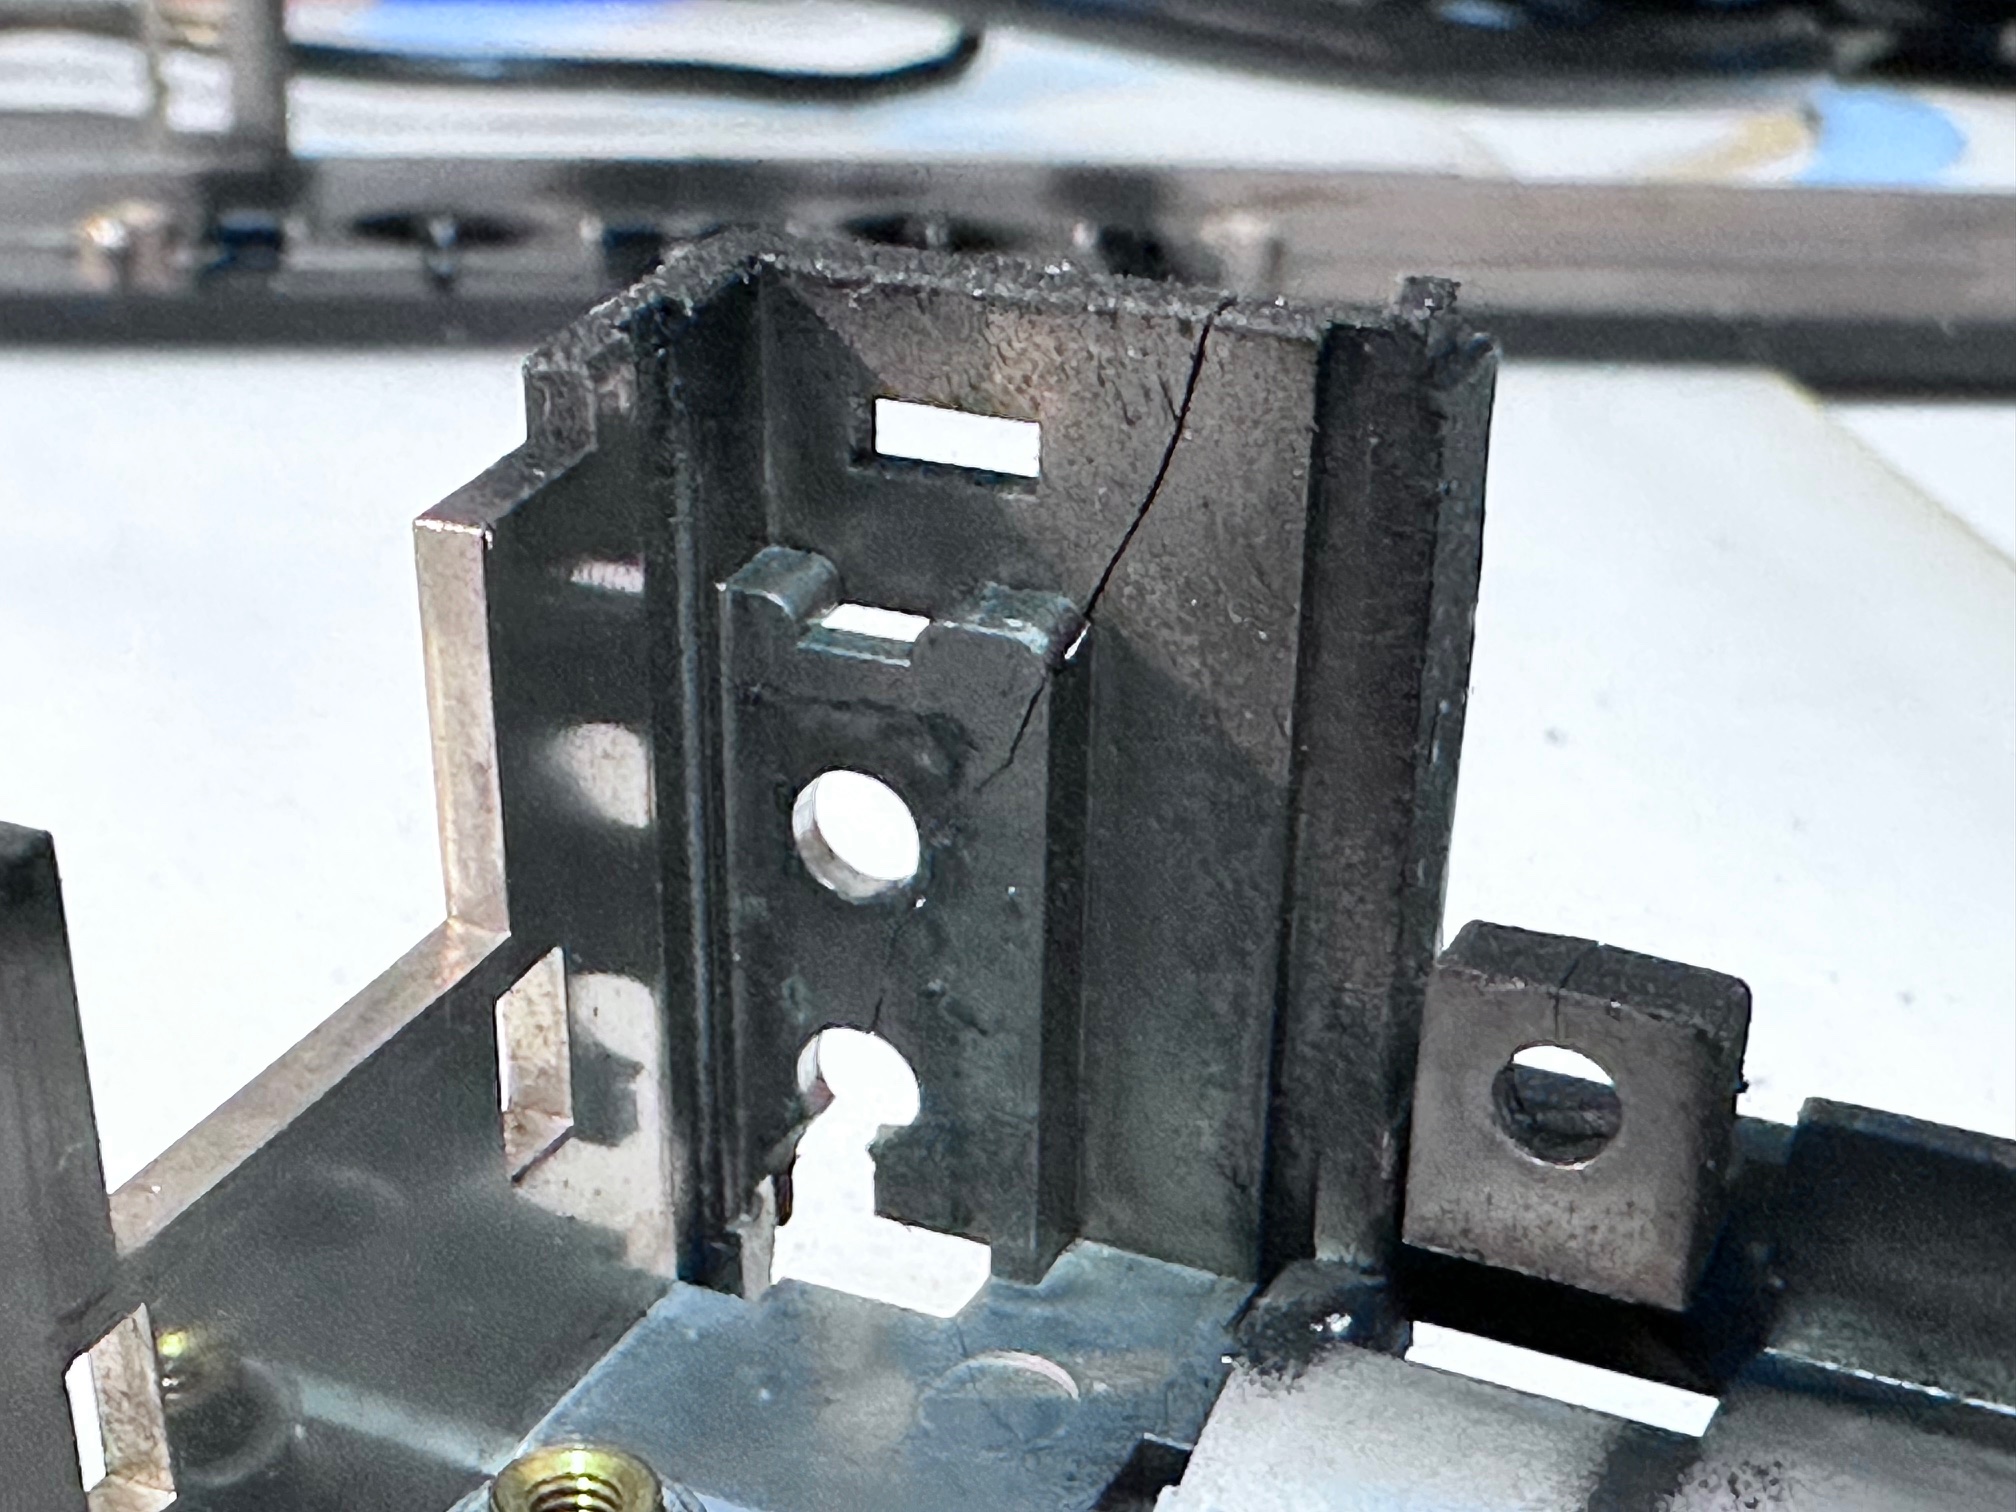
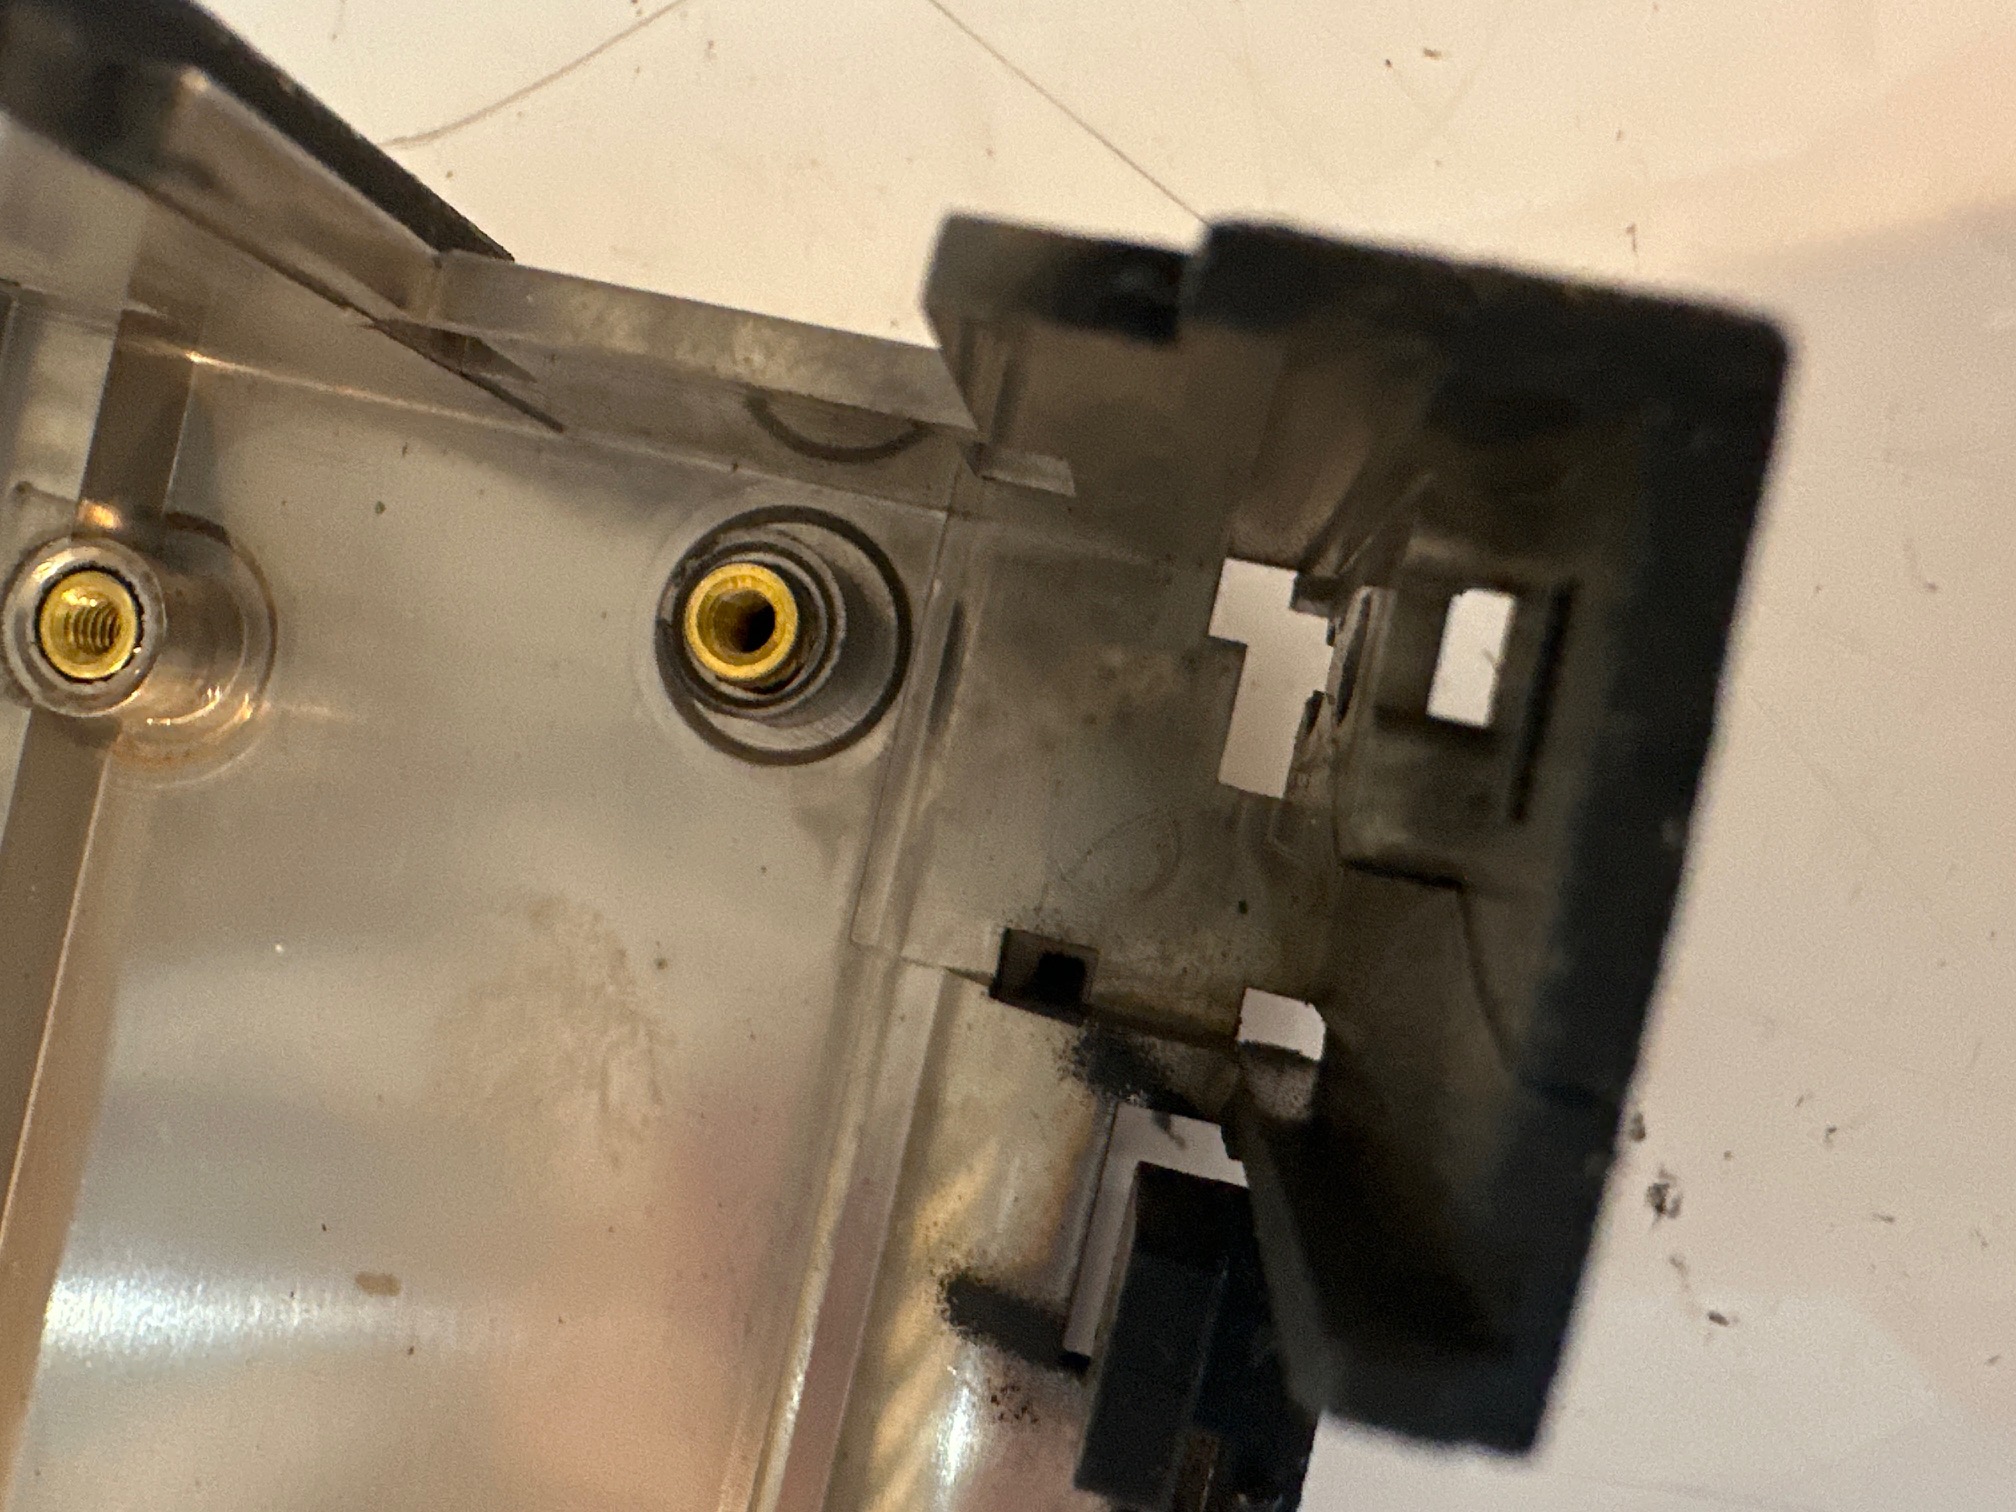
If you've rotated the machine around 180-degrees, here is what the back side looks like on the left and (snapped) right:
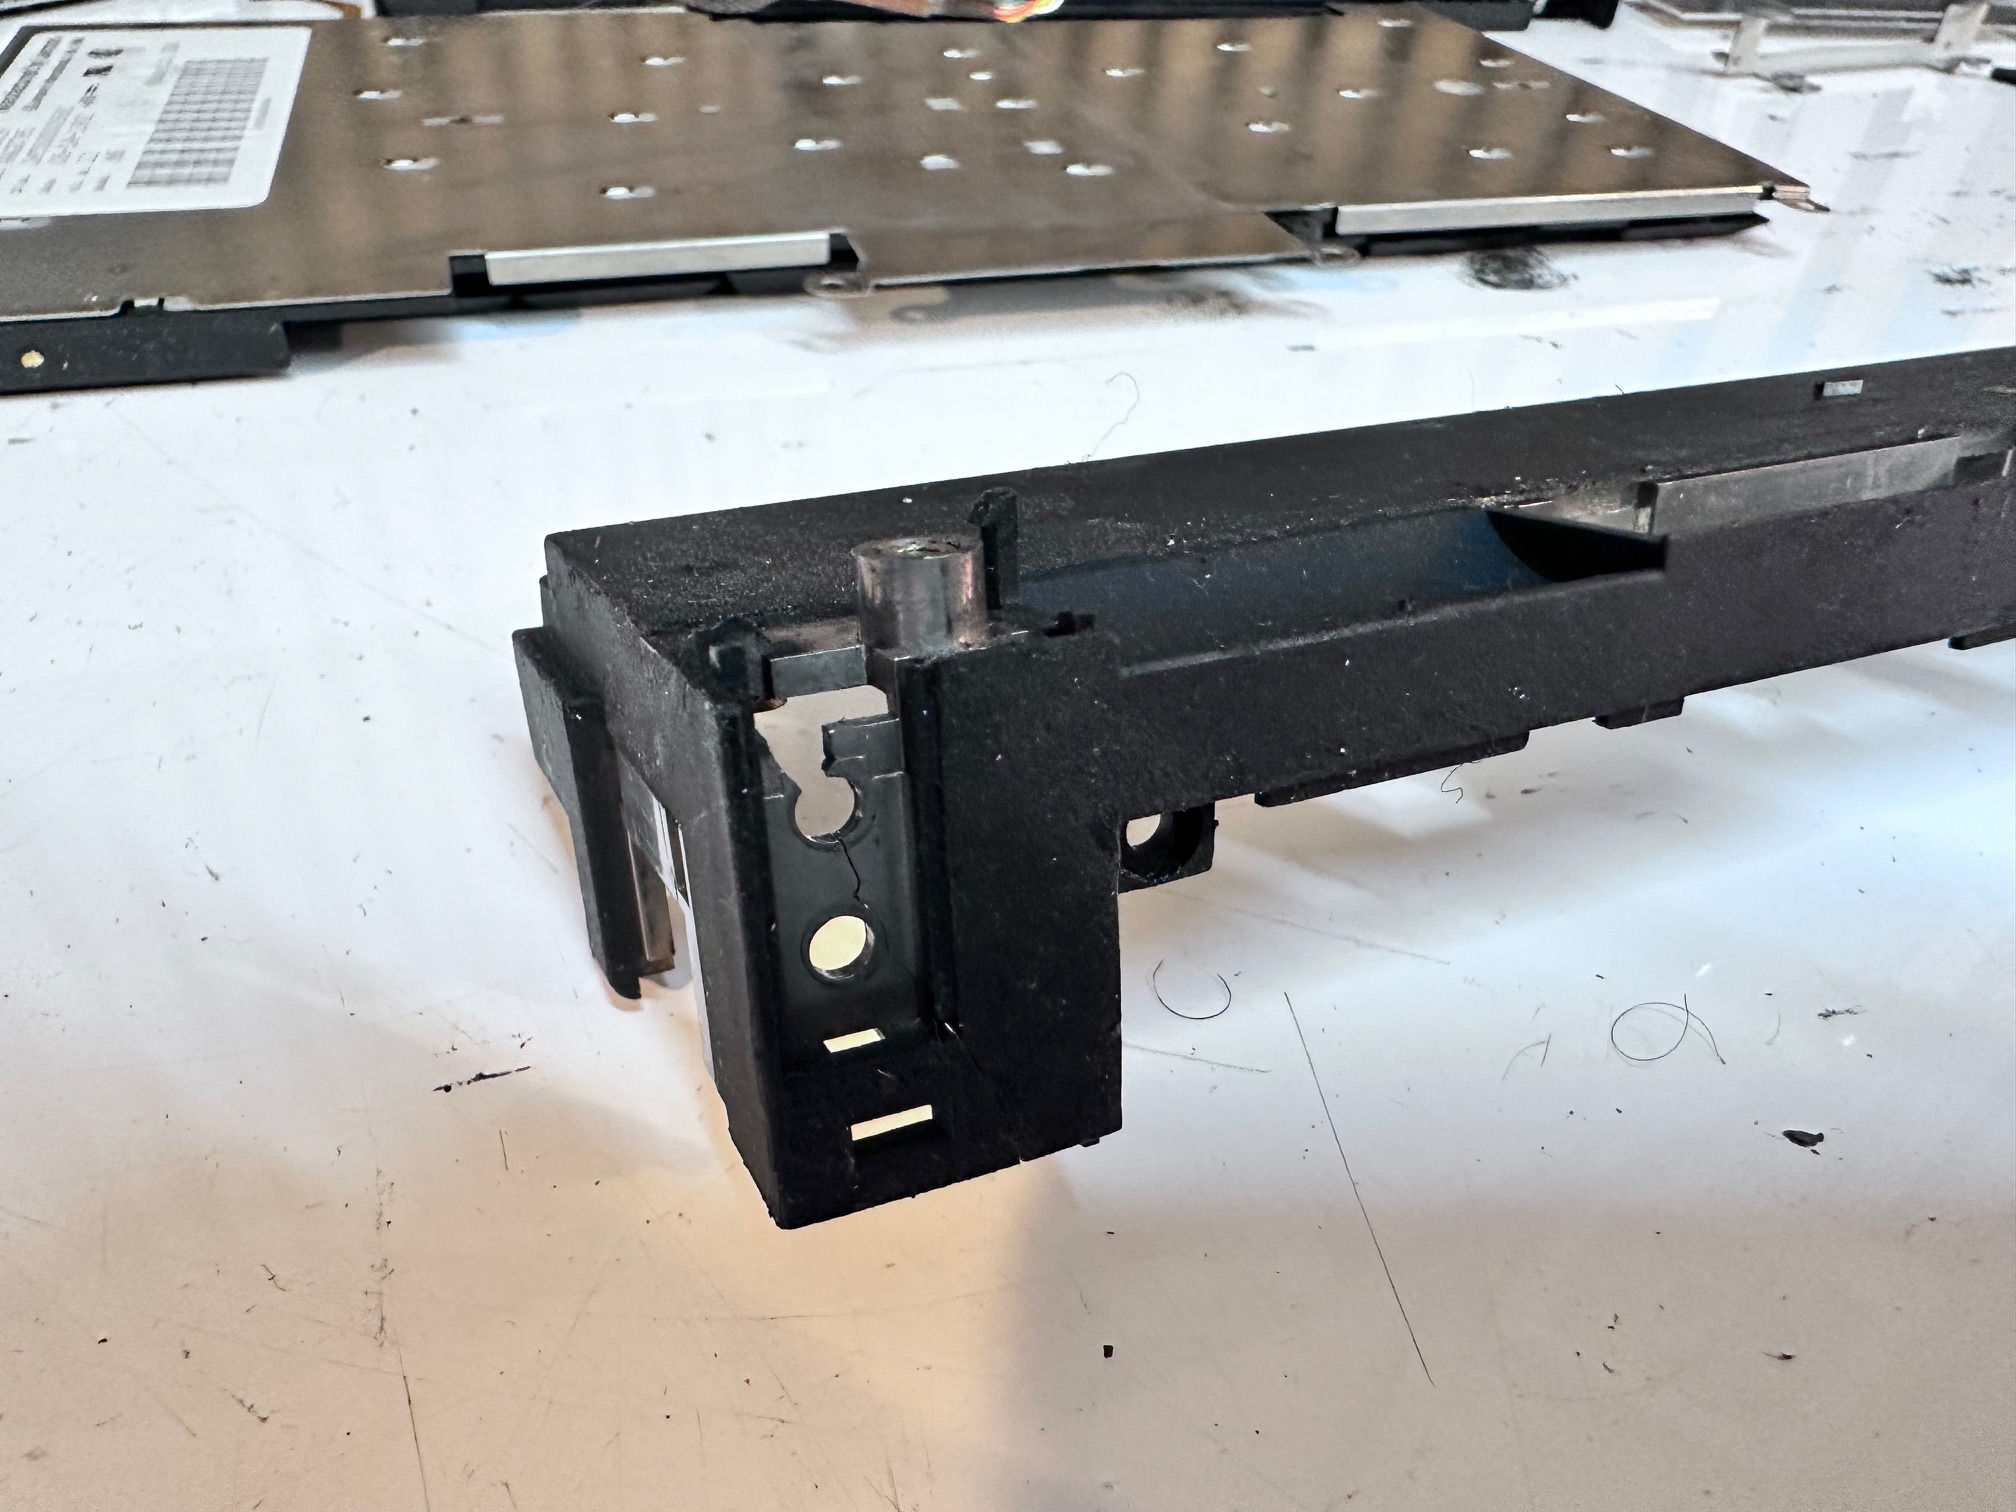

And here it is from the inside:
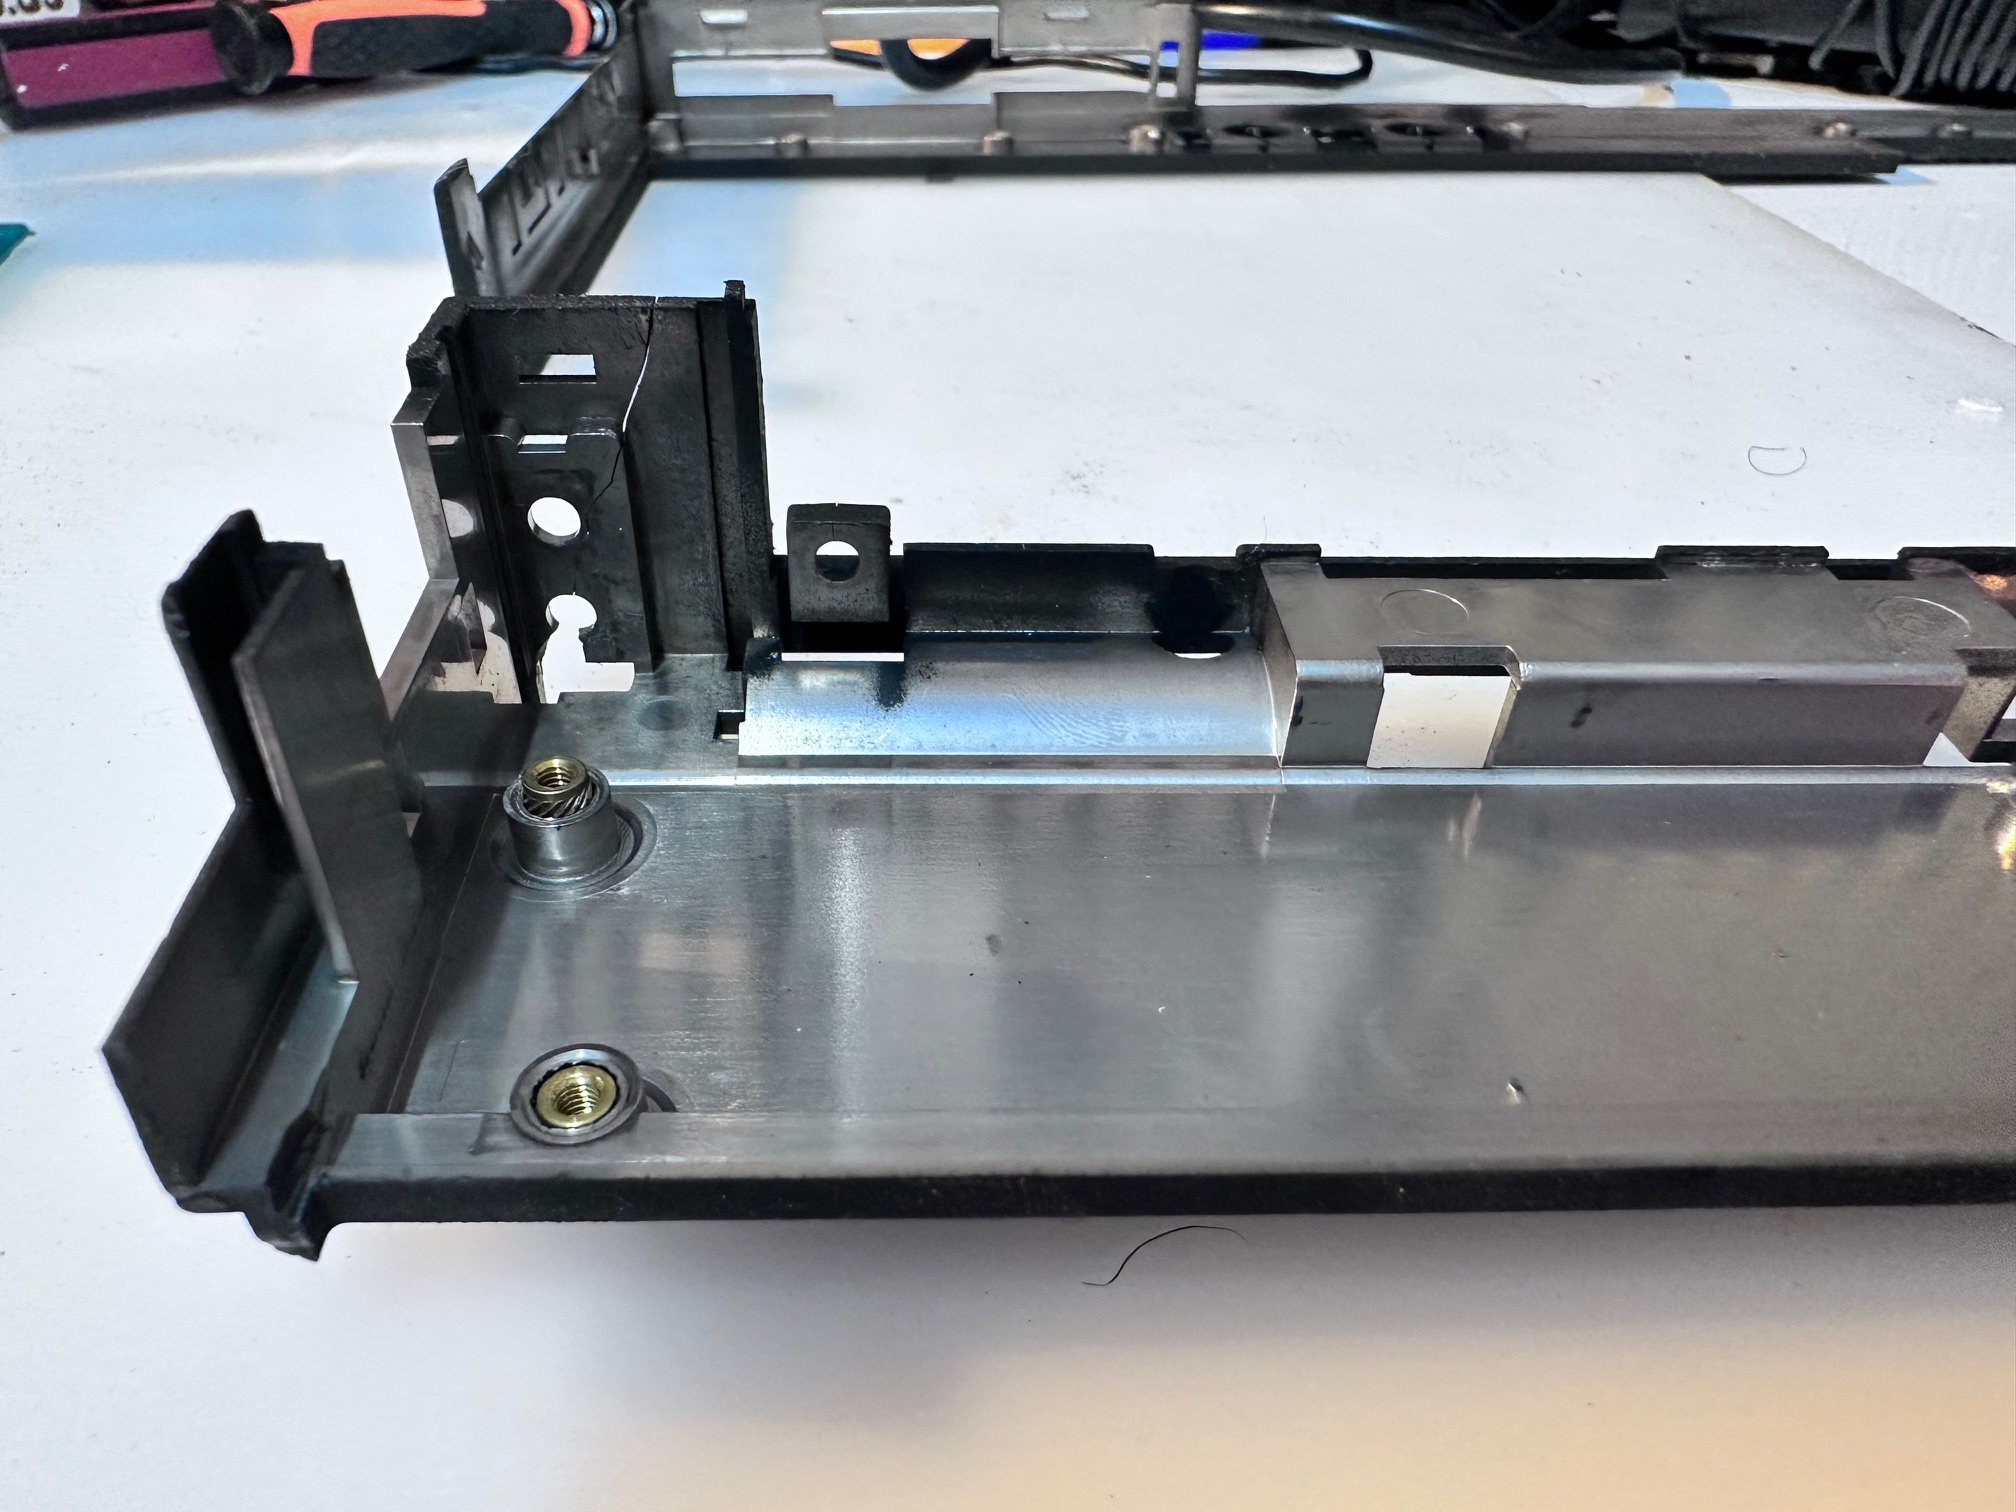
I'm going to have to dismantle an undamaged machine to get a clear picture of the measurements of the original piece.
Hinges
Here is the best link I could find regarding steps you might make to the hinges.
9th March Update
Well, it's been nearly a month. I'd say about 25 prototype designs in (which will all need to be skipped!) I'm getting extremely close to a reinforced top cover replacement for the 700C. If I have learned anything it's not to assume any gap, space, ridge, curve, bend or hole is there 'for no reason'. Also I need to get better at measuring the first time. I've started to look at shapes in all different ways, and also notice when one level is even 1mm different in height to another!
The two gaps to hold the mouse buttons are extremely hard to get right, even when you've got it right. The plastic buttons themselves essentially hard-attach to the top, and are held tightly in position along the top by two raised bits of plastic so the top doesn't really move, whereas the bottom has the space to move up and down against the two metal contact push-buttons on the bottom of the keyboard. Even when you get it right, a print which has gone slightly off what it should be ruins it all and you're another 10 hours off trying again.


IBM Thinkpad 700 720 Family Brochure